Full end to end encryption on an Azure WebApp using Cloudflare

· 7 min read

Cloudflare offers many capabilities; one of the capabilities it offers is SSL offloading and CNAME flattening.

When setting up an Azure Web App using default settings, it is set up using HTTP, not HTTPS, so we will set the WebApp to your custom domain, then use Cloudflare to protect traffic from your user's browsers to Cloudflare, then encrypt traffic from Cloudflare to your website.

We will go through both setups, with the result being full end-to-end encryption of your Azure WebApp using Cloudflare and your custom domain.

Using Cloudflare without a backend Certificate

Using Cloudflare without a backend Certificate

Using Cloudflare with a backend Certificate

Using Cloudflare with a backend Certificate

By default, Azure WebApps have a wildcard cert for the following domains:

  • *.azurewebsites.net
  • With Subject alternative names for:
  • *.scm.azurewebsites.net
  • *.azure-mobile.net
  • *.scm.azure-mobile.net
  • *.sso.azurewebsites.net

badasscloud - azurewebsites.net secure

This certificate allows you to use HTTPS using the default azurewebsites URL, which gets created when you create your Azure WebApp and is completely managed by Microsoft and the Azure ecosystem. Still, if you want to use your own Custom Domain, then these certificates won't work.

Prerequisites

  • Azure WebApp (supports Custom Domain SSL support, Custom Domains/SSL support are available from ‘B1’ plans and upwards.)
  • Cloudflare account (can be free)
  • Domain (an actual custom domain to use for your website that is already setup to use Cloudflare nameservers)
  • PfxCreator

Add a Custom Domain to your Azure WebApp using Cloudflare

  1. Login into the Azure Portal
  2. Navigate to your App Service.
  3. Underneath Settings on the left-hand side blade of the App Settings, look for Custom Domains and select it.
  4. Click on ‘Add Custom Domain’.
  5. type in your custom domain (in my example, I am using a domain I own called: badasscloud.com)
  6. Select Validate; you will have a similar seen to me below; select CNAME. Azure - Add Custom Domain
  7. Now we need to validate that you are the one who owns the domains and can use it for your WebApp, so we will need to create some records to verify that you own the domain and redirect the website to the Azure Websites.
  8. Login to Cloudflare
  9. Select SSL/TLS and make sure that ‘Flexible’ SSL has been selected.
  10. Select DNS Note: You may need to remove any A records for ‘www’ or the root domain ‘@’ you have set; please make sure you have a reference to them in case you need to roll back any changes because we will be redirecting the main URL to an Azure DNS alias, we will be using Cloudflare CNAME flattening at the root level, so anyone going to ‘badasscloud.com’ will be redirected to the Azure WebApp.
  11. You can also use the txt record to validate the domain and do some reconfiguration without changing the domain and redirecting traffic ahead of your change to avoid downtime.
  12. Add in the records to Cloudflare (please note that verification will fail if Cloudflare proxy is turned on, so make sure that the proxy status is set to DNS only)
  13. Navigate back to the Azure Portal.
  14. Click on Validate again and select CNAME.
  15. Hostname availability and Domain ownership should be both green.
  16. Add Custom Domain. Azure - Add Custom Domain
  17. If they are still Red, wait a few minutes for Cloudflare to replicate the changes across its Networks and Azure to clear any server-side caching, verification can fail if you try to verify straight away.
  18. Now that Domain verification has been completed navigate Cloudflare and enable the Cloudflare proxy for your root domain and www record.
  19. Navigate and test your website. Now that the domain has been added to the Azure WebApp and Cloudflare proxy has been enabled, your website will now have a certificate supplied by Cloudflare. You have now set up Flexible SSL traffic to your website, so traffic between users’ browsers to Cloudflare is now encrypted. badasscloud.com - Cloudflare Certificate

Update your WebApp to support ‘Full’ end-to-end using Cloudflare origin certificate

Adding your domain to Cloudflare was only the first part of the puzzle; although traffic between the browser and Cloudflare is now encrypted, traffic between Cloudflare and your WebApp is not; to encrypt this traffic, we are going to use the Cloudflare origin certificate.

Cloudflare Origin Certificates are free SSL certificates issued by Cloudflare for installation on your origin server to facilitate end-to-end encryption for your visitors using HTTPS. Once deployed, they are compatible with the Strict SSL mode. By default, newly generated certificates are valid for 15 years, but you can change this to 7 days.

  1. Log in to Cloudflare
  2. Click on SSL/TLS
  3. Click on Origin Server
  4. Click on Create Certificate Cloudflare - Origin Certificate
  5. Verify that the Private Key Type is RSA (2048)
  6. Make sure that the Hostnames you want to be covered under the origin cert is covered.
  7. Verify certificate validity, in my example, and I am going with 15 years; remember to keep this certificate validated and updated. Cloudflare - Origin Certificate
  8. Click Create
  9. Cloudflare will now generate your Origin certificate and Private key (save these somewhere secure, the private key will not be shown again).
  10. Now we need to create a certificate PFX file to upload to the Azure WebApp, run PfxCreator.exe (see Prerequisites for download link)
  11. Paste the Origin Certificate into the: Certificate (PEM)
  12. Paste the Private Key into the Private Key (PEM) PfxCreator
  13. Type in a password for the certificate
  14. Click Save PFX… and save your certificate.
  15. Login into the Azure Portal
  16. Navigate to your App Service.
  17. Underneath Settings on the left-hand side blade of the App Settings, look for Custom Domains and select it.
  18. You should see the SSL state of your domain as ‘Not Secure’, and under SSL Binding, you will have an option to Add Binding, click on Add Binding.
  19. Select your Custom Domain and click Upload PFX Certificate
  20. Click File and browse for your certificate.
  21. Type in the password you entered PFXCreator earlier. Azure Portal - Add Private Certificate
  22. Click on Upload.
  23. Once uploaded, select your Custom Domain.
  24. Select the Cloudflare Origin Certificate
  25. Make sure the TLS/SSL type is: SNI SSL and click Add Binding. Azure Portal - Add Private Certificate
  26. The SSL State of your Custom Domain should now have been changed to Secure.
  27. Click on HTTPS Only Note: You may see constant redirect issues with your website until the following Cloudflare changes have been made. Azure Portal - Enable HTTPS
  28. Login to Cloudflare
  29. Select SSL/TLS and make sure that ‘Full (Strict)’ has been selected.
  30. Give it 30 seconds to a minute to take effect, and you have now successfully encrypted traffic end-to-end on your website, from the browser to Cloudflare and from Cloudflare to your Azure WebApp.

#ProTip - If you want to be more secure, you can look into blocking access to your website from Cloudflare and a few select IPs for testing only to avoid traffic from bypassing Cloudflare and going to the azure websites URL.

Azure Blob and Azure Lifecycle Management

· 7 min read

Azure Blob storage (Platform-as-a-service (PaaS)) is used for streaming and storing documents, videos, pictures, backups, and other unstructured text or binary data… however the functionality extends beyond just a place to “store stuff”, it can save you money and time by automating the lifecycle of your data using Azure Blob Lifecycle Management and access tiers.

As of January 2021, Blob storage now supports the Network File System (NFS) 3.0 protocol. This support provides Linux file system compatibility at object storage scale and prices and enables Linux clients to mount a container in Blob storage from an Azure Virtual Machine (VM) or a computer on-premises.

Blobs - “Highly scalable, REST-based cloud object store”

  • Data sharing, Big Data, Backups
  • Block Blobs: Read and write data in blocks. Optimized for sequential IO. Most cost-effective Storage. Ideal for files, documents & media.
  • Page Blobs: Optimized for random access and can be up to 8 TB in size. IaaS VM OS & data disks and backups are of this type.
  • Append Blobs: Like block blobs and optimized for append operations. Ideal for logging scenarios and total size can be up to 195 GB.

Aren’t there only 2 access tiers?

When you create an Azure Storage account, you get presented with 2 options for the Access Tier:

  • Hot
  • Cool

Hot access tier

The hot access tier has higher storage costs than cool and archive tiers, but the lowest access costs. Example usage scenarios for the hot access tier include:

  • Data that is in active use or is expected to be read from and written to frequently.
  • Data that is staged for processing and eventual migration to the cool access tier

Cool access tier

The cool access tier has lower storage costs and higher access costs compared to hot storage. This tier is intended for data that will remain in the cool tier for at least 30 days. Example usage scenarios for the cool access tier include:

  • Short-term backup and disaster recovery
  • Older data not used frequently but expected to be available immediately when accessed.
  • Large data sets need to be stored cost-effectively, while more data is being gathered for future processing.

These options are set globally for your Azure Storage account blobs, however, there is a third tier, the Archive Access Tier:

Archive access tier

The Archive access tier has the lowest storage cost, but higher data retrieval costs compared to hot and cool tiers.

Data must remain in the archive tier for at least 180 days or be subject to an early deletion charge. Data in the archive tier can take several hours to retrieve depending on the specified rehydration priority.

While a blob is in archive storage, the blob data is offline and cannot be read or modified. To read or download a blob in the archive, you must first rehydrate it to an online tier.

How is this charged?

Depending on which tier your data is in, depends on the costs, Azure Blob Storage is charged on Read/Write and list operation and other factors, for example:

  • Hot Tier: Lower access prices for frequent use
  • Cool Tier: Lower storage prices for high volume
  • The volume of data stored per month.
  • Quantity and types of operations performed, along with any data transfer costs.
  • Data redundancy option selected.

More information here: https://azure.microsoft.com/en-us/pricing/details/storage/blobs/

What is data lifecycle management?

There are many versions of it, but at its core, there are 5 stages to simple data lifecycle management:

  • Creation – When the data is first created.
  • Storage -Where the data is stored.
  • Usage – When the data is useful and relevant and used.
  • Archival – When the data is not as useful, but still helpful to have around due to knowledge or legal requirements.
  • Destruction – When the data is completely irrelevant and there is no need to store or use it anymore.

Right... so, tell me more about the Azure Blob Lifecycle Management?

Azure Blob Storage has a lifecycle management feature built-in. Azure Blob Storage lifecycle management offers a rich, rule-based policy for General Purpose v2 and blob (and Premium Block blob) storage accounts.

  • Imagine you working on a project, such as purchasing a new company you not only want somewhere to store that data, but you want to make sure it is accessible quickly, so you put it in an Azure Blob Storage account under the Hot Tier.
  • You’ve then spent some time working on new documents using the data you acquired when you purchased the ‘new’ company, but don’t touch them anymore, you don’t want them sitting on fast storage costing you additional money, so they get migrated to a ‘Cool’ access tier.
  • A few months later, you realized that you needed some of the original data from the company acquisition, you find the files and use them, it took a bit longer to open as the data needed to be migrated to the ‘hot tier’ but you are happy because the data that you want was there.
  • A year later, you are onto acquiring another company and the data from the company acquisition which seemed a lifetime ago is forgotten about, however, you know you might need it for legal or finance auditing purposes, the data goes into the Archive tier, costing you less than the cool tier, but could be reacquired at a later date if needed (for an extra charge).
  • 7 years down the track, you’re now a multi-million-dollar firm, and have completely forgotten or no longer need the data from your original acquisition, the data then gets deleted, saving you money and data management costs.

Microsoft Azure and Lifecycle Management for Blob Storage automate the entire lifecycle for you.

How do I enable or configure Azure Blob Lifecycle Management?

  1. Log in to the Azure Portal
  2. Find the Azure storage account you want to configure Lifecycle Management on
  3. On the Storage account left-hand side Blade, under Blob Service click on Lifecycle Management
  4. Click on Add a rule
  5. Enter in a Rule name any name that suits your naming standards, for example, AzureBlobLifecyclePolicy. Azure Blob Lifecycle Policy Note: Make sure Append Blobs is unselected, this is un-supported for moving access tiers (however supports being deleted after x amount of days).
  6. Click Next
  7. This is where the magic happens, we are going to go with the following: Azure Base Blob Policies
  8. Base Blobs that were last modified 90 days ago will be moved to Cool storage.
  9. Click on + Add if-then block, now we will select the Archive Storage, the example we will now archive data that has been in Cool storage for 90 days, so we enter in: 180 days. Note: Migrating the data between Access Tiers, does not change the last modified date of the file, so it's 90 days for migrating to Cool, then another 90 days to move to archive.
  10. Click on + Add if-then block, now we will select the Delete the blob, data that has been in Archive storage for 90 days will now be deleted, so we enter in: 270 days.
  11. Click Next and do the same for Snapshots and versions and click Save.
  12. Congratulations, you have now created an Azure Blob Lifecycle policy!

Once the Policy has been saved, it is Enabled by default. You can disable it by selecting the Policy and select Disable on the top banner.

!Azure Blob Lifecycle Management

#ProTip - You can also view the policy as Code in Code View, which is a simple and quick way of documenting and modifying your lifecycle policy.

#ProTip - You can have multiple Lifecycle Policies on a single storage account.

#ProTip - You can learn more about Lifecycle policies by going to the Microsoft documentation here: Optimize costs by automating Azure Blob Storage access tiers.

#ProTip - If you are looking for integration with Azure AD or Active Directory NTFS permissions, replicating data from fileservers, you are better off looking at Azure File Shares and not blob storage.

Azure DevOps and creating your Cloud Adoption Framework

· 5 min read

Do you want to make a start on Azure Adoption and Governance, Server Migration or Azure Virtual Desktop and do not know where to start, or whether you are asking the right questions?

If you want to create a framework for your cloud adoption or migration plans, you can look at... using Azure DevOps Demo Generator

Azure DevOps is not only a continuous integration and deployment tool, along with the Repos, Pipelines, Test plans and Artifacts – there is Azure Boards, with Boards you can plan and track your work items and use the Kanban board functionality to easy update or track your work in progress items and add to the backlog, although Agile squads and sprint planning organizations primarily use Azure Boards – it does not have to be.

The Azure DevOps Board’s come with your MSDN license or free under the Basic plan for the first 5 users.

The Azure DevOps Demo Generator can create projects in your Azure DevOps organization, already prepopulated with relevant Epics, Features and Tasks that can help you on your cloud journey!

Azure DevOps Demo Generator

There are many prepopulated projects in the Demo Generator, from Security to Learning; you can even import prepopulated templates from other people.

The ones we are going to concentrate on is the: Cloud Adoption Framework projects.

Azure DevOps Generator - Choose a template

The following projects are available under the Cloud Adoption Framework heading to help you on your journey (as of the date this article was published):

ProjectDescription
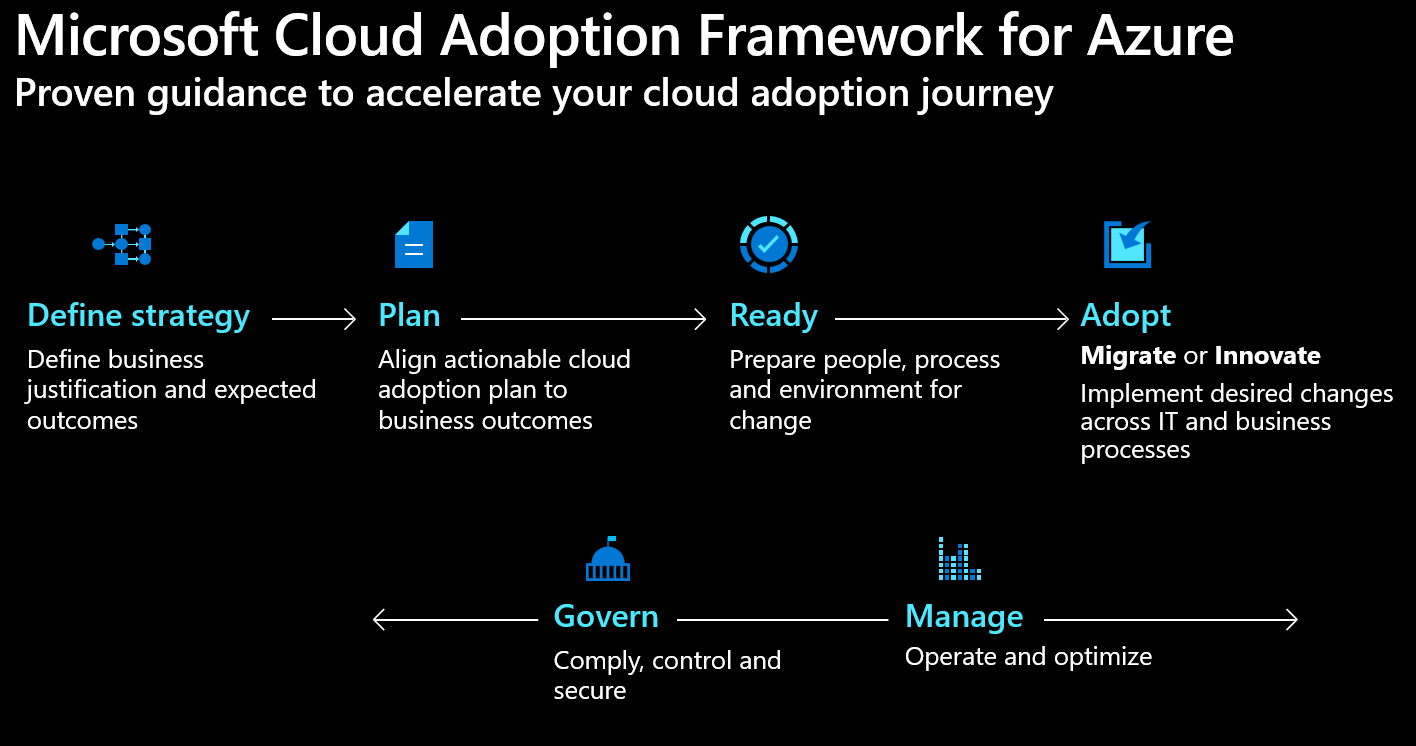
Cloud Adoption PlanThe Cloud Adoption Plan template creates a backlog for managing cloud adoption efforts based on the guidance in the Microsoft Cloud Adoption Framework.
CAF Strategy-Plan-Ready-GovIn this checklist we share all the decision points needed to successfully build a Cloud Adoption Plan as well as the Landing Zone with Governance
ServerMigration_CAF_DevOps_ProjectTaskListServer migration has many different activities. In the Azure DevOps Project we will provide the steps necessary to go from zero to a complete Server migration and management.
AKS_CAF_DevOps_Project_TaskListAKS deployment has many different activities. In the Azure DevOps Project we will provide the steps necessary to go from zero to a complete AKS deployment and management.
SQL MigrationSQL migration has many different activities. In the Azure DevOps Project we will provide the steps necessary to go from zero to a complete SQL migration and management.
Windows Virtual DesktopProject work plan templates in Azure DevOps that provide the steps necessary to go from zero to a complete WVD deployment with ongoing management
Knowledge MiningKnowledge project simplifies the process of accessing the latent insights contained within structured and unstructured data. Use this project to help you address all the steps.
Azure Governance ReadinessThe standalone Azure governance project provides guidance and tools on how to ensure that your Azure environment is governed in the correct way.
Modern Data WarehouseBuild your modern data warehouse using this ADO checklist of items, in this checklist we have links to assets, code and learning material.
Retail Recommender with Azure SynapseThis Solution Accelerator is an end-to-end example on how to enable personalized customer experiences for retail scenarios by leveraging Azure Synapse Analytics, Azure Machine Learning Services, and other Azure Big Data services.
Modern IOTConnected sensors, devices, and intelligent operations can transform businesses and enable new growth opportunities. In this project you will get the work items needed to plan and implement your IOT solution using the Azure IoT Platform.

Once the project has been created, you can go into Azure Board and click on: Work Items.

If we take a look at the CAF Strategy-Plan-Ready-Gov Team one, we can see the Epics, Features and Tasks associated with Cloud Adoption:

Azure DevOps - Cloud Adoption Strategy

If we click Boards, we can see the Kanban board, the state of the Epics, features etc. and where they are.

Azure DevOps - Kanban

Depending on the Tasks, it may have a description of the task with links to the relevant documentation, such as this SQL Deployment and Migration testing:

Azure DevOps - Kanban

As you can see, the Azure DevOps Generator offers not only a place to track your progress but relevant data to help you put a framework around your cloud journey, and these projects work well with the Microsoft Cloud Adoption and Azure Well Architected Framework!

These are guidelines, and they do not need to be followed to the letter; however, in my opinion, they offer an excellent base to build your cloud adoption and implementations upon.

I have extracted the following work items from the projects as CSV, in case you prefer to start with excel or want to take a look at the epics, features and tasks that come with these projects:

Azure Resource Graph Explorer and the PowerShell Azure Resource Graph

· 6 min read

Every now and again you come across something that you pay little attention to until you actually spend the time to sit down, work through and try to break stuff! The Azure Resource Graph was that for me!

The idea was to create an export of Azure Recommendations, directly from the Azure Advisor into PowerShell, Microsoft Azure has this functionality out of the box with a few tools:

Azure Graph Resource Explorer

The Azure Graph Resource Explorer is built into the Azure Portal, it can be found by going to https://portal.azure.com/#blade/HubsExtension/ArgQueryBlade or by logging into the Azure Portal and typing in 'Resource Graph' and select Explorer.

Azure Resource Graph

The Azure Resource Graph Explorer, allows you to explore the Microsoft Azure Resource Graph, using inbuilt Sample Queries and the Kusto Query language.

The Powershell queries mentioned in the section below, started by clicking on the 'microsoft.advisor/recommendations' field and selecting Run Query.

advisorresources
| where type == "microsoft.advisor/recommendations"

Azure Resource Graph Explorer

I then clicked on the 'See Details' on the right-hand side to see all the details that were being brought in, in each object or row. Example below:

{
"recommendationTypeId": "7262dc51-c168-41b5-b99b-b5b98f8fe50a",
"extendedProperties": {
"assessmentKey": "7262dc51-c168-41b5-b99b-b5b98f8fe50a",
"score": "0"
},
"resourceMetadata": {
"resourceId": "/subscriptions/0673a0bd-0c9b-483f-9aee-c44795ae739f",
"singular": null,
"plural": null,
"action": null,
"source": "/subscriptions/0673a0bd-0c9b-483f-9aee-c44795ae739f/providers/Microsoft.Security/assessments/7262dc51-c168-41b5-b99b-b5b98f8fe50a"
},
"shortDescription": {
"solution": "Subscriptions should have a contact email address for security issues",
"problem": "Subscriptions should have a contact email address for security issues"
},
"suppressionIds": null,
"impactedField": "Microsoft.Subscriptions/subscriptions",
"impactedValue": "0673a0bd-0c9b-483f-9aee-c44795ae739f",
"lastUpdated": "2021-04-08T13:15:54.2870000Z",
"category": "Security",
"metadata": null,
"impact": "Low"
}

And no, that isn't my real Subscription ID etc, I've replaced the field with randomly generated GUIDs.

We can see that there is a good amount of actionable data here such as:

  • This is a Security Category recommendation
  • It is Low Impact
  • The problem is that the Azure subscription should have a contact email address to be used for Security alerts and it does not have one set up (Oops!)

So we need to turn it into something a bit more useable, I know that the Azure Advisor has the following categories:

  • Cost
  • HighAvailability
  • OperationalExcellence
  • Performance
  • Security

The same syntax can be used for any of these categories, for my example, we will continue with Security, Looking at the Details (or Example above) we can see that Category is simply listed on its own at the top level, inside the 'microsoft.advisor/recommendations' field, so we now need to add another pipe to the query:

| where properties['category'] == 'Security'

This will now only select the 'Security' category. However as you can see below, it's hardly something you can action on or read.

Azure Resource Graph - Category 'Security'

The next step is to look into making it a bit more readable because we know this is a Kusto Language, its time to hit the Microsoft Docs page and read up about the 'Project Operator' - https://learn.microsoft.com/en-us/azure/data-explorer/kusto/query/projectoperator. Project = "Select the columns to include, rename or drop, and insert new computed columns." That sounds like what we want.

If we take a gander back at the 'Full Details' (or Example above) there are 3 fields I am looking at that would add the most value to a report or digest for the security posture of my Azure ecosystem:

  • Solution
  • impactedField
  • impactedValue

We now need to add our final pipe to remove everything we don't want and add the properties that make the most sense to use, because we are using multiple properties we will do it separated by commas. It's worth noting that unlike the 'Security' property above (and the impactedField, impactedValue), which was a top-level property, the Solution property is a sub-properties of 'shortDescription', so we have to select the shortdescription property and then expand out to the extended solution property like below:

| project properties.shortDescription.solution

That now gives us a list of the security alerts on the subscription, but without a heading that makes sense:

Azure Resource Graph

To add a header called: Recommendation, we need to do the following

| project Recommendation=tostring(properties.shortDescription.solution)

Now we are ready to add the impactedField and impactedValue.

The final query should look like this:

advisorresources
| where type == 'microsoft.advisor/recommendations'
| where properties['category'] == 'Security'
| project Recommendation=tostring(properties.shortDescription.solution), ImpactedType=tostring(properties.impactedField), ImpactedResources=tostring(properties.impactedValue )

and the Azure Resource Graph Explorer should display something like this:

Azure Resource Graph

Protip, on the Azure Resource Graph Explorer page, click on 'Get Started', underneath the Query window to view Example Queries, such as Listing all Public IP addresses or even getting the Security Center Recommendations. They are really good to use as a base and see how they work.

Azure Graph PowerShell

Using the Azure Resource Graph Explorer is a good way to create the Kusto queries you want, which you can then run the queries in PowerShell and turn them into PowerShell objects, which opens up a few possibilities for things like:

  • Automated Reporting on Cost, Security etc
  • Proactive remediation actions.

First things first you need to install the Az.ResourceGraph module, then you can use the Search-AzGraph to run the queries that you created above. I am going to rely on the gist below to give you a few examples.

Azure Resource Graph

AzGraph.ps1

<#
.SYNOPSIS
Installs the Az.ResourceGraph Module and has example queries
.NOTES
Version: 1.0
Author: Luke Murray (Luke.Geek.NZ)
Website: https://luke.geek.nz/azure-resource-graph-explorer-and-the-powershell-azure-resource-graph
Creation Date: 09.04.21
Change History:
09.04.21 - Intital script development

#>

# Install the Resource Graph module from PowerShell Gallery
Install-Module -Name Az.ResourceGraph -Scope CurrentUser

# Imports the Resource Graph module into the PowerShell session
Import-Module -Name Az.ResourceGraph

#Connects to Microsoft Azure
Connect-AzAccount

#Grabs the acount of all recommendations under each Category that the Azure Advisor Has

Search-AzGraph -Query "advisorresources | summarize Count=count() by Category=tostring(properties.category) | where Category!='' | sort by Category asc"

#Following on from the Blog post, this is the query we created to list all Security recommendations, their resource type and what resources were impacted

Search-AzGraph -Query "advisorresources
| where type == 'microsoft.advisor/recommendations'
| where properties['category'] == 'Security'
| project Recommendation=tostring(properties.shortDescription.solution), ImpactedType=tostring(properties.impactedField), ImpactedResources=tostring(properties.impactedValue )"

#List of Performance recommendations

Search-AzGraph -Query "advisorresources | where type == 'microsoft.advisor/recommendations' and properties.category == 'Performance' | project Solution=tostring(properties.shortDescription.solution) | summarize Count=count() by Solution | sort by Count"

#List of Cost recommendations

Search-AzGraph -Query "advisorresources | where type == 'microsoft.advisor/recommendations' and properties.category == 'Cost' | summarize Resources = dcount(tostring(properties.resourceMetadata.resourceId)), Savings = sum(todouble(properties.extendedProperties.savingsAmount)) by Solution = tostring(properties.shortDescription.solution), Currency = tostring(properties.extendedProperties.savingsCurrency) | project Solution, Resources, Savings = bin(Savings, 0.01), Currency | order by Savings desc"

Keep up to date with Azure changes using PowerShell

· 3 min read

Keeping up with what is happening with changes and previews in Microsoft Azure is difficult, change happens all the time - and being able to stay informed on what is happening with the Azure ecosystem is half the battle, whether it is a new feature or security fix.

Microsoft publishes the latest updates on Azure Products and features to their Azure Updates blog: https://azure.microsoft.com/en-us/updates/

So you can browse the website each week, or... monitor the RSS feeds. Sometimes this isn't enough, you may want to do something with this information such as:

  • Create Alerts or Notifications to specific teams who may work with Azure SQL, or Azure Automation and not care about any other product.
  • Not have to go to the website to keep up-to-date with what is happening, maybe your happy with it popping up in your PowerShell session each time you open it.
  • Publish the information to Microsoft Teams channels to keep people informed.

I have created a basic PowerShell function, that will retrieve the latest updates from the Microsoft Azure Updates RSS Feed and turn it into a PowerShell object you can actually use to keep informed.

The Script - Get-AzureBlogUpdates

The script is hosted on my Github repository. Feel free to clone/recommend improvements or fork, I can add parameter sets instead of relying on the PowerShell methods listed in the examples section - if you find this script useful:

Get-AzureBlogUpdates.ps1

function Get-AzureBlogUpdates {
<#
.SYNOPSIS
Retrieves the latest Updates of Azure, from the Azure Blog RSS feed.
.DESCRIPTION
Retrieves the latest Updates of Azure, from the Azure Blog RSS feed.
.NOTES
Version: 1.0
Author: Luke Murray (Luke.Geek.NZ)
Website: https://luke.geek.nz/keep-up-to-date-with-latest-changes-on-azure-using-powershell
Creation Date: 03.04.21
Purpose/Change:
03.04.21 - Intital script development
.EXAMPLE
Get-AzureBlogUpdate

#>
#Retrieving RSS Feed Content - as XML, then converting into PSObject
$xml = [xml](Invoke-WebRequest -Uri 'https://azurecomcdn.azureedge.net/en-us/updates/feed/').content
$Array = @()
foreach ($y in $xml.rss.channel.selectnodes('//item'))
{
$PSObject = New-Object -TypeName PSObject
$Date = [datetime]$y.pubdate
$PSObject | Add-Member NoteProperty 'Title' $y.title
$PSObject | Add-Member NoteProperty 'Date' $Date
$PSObject | Add-Member NoteProperty 'Category' $y.category
$PSObject | Add-Member NoteProperty 'Description' $y.content.InnerText
$PSObject | Add-Member NoteProperty 'Link' $y.link


$Array += $PSObject
}
#Some article had multiple categories, to make it easier for reporting, joined the categories together and got rid of duplicates.

$results = @()
ForEach ($item in $Array) {
$Category = Foreach ($title in $item.Title)
{
$results += [pscustomobject]@{
'Title' = $item.Title
'Category' = $item.Category -join ',' | Select-Object -Unique
'Published Date' = $item.Date
'Description' = $item.Description
'Link' = $item.Link
}
}
}
$results
}

Examples

#Runs the actual Function:
Get-AzureBlogUpdates

Get-AzureBlogUpdates

#EXAMPLE - Gets Azure Blog Updates, that have been published in the last 7 days.
$PublishedIntheLastDays = (Get-Date).AddDays(-7)
Get-AzureBlogUpdates | Where-Object 'Published Date' -GT $PublishedIntheLastDays

Get-AzureBlogUpdates

#EXAMPLE - Gets all Azure Blog Updates, and displays it as a Table, organised by Category
Get-AzureBlogUpdates | Sort-Object Category -Descending | Format-Table

Get-AzureBlogUpdates

#EXAMPLE -Gets the latest 10 Azure Blog Articles
Get-AzureBlogUpdates | Select -Last 10

Get-AzureBlogUpdates - Select Last 10 Articles

#EXAMPLE - Gets the Azure Blog Update articles, where the title has Automation in it.
Get-AzureBlogUpdates | Where-Object Title -match 'Automation'

Get-AzureBlogUpdates - Title matches Automation