Capturing Virtual Machine images and Snapshots in Azure using WVDAdmin
WVDAdmin - is a native administration GUI (graphical user interface) for Azure Virtual Desktop (AVD). WVDAdmin is a free custom-built tool designed to make managing and standing up Azure Virtual Desktop infrastructure easy. Not only can you use it to roll out your Azure Virtual Desktop infrastructure and manage existing workspaces and host pools - you can use it to create Virtual Machine images that can be used for Virtual Scale Sets, but Base also builds or Azure Virtual Desktop session hosts! In addition, WVDAdmin automates creating and using snapshots and virtual machine images in a simple point and click interface - that just works!
Prerequisites
- Azure subscription
- Resource Group
- Virtual Machine (to be used as your master image)
- Of course - WVDAdmin
You can download WVDAdmin from the following page: Azure Windows Virtual Desktop administration with WVDAdmin.
Also, make sure you have set up a service principal with the appropriate rights to the Resource Groups that holds your Virtual Machine.
Before proceeding ahead, make sure you have a virtual machine backup!
Capturing a Snapshot
Although, possible to do using the Azure Portal, quickly taking an OS disk snapshot and then reverting the change can be a bit tedious, especially if you want to make a backup quickly of the operating system disk before patching or application upgrade, Snapshots are a lot quicker to take and work well for immediate and temporary recovery, especially when you want to quickly try something out - without having to wait for an Azure Backup. Please note this tool does not snapshot any data drives present.
Capture a Snapshot
- Open WVDAdmin
- On the "Welcome" tab, enter in your Azure Tenant id
- Enter in your Service principal (application) ID and key
- Click on Reload all - to connect to Azure
- Expand Azure
- Expand Virtual Machines
- Expand your Resource group; in my example; it is: SERVERS-RG
- Right-click your server; in my example, it is: Server2019
- Select SnapShot-Create
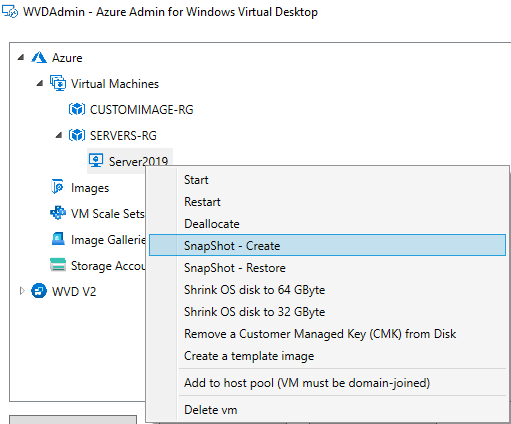
- WVDAdmin will then prompt you to verify that you want to create your Snapshot.
- Confirm the server is correct and click Ok
- Depending on the size of your disk, this process may only take a few seconds; the virtual Machine may experience a slight performance hit. Still, I did not lose RDP connectivity during the snapshot process in my testing.
- Review the logs to make sure that the Snapshot has been created successfully:
- You should now see the Snapshot in the Azure Portal, in the same Resource Group as the server.
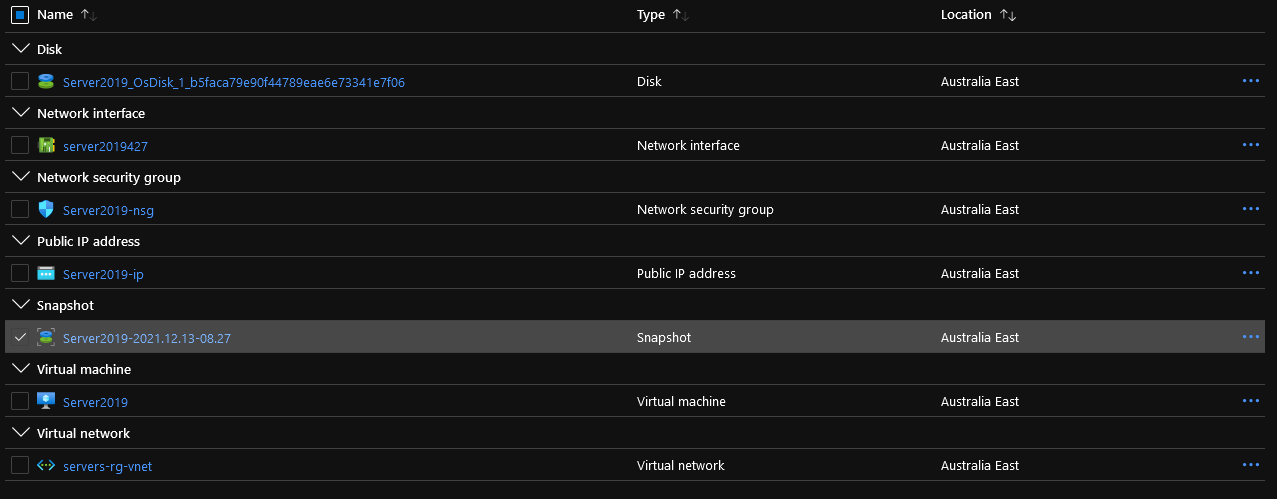
Restore a Snapshot
Before you proceed, just a warning that restoring the Snapshot will discard any changes made after the Snapshot. The virtual machine will also be deallocated, so it will stop any connections to it.
- Open WVDAdmin
- On the "Welcome" tab, enter in your Azure Tenant id
- Enter in your Service principal (application) ID and key
- Click on Reload all - to connect to Azure
- Expand Azure
- Expand Virtual Machines
- Expand your Resource group; in my example; it is: SERVERS-RG
- Right-click your server; in my example, it is: Server2019
- Select SnapShot-Restore
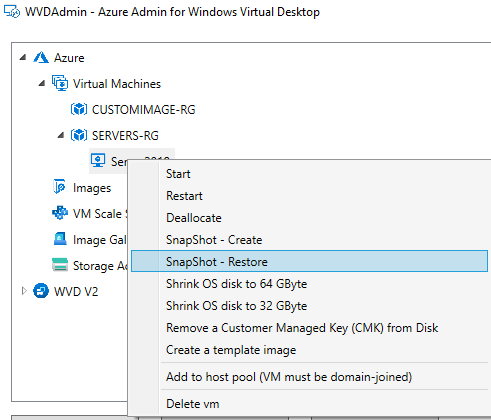
- Select the Snapshot you would like to restore to, and when you are ready, click Ok. This will force the Virtual Machine to be shut down and deallocated and the Snapshot to be restored.
- You may also start the VM from WVDAdmin, by right-clicking on the Virtual Server after the Snapshot restores and click: Start.
- Verify that your Virtual Machine is back up and running and remove any unneeded snapshots and disks from the Azure Portal, to reduce additional costs. If you intend to keep any around, make sure you add appropriate Tags and a review date so you know what and why they existed in the first place.
A few things to note:
- WVDAdmin gave me errors, stating that the "Recovering snapshot was not successful", however, this occurred after the Swapping disk process when the old disk was attempting to be deleted. The recovery did, in fact, reoccur; I then successfully deleted the disks in the Azure Portal manually.
- I also had the: "Virtual machine agent status is not ready." error occur. After the Virtual Machine had enough time to start the Azure agent, this self-resolved.
Capturing a Virtual Machine Image
Virtual Machine images work well for Azure Virtual Desktop and Virtual Machines scale sets, where you want consistency between your various virtual machines. The same process I will run through works with Windows 10/11 along with Windows Server 2022 and below (and I would also imagine Linux workloads).
I will be using the Windows Server 2019 Virtual Machine I had created before, however with various applications that I want to be standard across new builds; in my demo I used chocolatey to install:
- Adobe Reader
- Microsoft Visual C++ runtimes
- 7Zip
- VLC
Then added a custom user policy to set the wallpaper. WVDAdmin will automatically generalise (sysprep) the Machine for you by creating a 'Temp' machine without touching your original Virtual Machine!
Capture a Virtual Machine Image
- Open WVDAdmin
- On the "Welcome" tab, enter in your Azure Tenant id
- Enter in your Service principal (application) ID and key
- Click on Reload all - to connect to Azure
- Expand Azure
- Expand Virtual Machines
- Expand your Resource group; in my example, it is: SERVERS-RG
- Right-click your server; in my example, it is: Server2019
- Select Create a template image
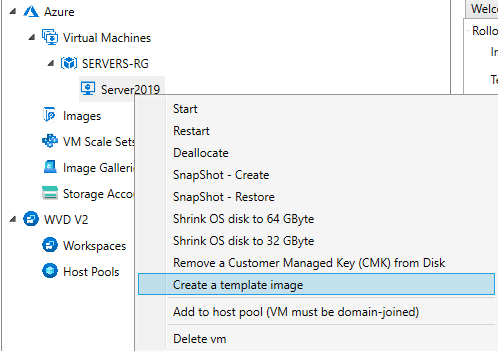
- WVDAdmin will then display the: Capture Image tab.
- Type in an appropriate image name (make sure you understand it, add specific versioning etc.)
- Verify that your Template VM is correct
- Select your Target Resource Group for your Image
- If you have a custom PowerShell script, you may add additional customisations. Add the script path here (make sure it's publically accessible by Azure, i.e. Azure storage account, Github repository etc.).
- Before proceeding to the next step, your VM will be deallocated
- When you are ready, select Capture
- WVDAdmin will then deallocate your VM and run through the following process:
- Deallocate VM -> Create a snapshot of VM ->Create a temporary VM from the snapshot -> Generalise the VM -> deallocate temporary VM -> create the image -> delete temp VM resources

- You should now see your Image in your Azure Portal.
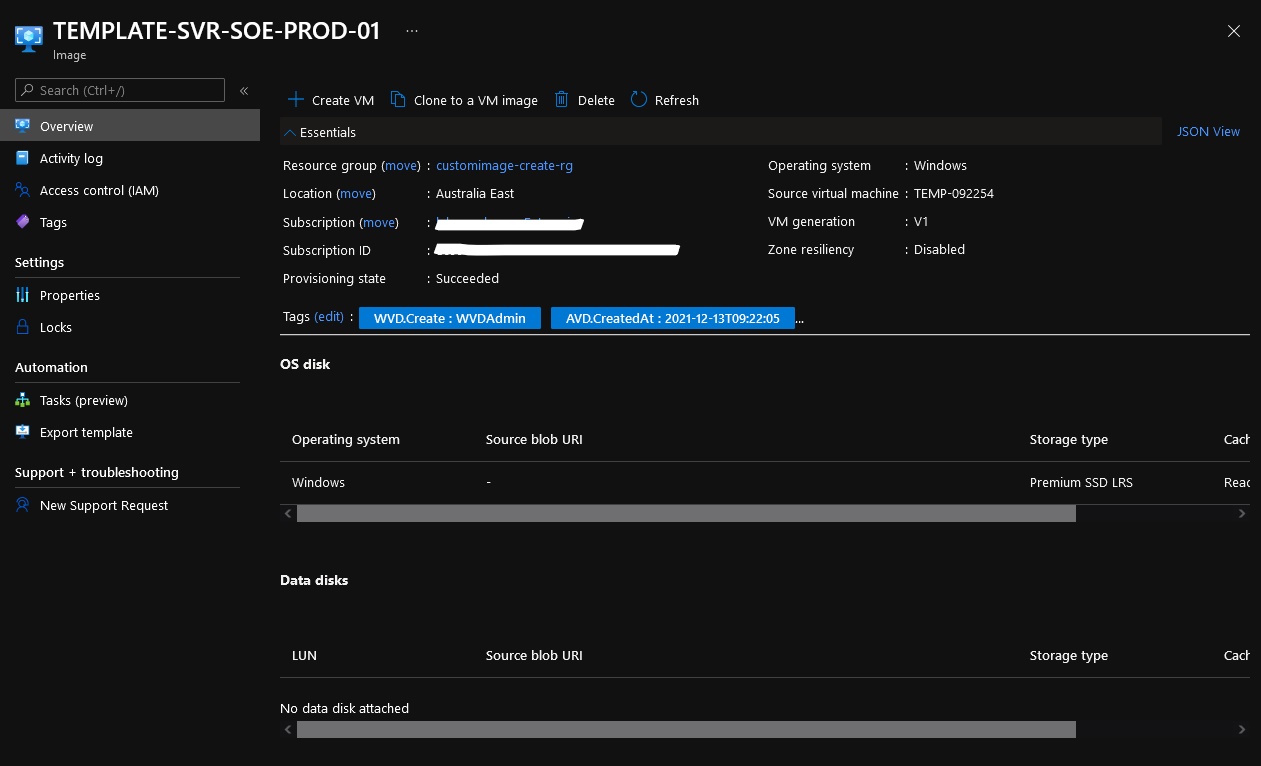
- You can now create additional Virtual Machines from your Custom image using the Azure Portal.
- WVDAdmin can also copy your Custom Image into a Shared Image Gallery, or you can use it to create an Azure Virtual Desktop session host!
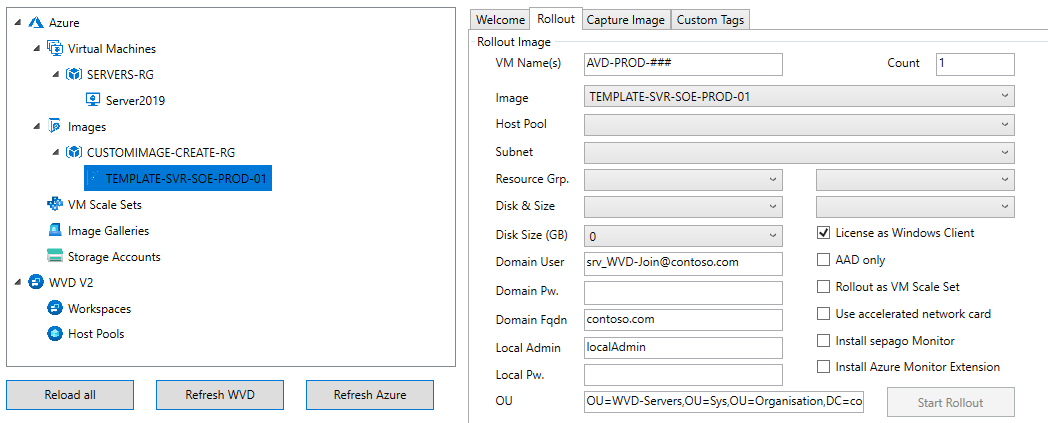
Hopefully, this article has been of some use - even if you don't use Azure Virtual Desktop - WVDAdmin is a great tool to help with day-to-day Azure Virtual Machine operations.
