Datto Remote Management Azure VM Application Deployment
The Azure Compute Gallery (superseded the Shared Image Gallery) offers more than just Azure Image management and replication, and you can deploy Applications to your Virtual Machines.
Overview
An Azure Compute Gallery helps you build structure and organization around your Azure resources, like images and applications. An Azure Compute Gallery provides:
- Global replication.
- Versioning and grouping of resources for easier management.
- Highly available resources with Zone Redundant Storage (ZRS) accounts in regions that support Availability Zones. ZRS offers better resilience against zonal failures.
- Premium storage support (Premium_LRS).
- Sharing across subscriptions, and even between Active Directory (AD) tenants, using Azure RBAC.
- Scaling your deployments with resource replicas in each region.
With images, Azure VM applications that support both Linux and Windows operating systems get these benefits.
While you can create an image of a VM with apps pre-installed, you would need to update your image each time you have application changes. Separating your application installation from your VM images means there’s no need to publish a new image for every line of code change.
Application packages provide benefits over other deployment and packaging methods:
- Grouping and versioning of your packages
- VM applications can be globally replicated to be closer to your infrastructure, so you don’t need to use AzCopy or other storage copy mechanisms to copy the bits across Azure regions.
- Sharing with other users through Azure Role Based Access Control (RBAC)
- Support for virtual machines, and both flexible and uniform scale sets
- If you have Network Security Group (NSG) rules applied on your VM or scale set, downloading the packages from an internet repository might not be possible. And with storage accounts, downloading packages onto locked-down VMs would require setting up private links.
- VM applications can be used with the DeployIfNotExists policy.
Azure VM Application packages (stored in an Azure Storage account) uses multiple resources, as below:
| Resource | Description |
|---|---|
| Azure compute gallery | A gallery is a repository for managing and sharing application packages. Users can share the gallery resource and all the child resources will be shared automatically. The gallery name must be unique per subscription. For example, you may have one gallery to store all your OS images and another gallery to store all your VM applications. |
| VM application | This is the definition of your VM application. This is a logical resource that stores the common metadata for all the versions under it. For example, you may have an application definition for Apache Tomcat and have multiple versions within it. |
| VM Application version | This is the deployable resource. You can globally replicate your VM application versions to target regions closer to your VM infrastructure. The VM Application Version must be replicated to a region before it may be deployed on a VM in that region. |
There is no extra charge for using VM Application Packages, but you will be charged for the following resources:
- Storage costs of storing each package and any replicas.
- Network egress charges for replication of the first image version from the source region to the replicated regions. Subsequent replicas are handled within the region, so there are no additional charges.
Before we deploy our first VM application, there are a few things we need to be aware of:
- VM Application requires an Azure Compute Gallery
- VM Application requires an Azure storage account to store your applications
- The VM Application gets downloaded to the VM using the name of the VM application (not the actual name and Extension of your file in the storage account)
- Currently, in order to retry a failed installation, you need to remove the application from the profile and add it back
- No more than five applications per Virtual Machine deployed at a time
- The maximum size of the application is 1 GB
- You can't have multiple versions of the same application installed on a Virtual Machine, and a newer version will supersede an older version either via an upgrade command or complete reinstall.
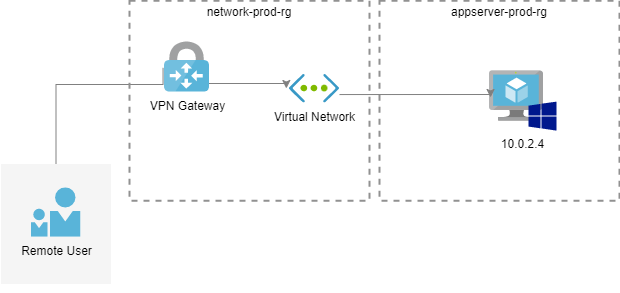
In this article, we are going to deploy the Datto Remote Management & Monitoring Agent to a Windows Server 2022 Virtual Machine; this agent is a simple executable that installs on a virtual machine and allows remote access and management of a virtual machine, without requiring any other form of connectivity (Azure Bastion, RDP via Public IP, Site to Site VPN etc.) for an MSP (Managed Service Provider) using the Datto toolset, the same concept can be applied to any application (theoretically you can also use this to run PowerShell installs or chocolatey installs).
It's worth noting the VM Applications are currently in Public Preview, there is a good chance there will be changes in the way these operate and are configured when it becomes Generally Available.
Setup Azure VM Application Deployment
Prerequisites
In order to use VM Applications, we need:
- A storage account
- Azure Compute gallery
- VM application definition and version (in my example: the Datto RMM agent)
Following the guide, we will run through the creation of everything from scratch; I am, however, assuming you already have the executable or application package and know the instructions to install/uninstall it - as each application is different. The MicrosoftVM Applications docs give a few good examples for getting started with various applications.
Setup Storage Account
The Storage account is where your application will be placed; it uses blobs; depending on the importance of your application deployments, you may want to go for geo-replication etc., but in this example, I will be going with a locally redundant, StorageV2 general-purpose account.
- Open the Azure Portal
- Click on + Create a Resource
- Search for: Storage account, and select it
- Click Create
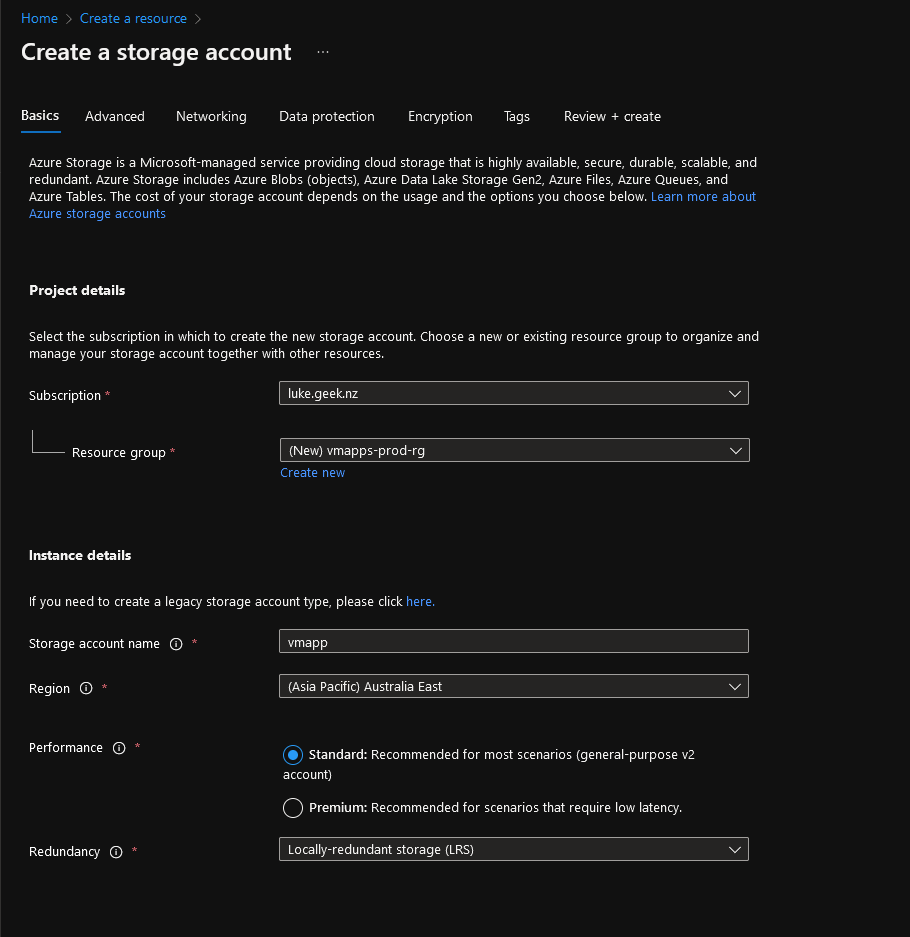
- Select your subscription
- Select a Resource Group for your storage account, or create a new one
- Enter your storage account name (this needs to be globally unique)
- Select your region that your application will be in; although the application can be replicated to other regions, it's better to select your primary region here.
- Select the performance and redundancy to match your requirements and click Next: Advanced
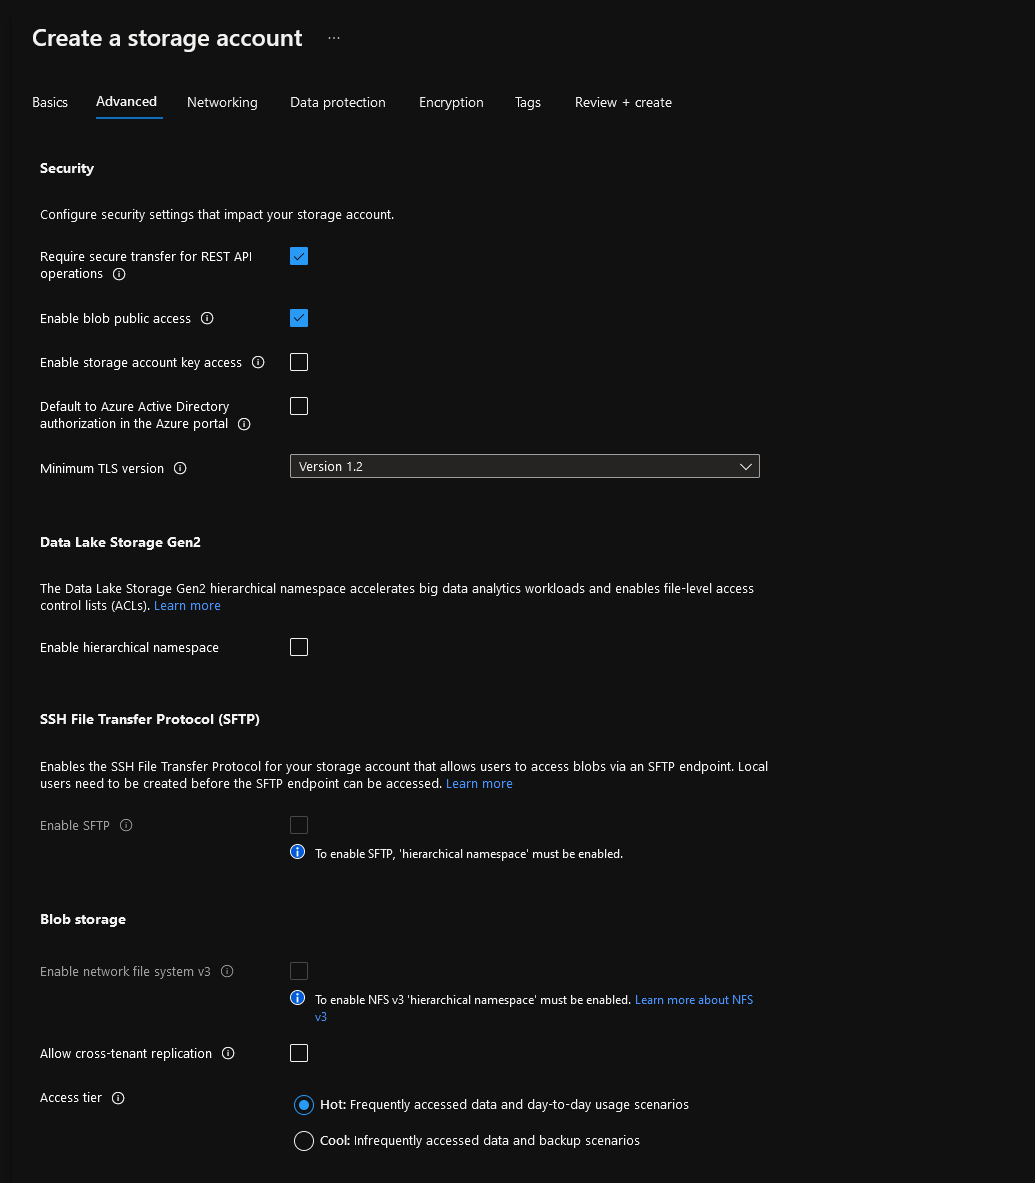
- You can leave most settings here as default, the application executable will need to be able to be accessed directly; make sure the Minimum TLS is at least 1.2.
- You don't need hierarchical namespace etc.; unselect 'Allow cross-tenant replication' unless this is a feature you use.
- Click Review + Create to skip to the last blade; most defaults are fine, but if you want to adjust the blob retainment and soft delete settings, go to the Data Protection tab, set them, then review your Configuration and select Create.
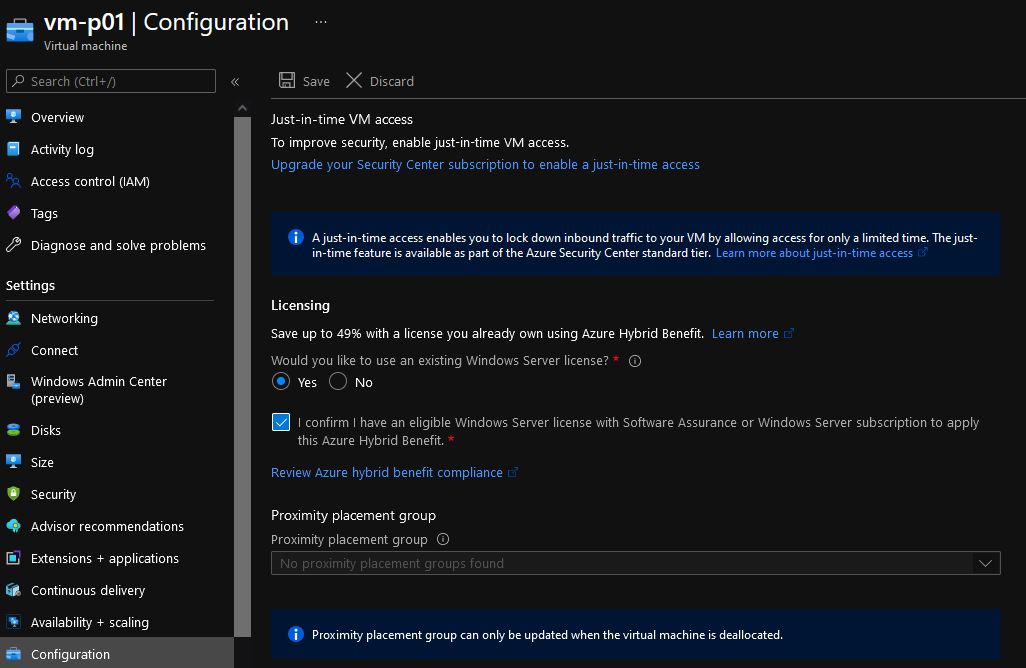
- Go back to your storage account and click Configuration
- Make sure: Allow storage account key access is: Enabled; if it is not, select Enabled and click Save.
Setup Azure Compute Gallery
Now that we have the Storage account to store your application binaries, we now need an Azure Compute Gallery (previously the Shared Image Gallery) to keep your application definition and version metadata.
- Open the Azure Portal
- Click on + Create a Resource
- Search for: Azure Compute Gallery and select it
- Click Create
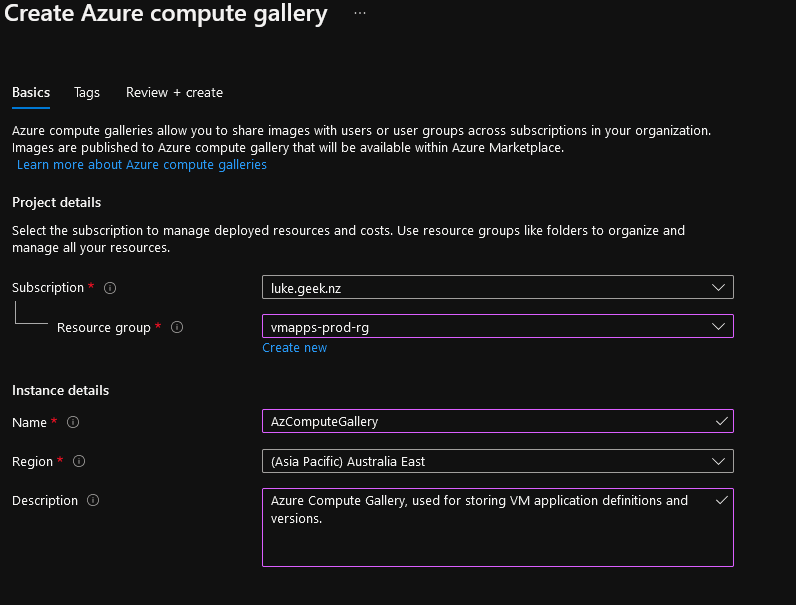
- Select your subscription and resource group (in this case, I am going to use the same resource group as the Storage account I created earlier)
- Type in a name, and select your region
- Although not mandatory, use the opportunity to fill in a description for the purpose of the Compute Gallery for future reference
- Select Review + Create
- Verify everything is correct and click on: Create
Create Application Definition
VM application definitions are created within a gallery and carry information about the application and requirements for using it internally. This includes the operating system type for the VM application versions contained within the application definition. The name of your Application definition defines the name of the file that will be downloaded to your virtual machines.
- Open the Azure Portal
- Navigate to 'All Resources'
- Find and click on your Azure Compute Gallery you created earlier
- On the overview pane, select + Add
- Click on +VM application definition
- Your subscription and resource group should be automatically selected to the location of the Compute Gallery, type in the name of your applicatio.n
- Select your region
- Select the OS type - in my case, and I select Windows
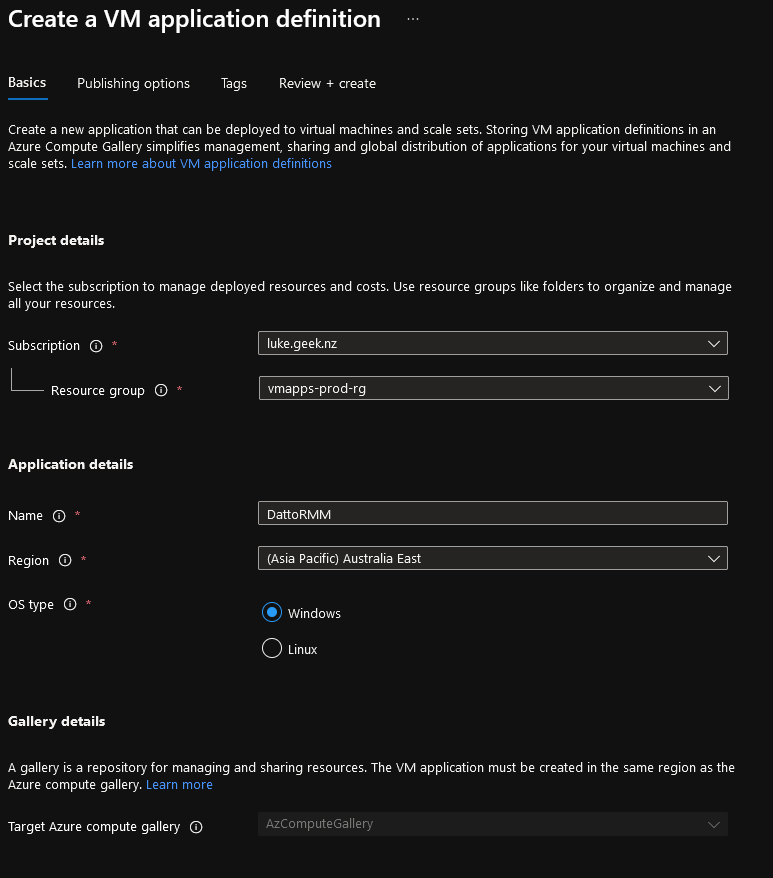
- Click Next: Publishing Options
- The following fields are not mandatory, but I recommend filling in areas to help report on and manage your applications.
- Description
- End of life date
- Eula link
- Privacy URI
- Release notes URI
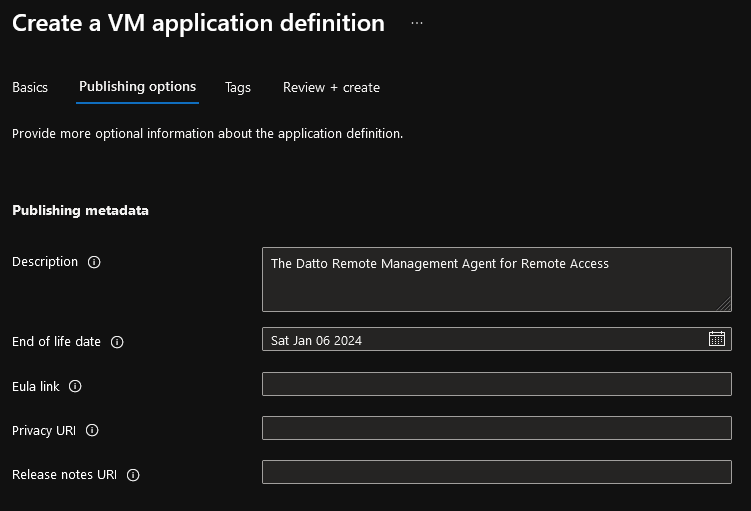
- Click Review + create
- Verify your Configuration and select Create
Create Application version
Now that we have the application definition setup, it's time to set up the version and upload our binary file.+
-
Open the Azure Portal
-
Navigate to 'All Resources'
-
Find and click on your Azure Compute Gallery you created earlier
-
Click on Definitions(besides the Get Started link)
-
Select your Application definition
-
Click on: +Add
-
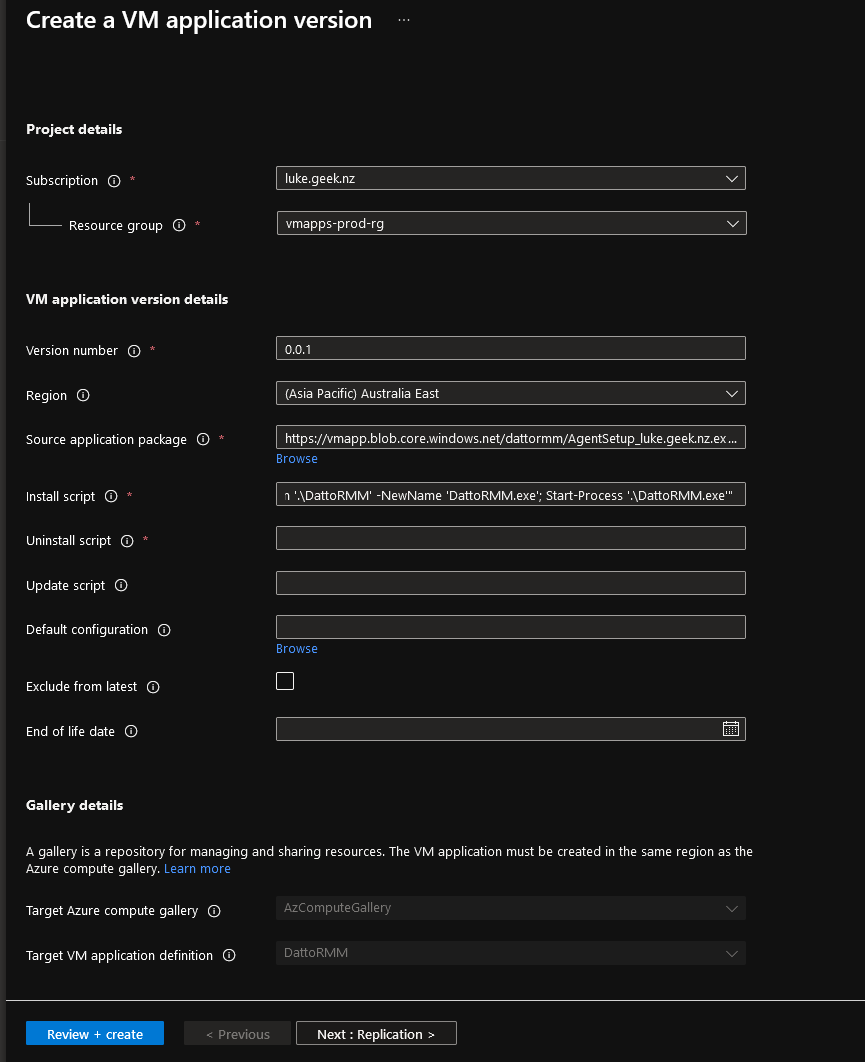
Enter in your version number, and this will increment and grow as you adjust and troubleshoot your application; I recommend starting with 0.0.1 then working your way up, with 1.0.0 being potentially your final/production-ready releast.
-
Select your Region
-
Now we need to select our source application package (you can enter in your blob URL if you know it); we haven't uploaded it to our storage account yet, so we will select Browse
-
Select your Storage account
-
Press + Container
-
Enter in the name of your container ( it has to be in lowercase), such as the application name (to keep things separate, consider a container per application)
-
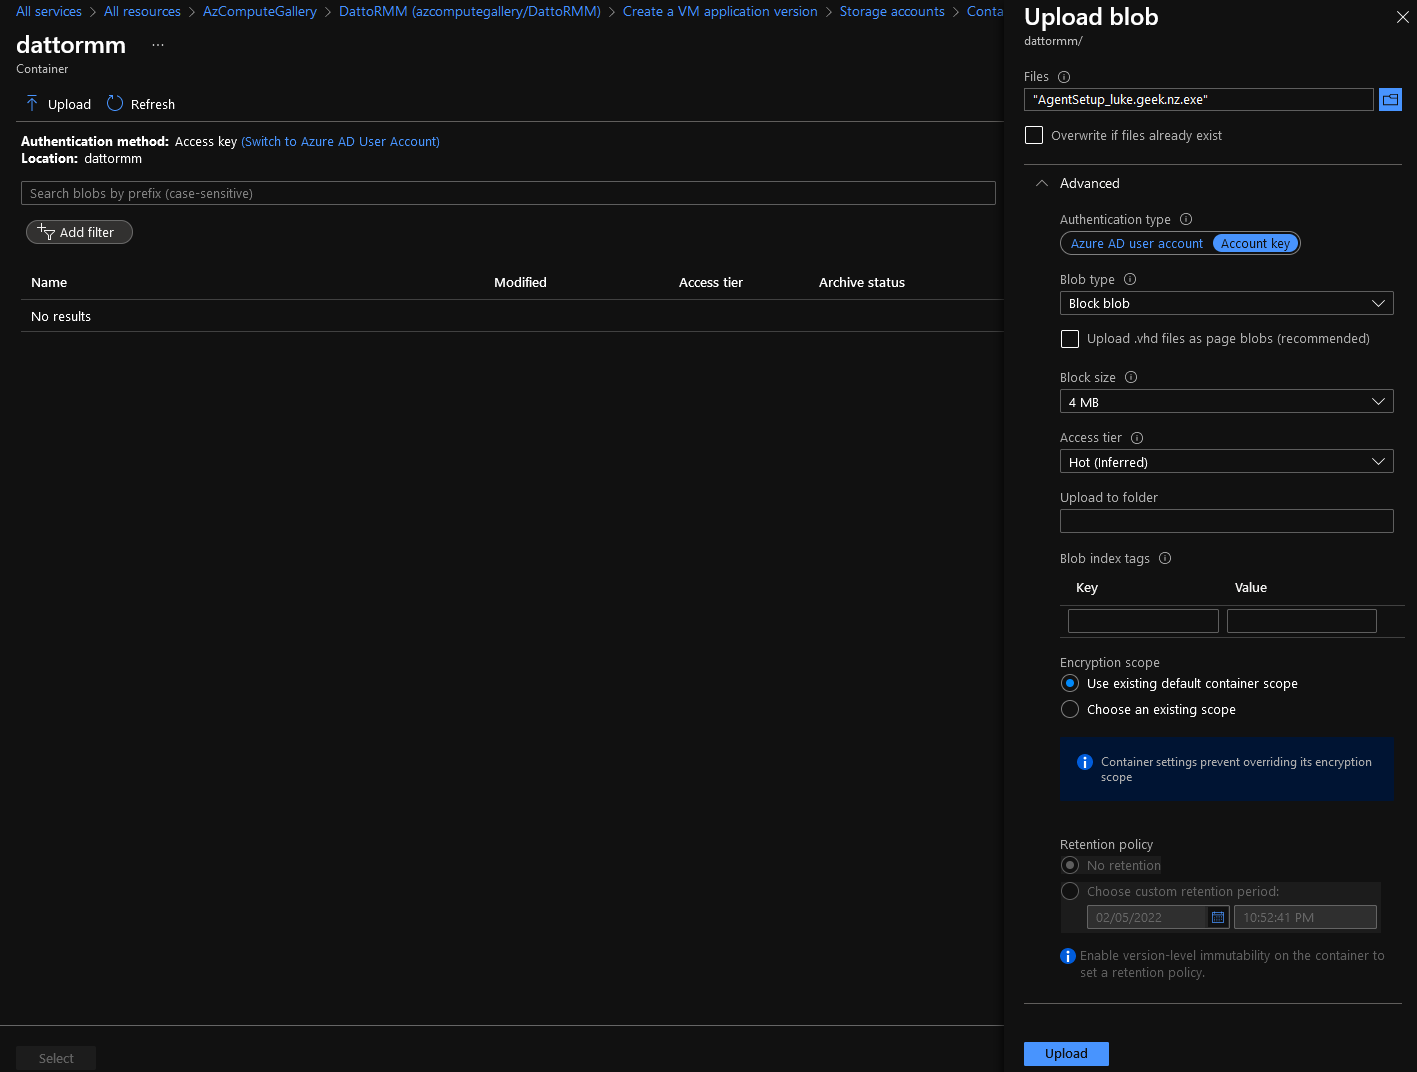
Press Upload
-
Browse to your file and select it
-
Expand Advanced
-
Make sure that Blob type is: Blob
-
-
Click Upload
-
Select your newly uploaded file and click Select
-
Note: You can only upload one file as part of your package, you can upload a ZIP file and have your Install script extract it
-
The Install script is the command to install to your application, by default windows applications are set to install cmd. This already knows the directory your files are in because the file will be uploaded as the application name (i.e. DattoRMM), it needs to be renamed to include .exe and then ran, I will switch to PowerShell for the Install script, so will enter:
powershell.exe -command "Rename-Item '.\DattoRMM' -NewName 'DattoRMM.exe'; Start-Process '.\DattoRMM.exe'" -
If you have a script to uninstall the application, enter it (in my case, I am just going to put a '.' to skip this, as I don't currently have an uninstall script developed)
-
The rest of the Configuration isn't mandatory; the Update script is used by Azure when a new version of an application is created; by default, the Azure VM extension will treat an upgrade like a completely new install and run the install steps unless an update script is defined.
-
-
Click Next: Replication
-
Like Azure Compute Images, you can replicate your Azure VM applications across multiple regions (depending on where your workloads are), such as Australia East to West Europe, and store it then Zone Redundant or Local storage. In my example, I am going to leave mine as one replica in Australia East on locally-redundant storage and click Review + create
-
Verify everything looks ok and click Create to create your application version! This may take a few minutes to create, depending on your configuration and replication.
Deploy Azure VM Application
Deploy Azure VM Application to Virtual Machines using the Azure Portal
Now that your Azure VM Application has been created, it is now time to deploy to a Virtual Machine. I have a Windows Server 2022 Datacenter Azure Gen 2 VM running as a Standard_B2ms as my test machine, and because I am going to use the Datto RMM agent to connect to the machine, I don't need any RDP ports open etc.
- Open the Azure Portal
- Navigate to Virtual Machines
- Click on your Virtual Machine
- Under Settings, click Extensions + Applications
- Click VM Applications
- Click + Add application
- Select your application (note you can select a particular version, by default, it is the latest)
- Click Ok

- You can select your Install Order (i.e. if you had multiple applications, you can select which one installs 1st, 2nd, third and so on); I will select No Reference and click Save to start the deployment.
- If you click Extensions, you should see that a: VMAppExtension has started to be installed; click on Refresh to update the status and click on the Extension to a more detailed status message, hopefully you see ":Operational Install is SUCCESS"
- My Virtual Machine has now had the Datto Remote Management agent installed successfully and has appeared in the portal for me to connect to!

Deploy Azure VM Application to Multiple Virtual Machines using PowerShell
I've created the PowerShell script below to deploy an application to multiple Virtual Machines at once, it can easily be adjusted for a PowerShell Runbook that runs periodically to install software on machines it may be missing. As usual, please make sure you test and run any PowerShell scripts first in a demo environment.
$allvms = Get-AzVM
$applicationname = 'DattoRMM'
$galleryname = 'AzComputeGallery'
$galleryrg = 'vmapps-prod-rg'
$appversion = '0.0.1'


try
{
  ForEach ($vm in $allvms)

  {
    $AzVM = Get-AzVM -ResourceGroupName $vm.ResourceGroupName -Name $vm.Name
    $appversion = Get-AzGalleryApplicationVersion `
    -GalleryApplicationName $applicationname `
    -GalleryName $galleryname `
    -Name $appversion `
    -ResourceGroupName $galleryrg
    $packageid = $appversion.Id
    $app = New-AzVmGalleryApplication -PackageReferenceId $packageid
    Add-AzVmGalleryApplication -VM $AzVM -GalleryApplication $app
    Update-AzVM -ResourceGroupName $vm.ResourceGroupName -VM $AzVM -ErrorAction Stop
  }
}

catch [Microsoft.Azure.Commands.Compute.Common.ComputeCloudException]
{
  #Most likely failed due to duplicate package ID/identical version
  [Management.Automation.ErrorRecord]$e = $_

  $info = [PSCustomObject]@{
    Exception = $e.Exception.Message
    Reason    = $e.CategoryInfo.Reason
    Target    = $e.CategoryInfo.TargetName
  }

  $info
}
Troubleshooting VM Application
If you have problems installing a package, just a reminder that the VM Application, uploads your file based on the name of the Application, to the server and needs to be renamed with a valid extension as part of the install script.
Package Location
The package/extension location is here:
- C:\Packages\Plugins\Microsoft.CPlat.Core.VMApplicationManagerWindows\{VERSION#}\
You will find your Application binary under Downloads.
Logs
For the extension status logs, navigate to:
- C:\Packages\Plugins\Microsoft.CPlat.Core.VMApplicationManagerWindows\{VERSION#}\Status
You should see files such as:
- 0.status
You can right-click these and open them in Notepad, and you should have the timestamp and the last status message, this should be identical to what you see in the Azure Portal.
For the application install logs, navigate to:
- C:\Packages\Plugins\Microsoft.CPlat.Core.VMApplicationManagerWindows\{VERSION#}\Downloads\{APPNAME}\{APPVERSION}\
You may see files such as:
- stderr
- stdout
You can right-click these and open them in Notepad, any errors will be noted in these.