Just in Time access to Azure Virtual Machines
Microsoft Defender for Cloud offers advanced security features, combining functions such as adaptive application controls (application whitelisting), networking hardening (machine learning that learns the traffic passing through your network security group, which helps you create more restricted rules) and advanced antivirus and threat protection; however, a hidden gem of this suite is: Just in Time VM Access.
For a fee for Microsoft Defender for Cloud, you can use Just In Time or JIT to lock down inbound traffic to your Azure Virtual Machines when you only need it.
This reduces exposure to attacks while providing easy access when you need to connect to a VM.
Today, we will use the Azure Portal and configure Just-in-Time access for RDP for a Windows virtual machine running in Microsoft Azure that has a public IP.
This article assumes you have the authority and permissions (at least the Security Administrator role) to configure and pay for Defender for Cloud.
Configure Defender for Cloud
- Open the Azure Portal
- Navigate to the Virtual Machine you would like to enable Defender for Cloud on and enable Just in Time Access for
- Click on Configuration
- Click on: Upgrade your Security Center subscription to enable just-in-time access.
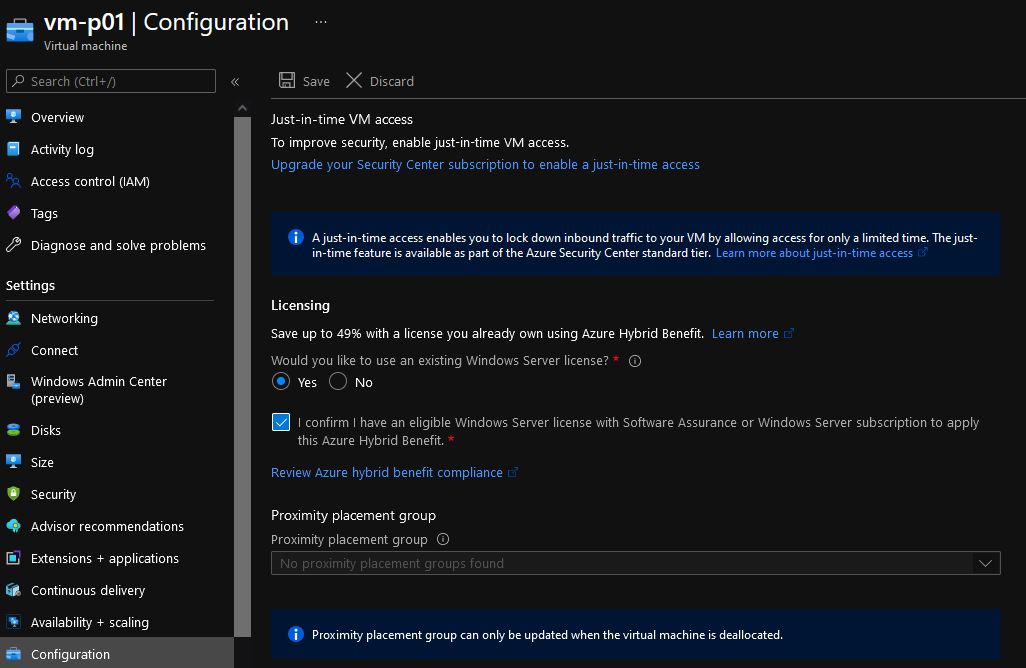
- Select the Subscription that holds your VM and select Upgrade
- If you want to make use of the rest of the Cloud Defender offerings (and you should), then make sure you install the Log Analytics agent; however, you don't need it for Just In Time Access.
- Navigate back to your Virtual Machine
- Click on Configuration
- Now you should see: Enable for Just-in-Time VM access; select this to enable Just in Time.
Now, if you go to the Network Security Group attached to the network interface of the VM, you should see a Deny Rule for 3389 that's been created with a priority lower than the allowed rules, forcing the block.

Configure Just In Time
Now that we have enabled Defender for Cloud, it's time to configure what ports (can be used for more than just RDP and SSH access) and the length of time that access is allowed.
- Click on Microsoft Defender for Cloud
- Select Workload Protections
- Select Just-In-Time VM access
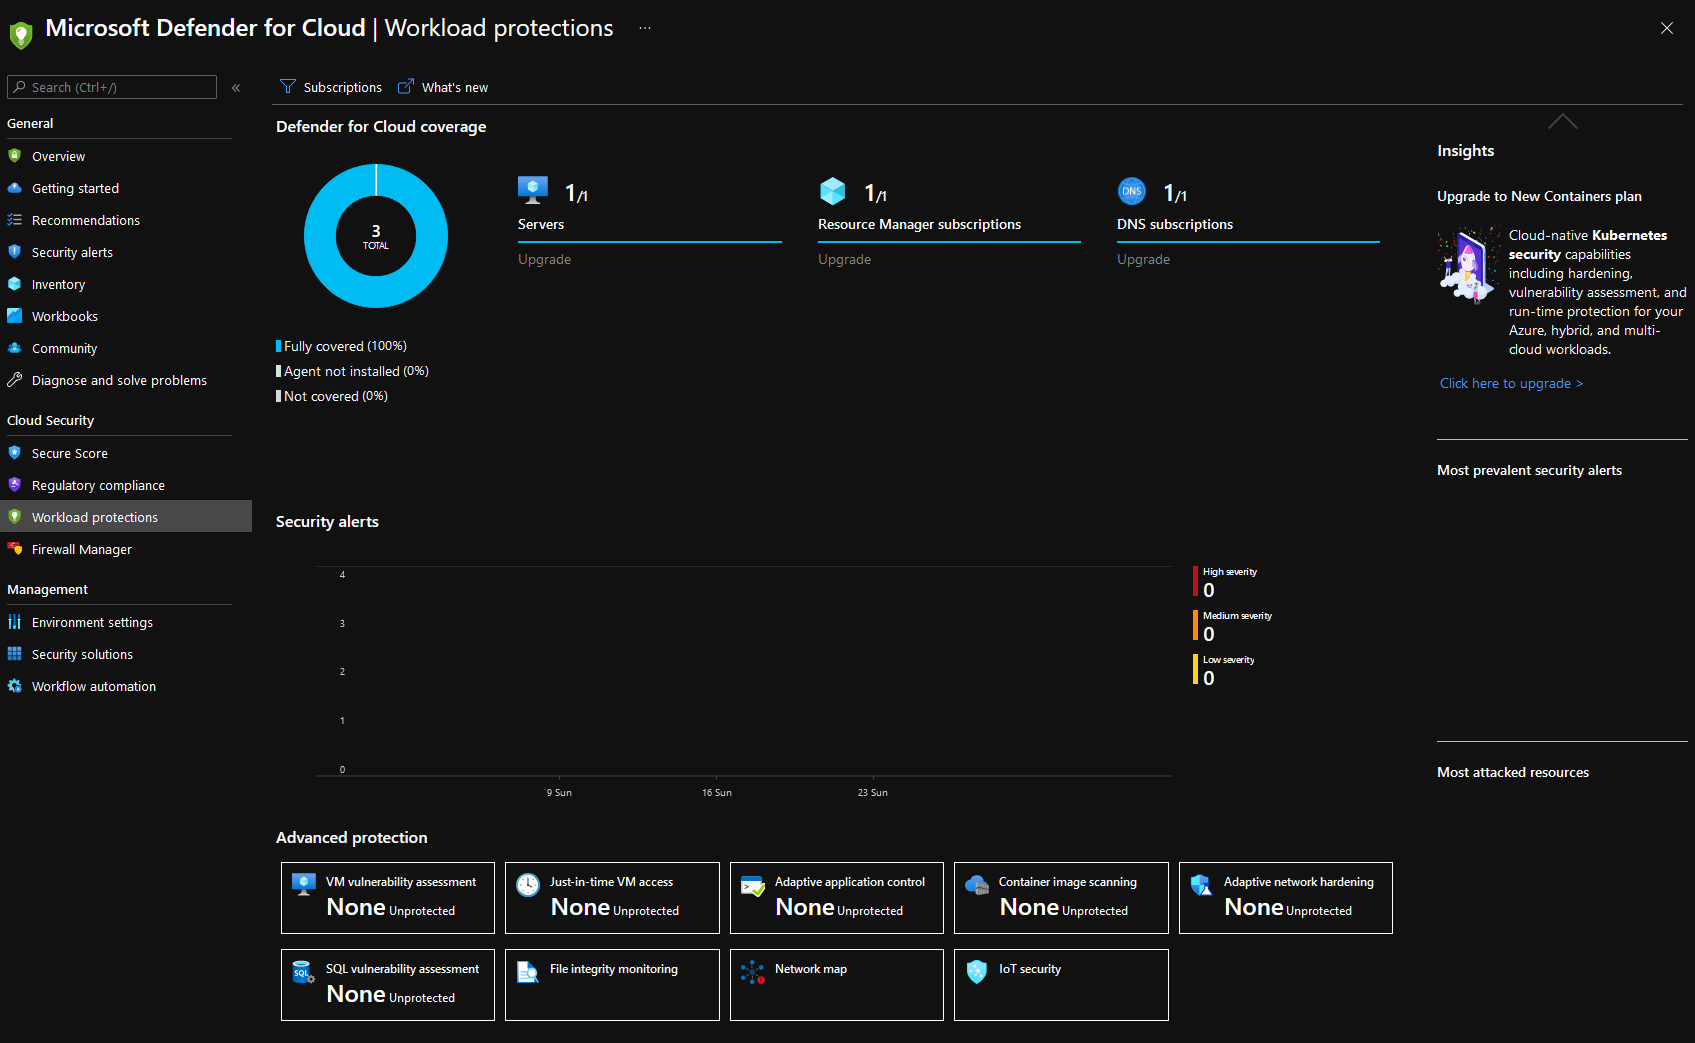
- Select the VM you have configured.
- Click the ellipsis on the right-hand side
- Select Edit
- Azure has automatically added the port for RDP (3389) and sets a maximum 3 hour request time (that I am allowed to connect to the VM); I can also restrict Just In TIme access from specific IP addresses, and IP ranges to avoid anyone being able to RDP from their home IP.

- Make any adjustments you feel suits your environment. I am going to leave the configuration as is.
Request Access for Just In Time Access to RDP
You can programmatically_request JiT access to Azure VM through PowerShell and the REST API (see Additional Resources below for a PowerShell script to get you started), but we are going to use the Azure Portal.
- Open the Azure Portal
- Navigate to the Virtual Machine you would like to enable Defender for Cloud on and enable Just in Time Access for
- Click Connect
- You should see an information alert at the top of the blade "This VM has a just-in-time access policy. Select "Request access" before connecting."
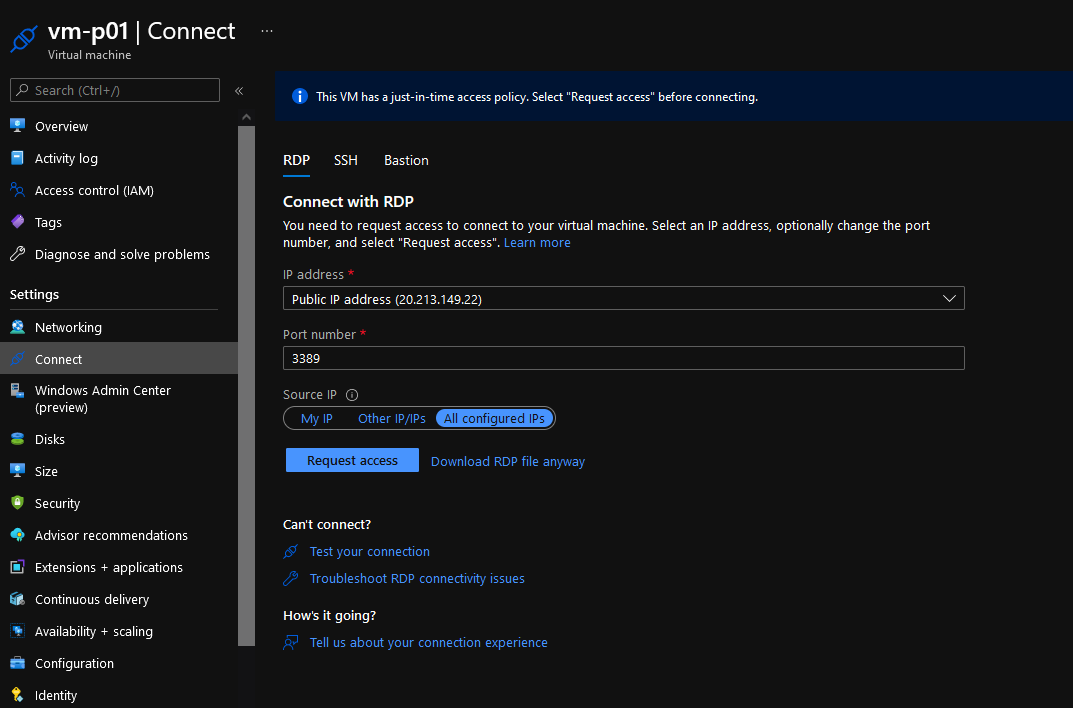
- Select Source IP (My IP)
- Click Request access
- You should now have access to RDP to the machine!
- If you look at the Network Security Group, you should be able to see a new 'Allow' rule has been created with a priority lower than the block rule.

- After 3 hours, the allowed rules will be removed automatically.
Hopefully, this helps keep your environment secure; if you implement this, make sure you read about the custom roles. To prevent the people from just adding in a rule for their public IP in the address manually, it may be better to create a custom role (see the script in Additional Resources below to create this role).