Microsoft Dev Box wrapped in a bow
It's that time of year again! The time to be jolly and experience the Month of December by looking at the Festive Tech Calendar!
This year the Festive Tech Calendar Team is raising money for the charity @missingpeople.
We believe its important to support charities that do great work. Without fundraising Missing People wouldn’t be able to find vulnerable missing people and reunite families.
If you would like to donate please visit our Just Giving Page
Today, we sent our present and took a peek inside the box - at Microsoft Dev Box!
Overview
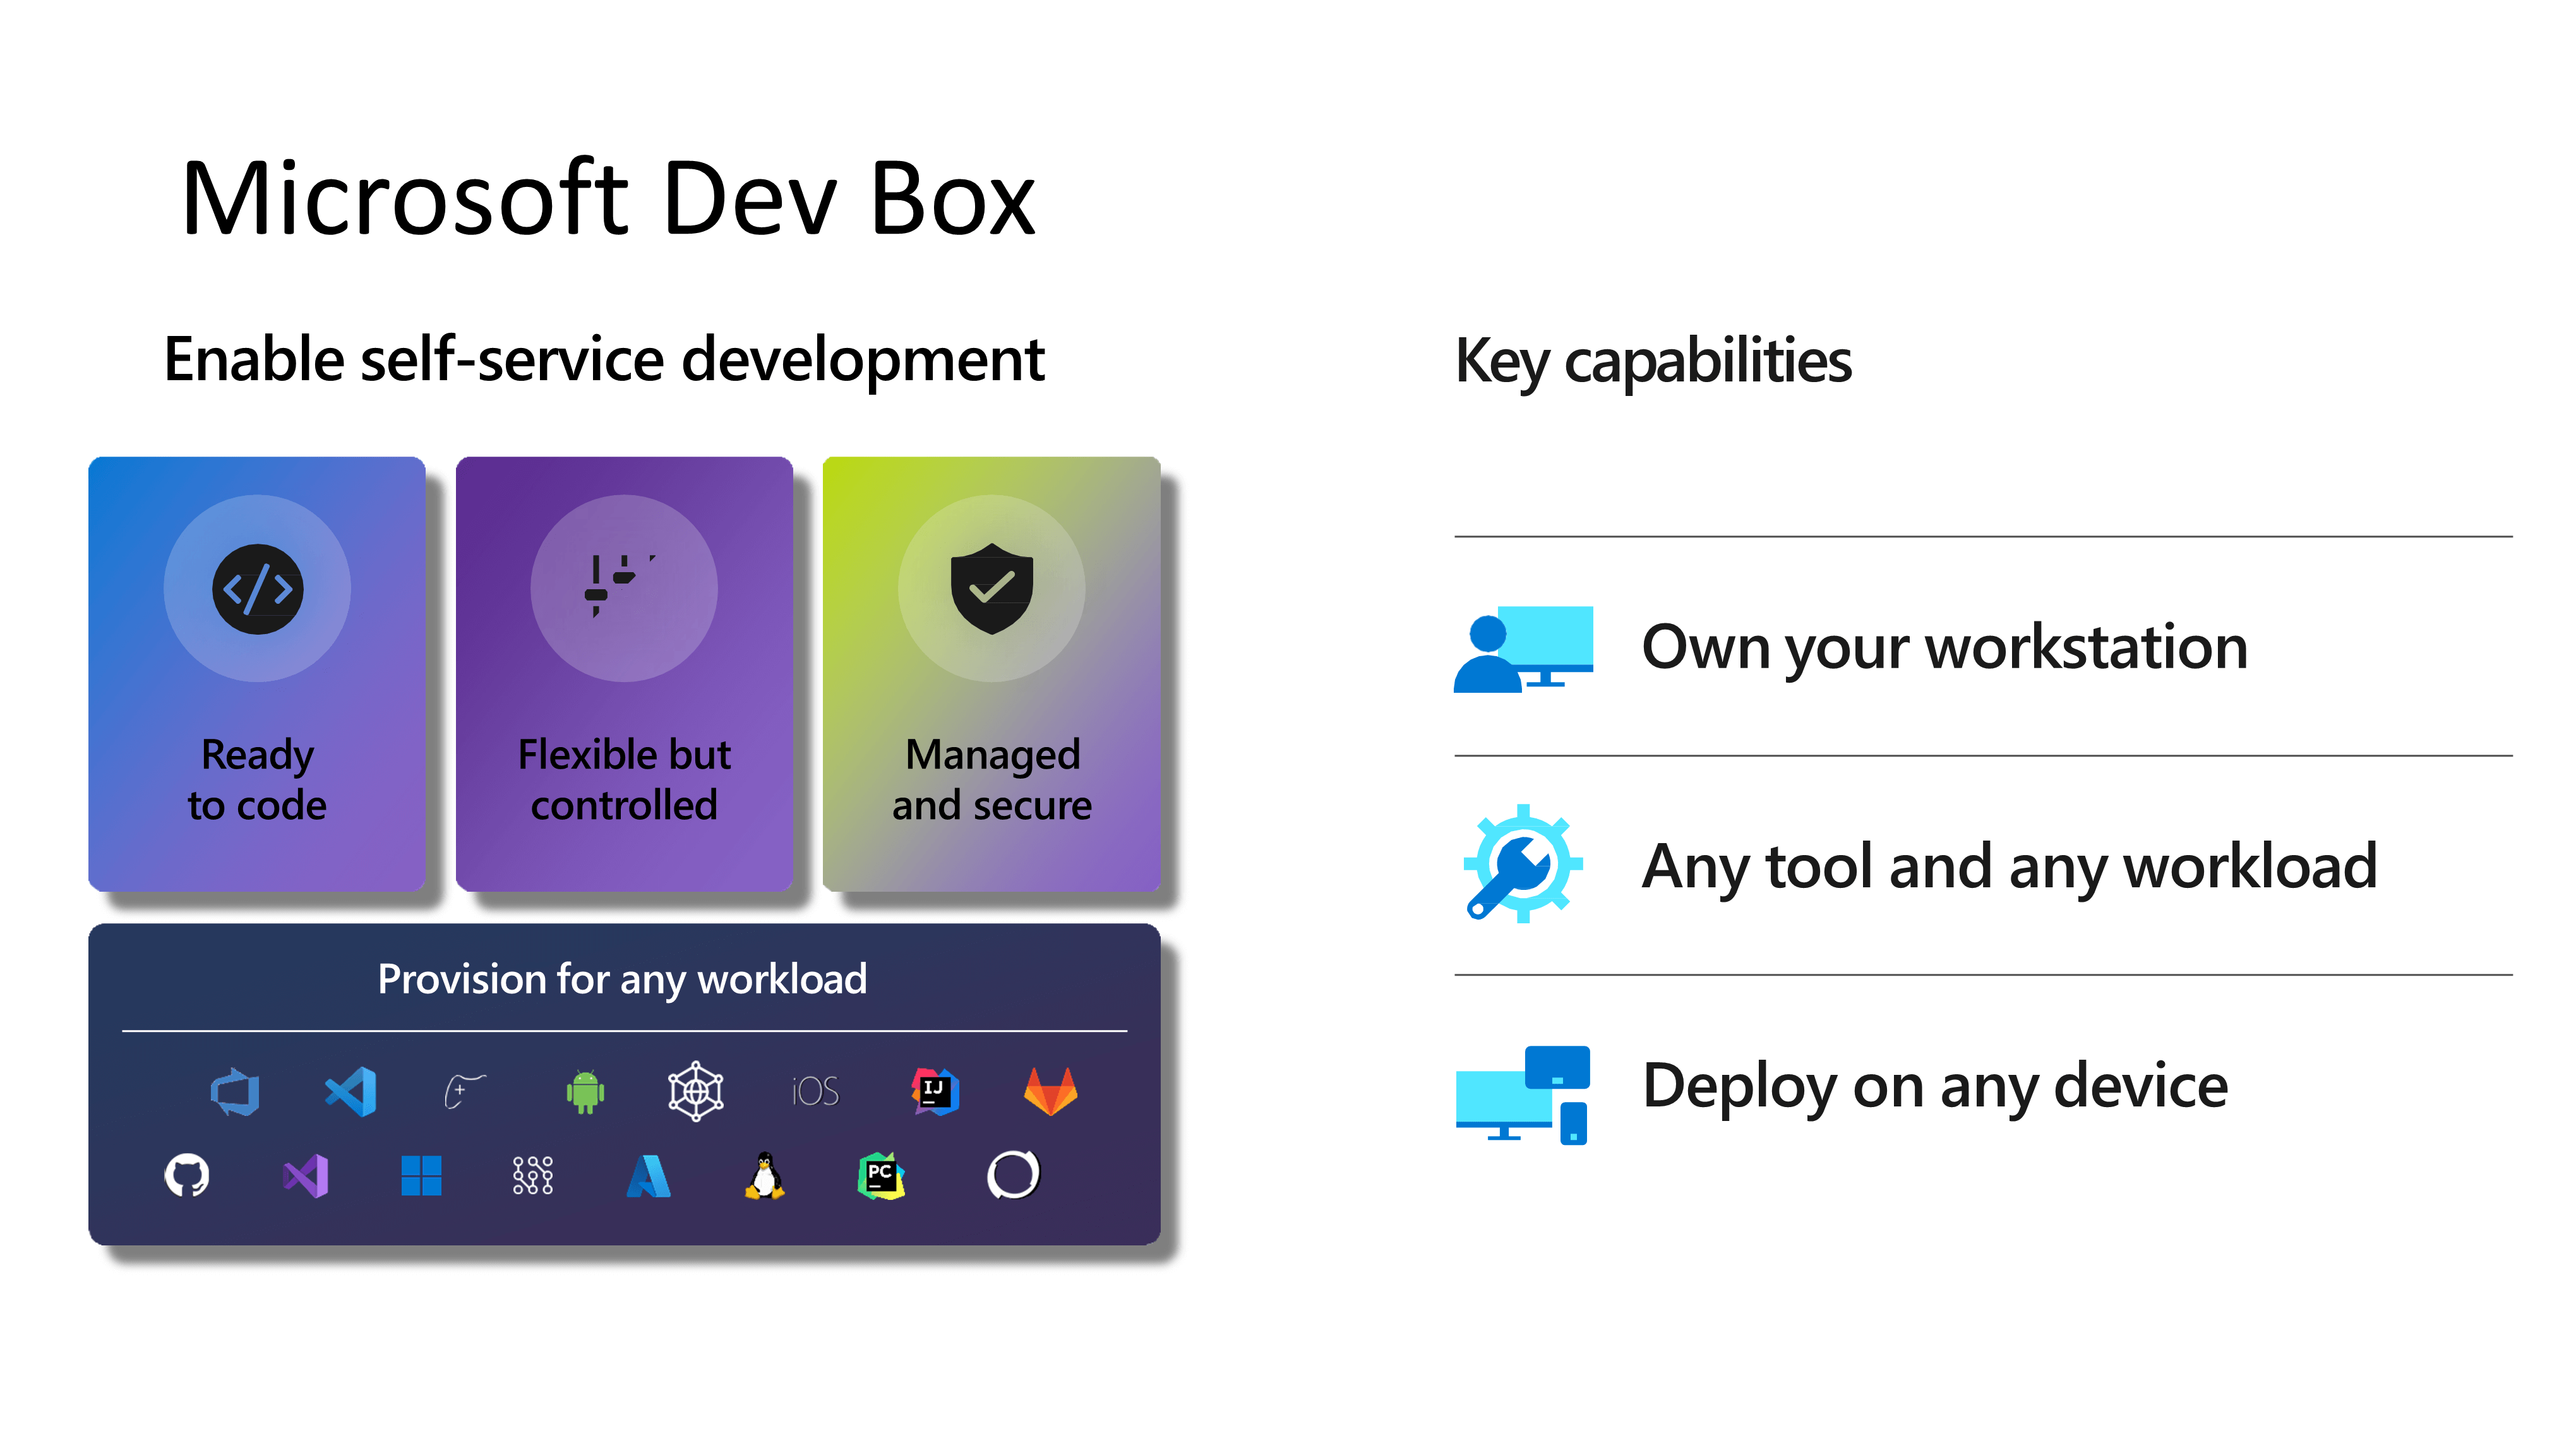
Microsoft Dev Box provides self-service access for developers to high-performance, cloud-based workstations preconfigured and ready-to-code for specific projects - all while maintaining security and corporate governance. With Microsoft Dev Box, organizations can:
- Maximize dev productivity with ready-to-code, self-service Dev Boxes.
- Central management of workstations running anywhere to maintain greater security, compliance, and cost efficiency.
- Customize dev boxes with everything developers need for their current projects.
Microsoft Dev Box supports any developer IDE, SDK, or tool that runs on Windows. Developers can target any development workload built from Windows, including desktop, mobile, IoT, and web applications. Microsoft Dev Box even supports building cross-platform apps thanks to Windows Subsystem for Linux and Windows Subsystem for Android. Remote access allows developers to securely access dev boxes from any device, whether it's Windows, macOS, Android, iOS, or a web browser.
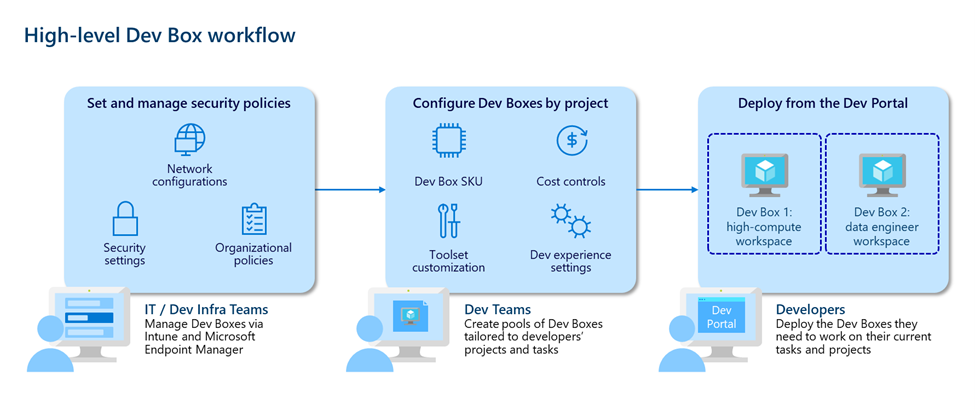
Microsoft Dev Box is a managed service that enables developers to create on-demand, high-performance, secure, ready-to-code, project-specific workstations in the cloud.
Microsoft Dev Box is available today as a preview from the Azure Portal. During this period, organizations get the first 15 hours of the dev box 8vCPU and 32 GB Memory SKU for free every month, along with the first 365 hours of the dev box Storage SSD 512 GB SKU.
Beyond that, organizations pay only for what they use with a consumption-based pricing model. With this model, organizations are charged per hour depending on the number of Compute and Storage consumed.
To use Microsoft Dev Box, each user must be licensed for Windows 11 or 10 Enterprise, Microsoft Endpoint Manager, and Microsoft Entra ID P1. These licenses are included in M365 F3, E3, E5, A3, A5, Microsoft Business Premium and Microsoft 365 Education benefit plans.
Disclaimer: At the time of writing, this service is still in Public Preview, some services and license requirements may change by the time this becomes generally avaliable.
So, where does Microsoft Dev Box fit in?
Microsoft offers a plethora of services, from Azure Virtual Desktop, Windows 365, and now Microsoft Dev Box - where would you use Microsoft Dev Box over another service, such as Windows 365?
General scenarios at a high level are:
| Scenario | Product |
|---|---|
| Production multi-session, supporting Windows Server and Client OS, Published Aps | Azure Virtual Desktop |
| Production dedicated personal PCs, for shift/party time users - or small environments | Windows 365 |
| Dev/Test Ondemand Windows machines for Testing and development with custom image support | Azure Dev Box |
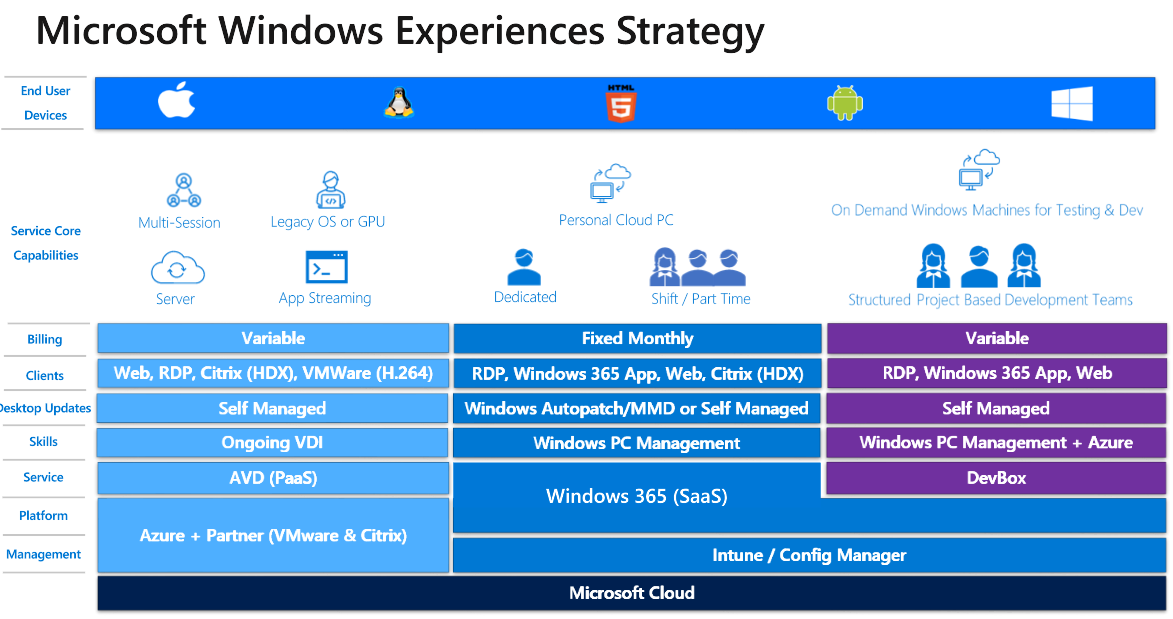
Microsoft Dev box can help project and development teams get up and running quickly, independent of what hardware a developer or contractor has, whether they prefer Mac, Windows, or Linux - the Microsoft Dev box can be used to get developers and contractors up and running in a secure environment that supports Intune!
Concepts & Roles
| Concepts | Notes |
|---|---|
| Dev center | A dev center is a collection of projects that require similar settings. Dev centers enable dev infrastructure managers to manage the images and SKUs available to the projects using dev box definitions and configure the networks the development teams consume using network connections. |
| Projects | A project is the point of access for the development team members. When you associate a project with a dev center, all the settings at the dev center level will be applied to the project automatically. Each project can be associated with only one dev center. |
| Dev box definition | A dev box definition specifies a source image and size, including compute size and storage size. You can use a source image from the marketplace, or a custom image. |
| Network connection | Network connections store configuration information like Active Directory join type and virtual network that dev boxes use to connect to network resources. |
| Dev box pool | A dev box pool is a collection of dev boxes that you manage together and to which you apply similar settings. |
| Dev box | A dev box is a preconfigured ready-to-code workstation that you create through the self-service developer portal. The new dev box has all the tools, binaries, and configuration required for a dev box user to be productive immediately |
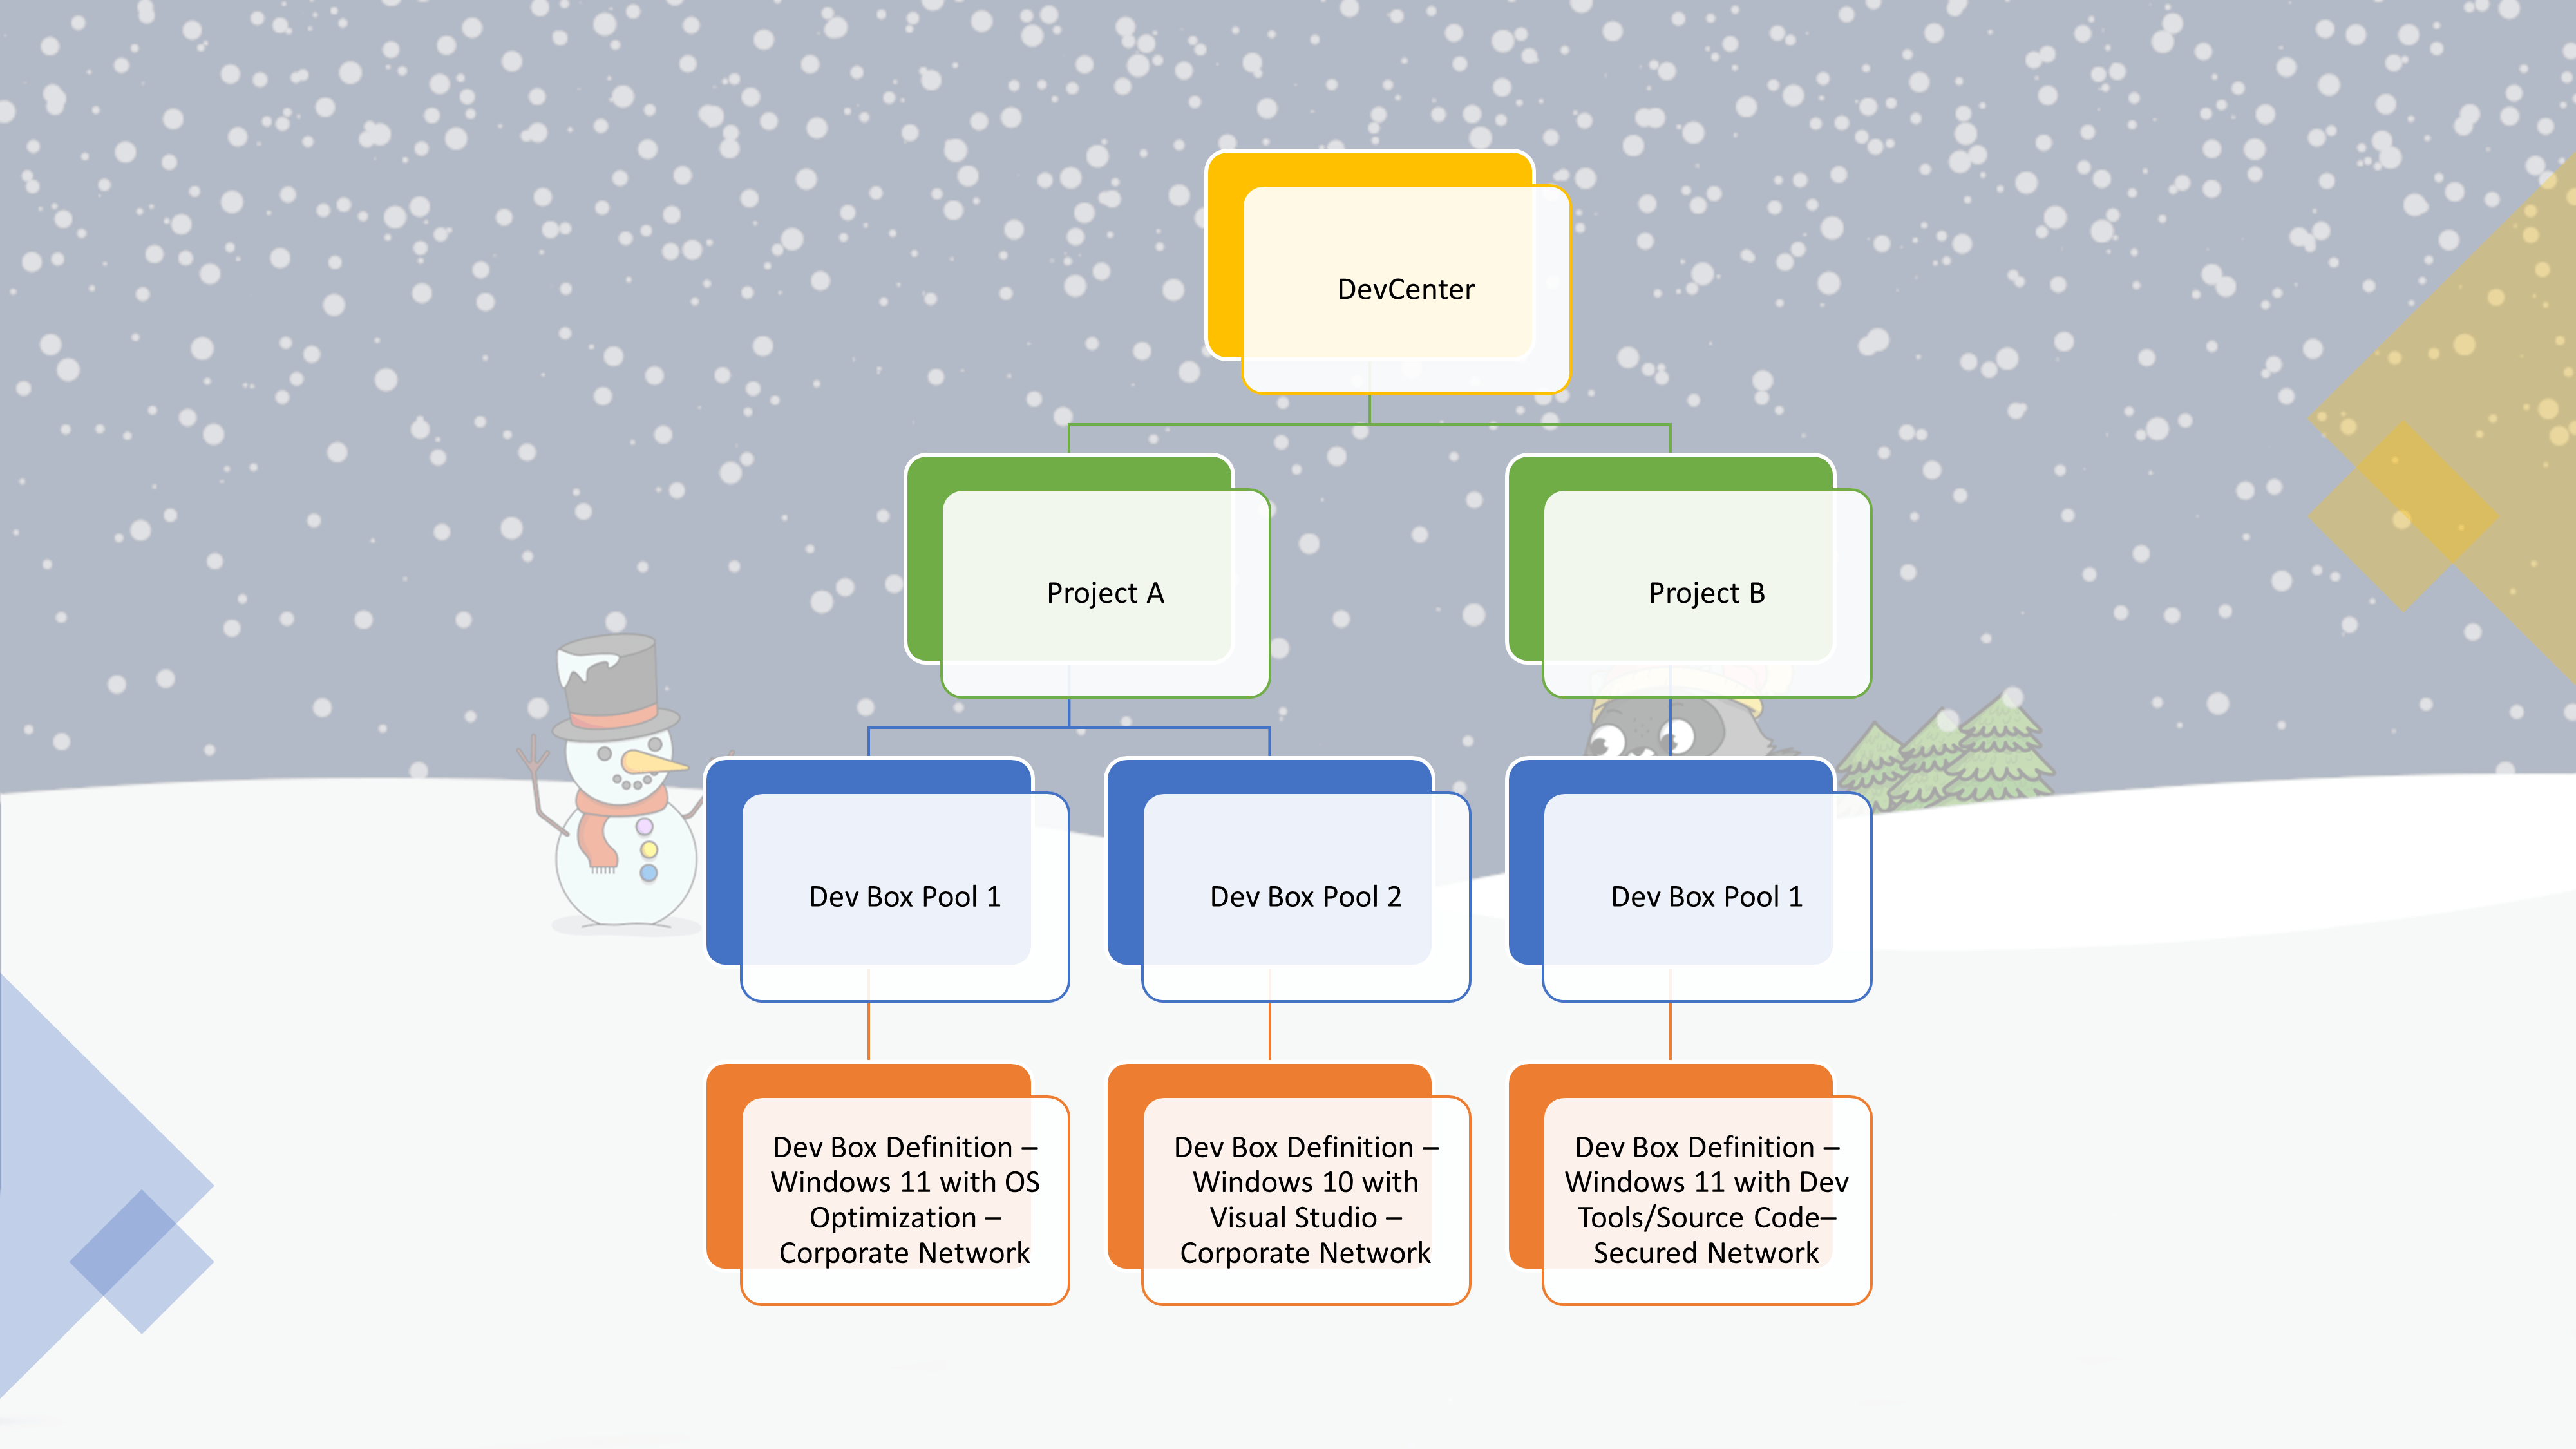
The following are typical Azure Dev Box roles.
| Role | Responsibilities | Permissions |
|---|---|---|
| Dev Infra Admins | Providing developer infrastructure and tools to the development teas | Can create and manage dev centers, can create projects and define images that are used to create the dev boxes |
| Project Admins | Does administrative tasks for the Dev Box solution and assist with day to day tasks. | Can create and manage dev box pools across different regions |
| Dev Box Users | Members of your development teams | Can self-service and create one or more dev boxes, depending on the projects assigned. |
Deployment
Create Dev Center
First, we need to create our Dev Center. A Dev Center allows us to centrally manage our developer environments and enable development teams with self-service capability. Dev Center is used by more than just Microsoft DevBox - an example is Azure Deployment Environments - which allows devs to spin up templated (ARM) application infrastructure quickly - but we will focus on components of Dev Center - used by Microsoft Dev Box.
Please confirm what region you can deploy Dev Box. As this is in Public Preview at the time of writing - only certain regions are supported.
Let's create a standard Dev Box environment in your favourite browser, starting with the Dev Center...
- Log in to the Microsoft Azure Portal
- Click + Create a resource
- Search for: Dev center, select your Dev center and click Create
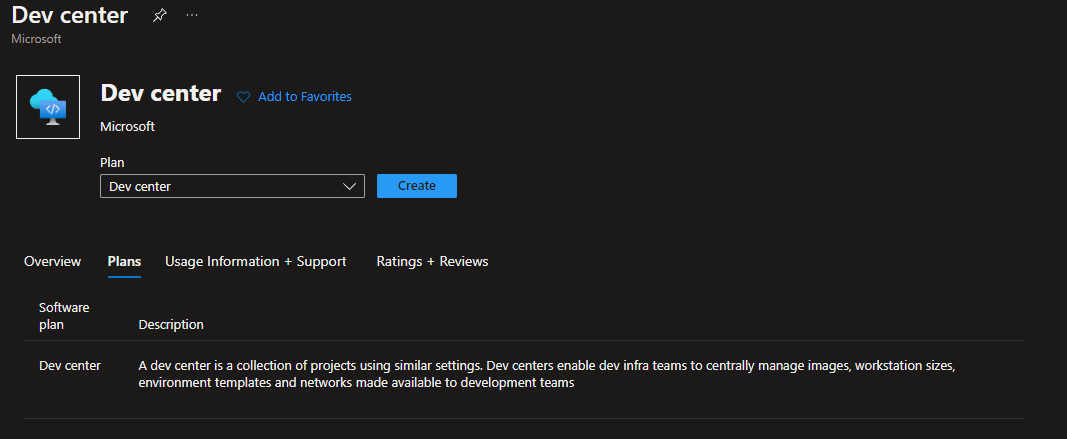
- Select the Subscription and ResourceGroup you want to deploy your Dev Center; you can use this opportunity to create a new Resource Group.
- Type in the name__ of your DevCenter **(in my example, it is named DevCenter-Devs)
- Then select the location (region) in which you want to deploy your DevCenter.
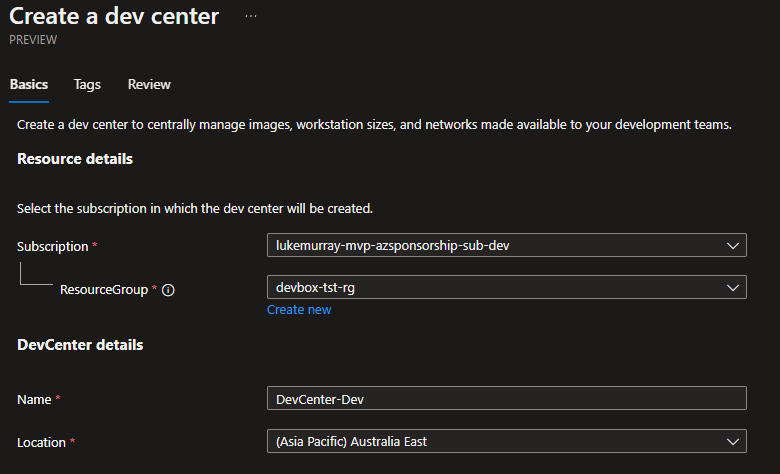
- Click Review + Create, then Create
Deployment of the Microsoft Dev Center will take a few minutes.
Create Virtual Network
To use Microsoft Dev Boxes - like any Virtual Machine in Azure, you need a Virtual Network! The Dev Boxes can connect to existing Virtual Networks, which could be peered with other VNETs, have connectivity to on-premises - or have standalone secure connectivity through network links! In my demo, I don't currently have a Virtual Network - so I will create a Virtual Network from scratch.
- Log in to the Microsoft Azure Portal
- Click + Create a resource
- Search for: Virtual Network
- Create a Virtual Network
- Select your Virtual Network name and region (make sure the region aligns with your workloads and Azure DevCenter location)
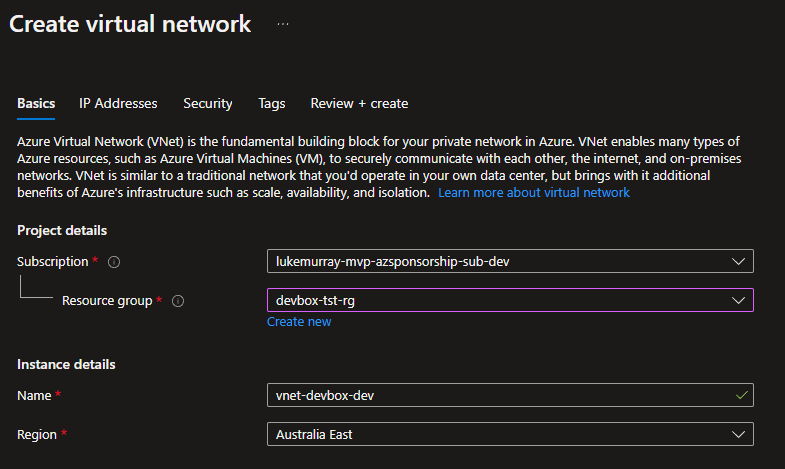
- Click Next: IP Addresses
- I will leave the IP address space the default of 10.1.0.0/16 - but change the default subnet name to devbox-subnet.
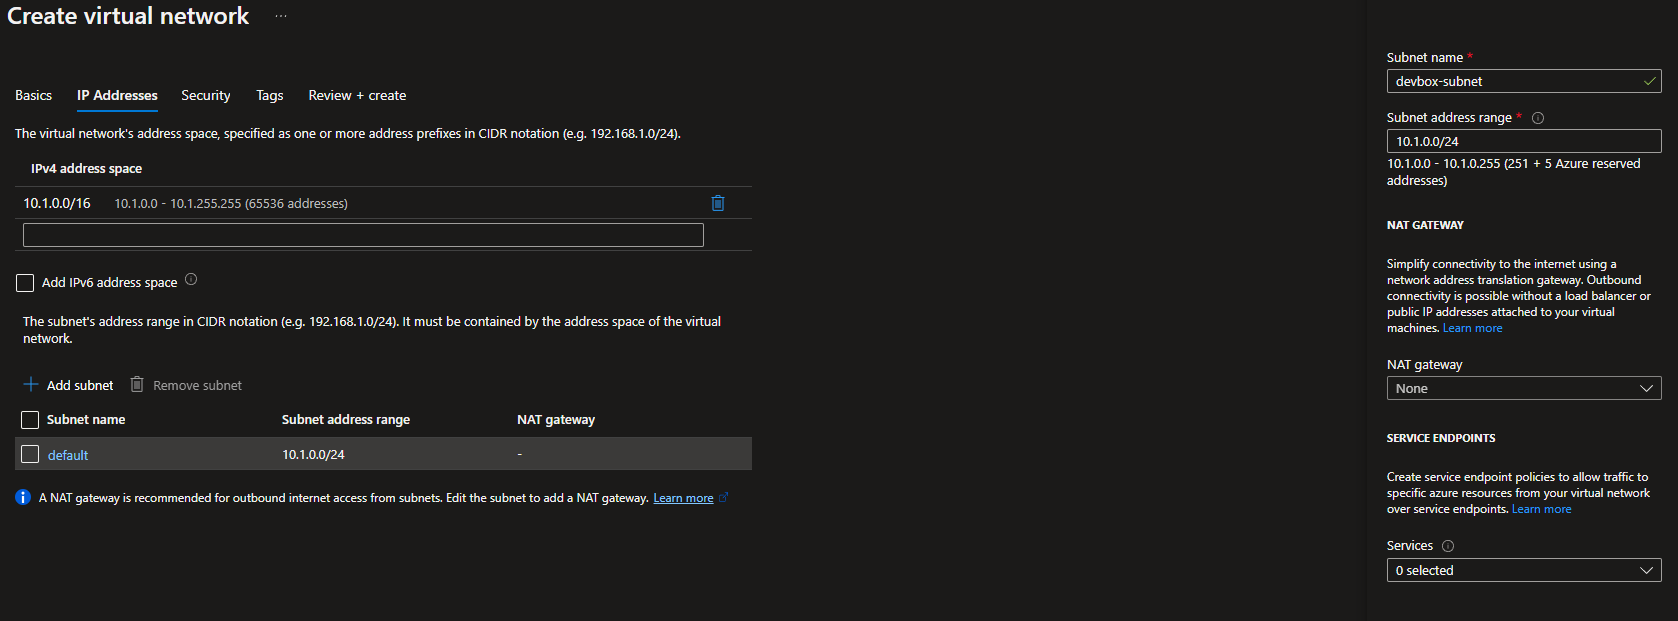
- Click Review + create
- Click Create
Create a Virtual Network Connection and link to Dev Center
Now that we have our Dev Center and our Virtual Network - it's time to make a Network connection - this connection will be used by Dev Center - to allow our Dev Boxes to connect to the Virtual Network - and to select your Virtual Machine identification (i.e. Microsoft Entra ID, or Hybrid Microsoft Entra ID).
- Log in to the Microsoft Azure Portal
- Click + Create a resource.
- Type in: Network Connection, find and click Create
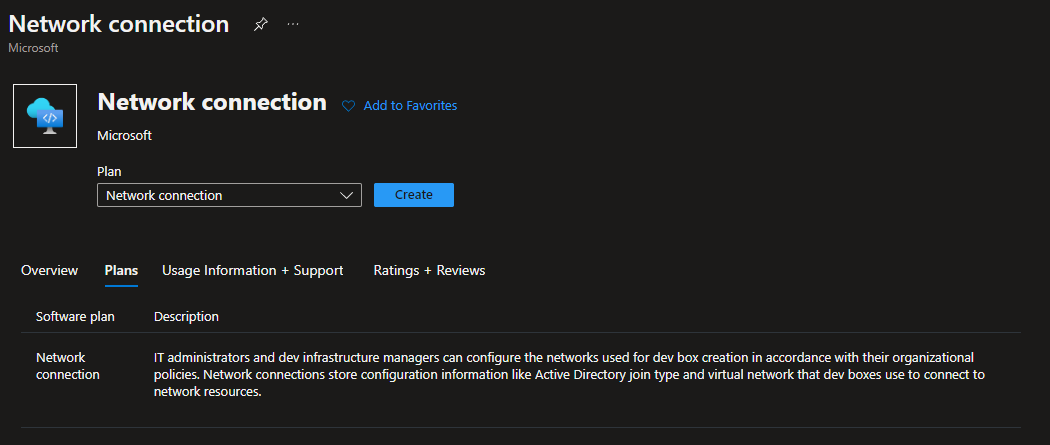
- As I will be using Microsoft Entra ID joined Virtual Machines, I will ensure that the Domain join type is: Microsoft Entra ID join.
- For the Network connection name, I will select: ProductionVNETAADJConnection
- I will select my Virtual Network and subnet, which the Dev Box will be placed into.
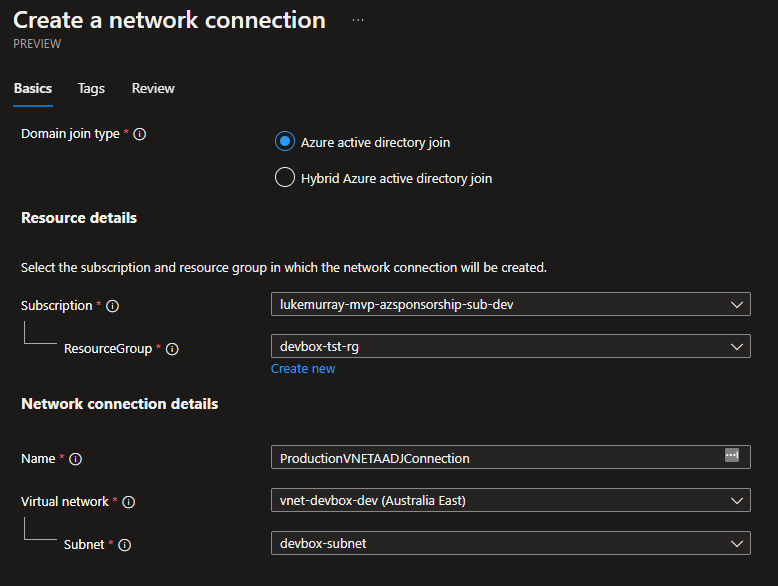
- Click Review + Create, and click Create
- Now that we have created the Network connection - it is time to link it to our Dev Center - so it can be used.
- Navigate to your Dev Center
- Under Dev Box configuration, select Networking
- Click + Add
- Select your Network connection that has just been created

- Click Add
- The Network Connection will check all the network requirements for the Dev Box service, such as the Azure tenant and Intune configuration (i.e. is there a restriction in Endpoint Management for Windows).
Create Dev box definitions
It's time to create our Dev box definition. The Dev box definition is the type of Virtual Machines -or Dev Boxes that are standard for your environment. A dev box definition will be used to define the image (whether a custom or marketplace image), SKU of virtual machines (Compute + Memory), and available storage. Note that if you want to use a Custom Image - you will need an Azure Compute gallery, and if you decide to go down this route, make sure you check out Azure VM Image Builder to help automate and build your images. You can have multiple definitions per project.
- Log in to the Microsoft Azure Portal
- Navigate to your Dev center
- Navigate to Dev box definitions
- Click + Create
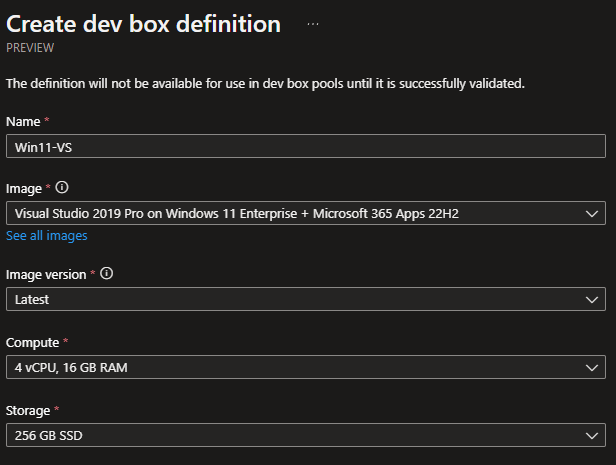
- For our Image definition name, I will go with Win11-VS
- For Images, there are a plethora of images available! For this guide, I will use Visual Studio 2019 Enterprise on Windows 11 Enterprise + Microsoft 365 Apps 22H2 image.
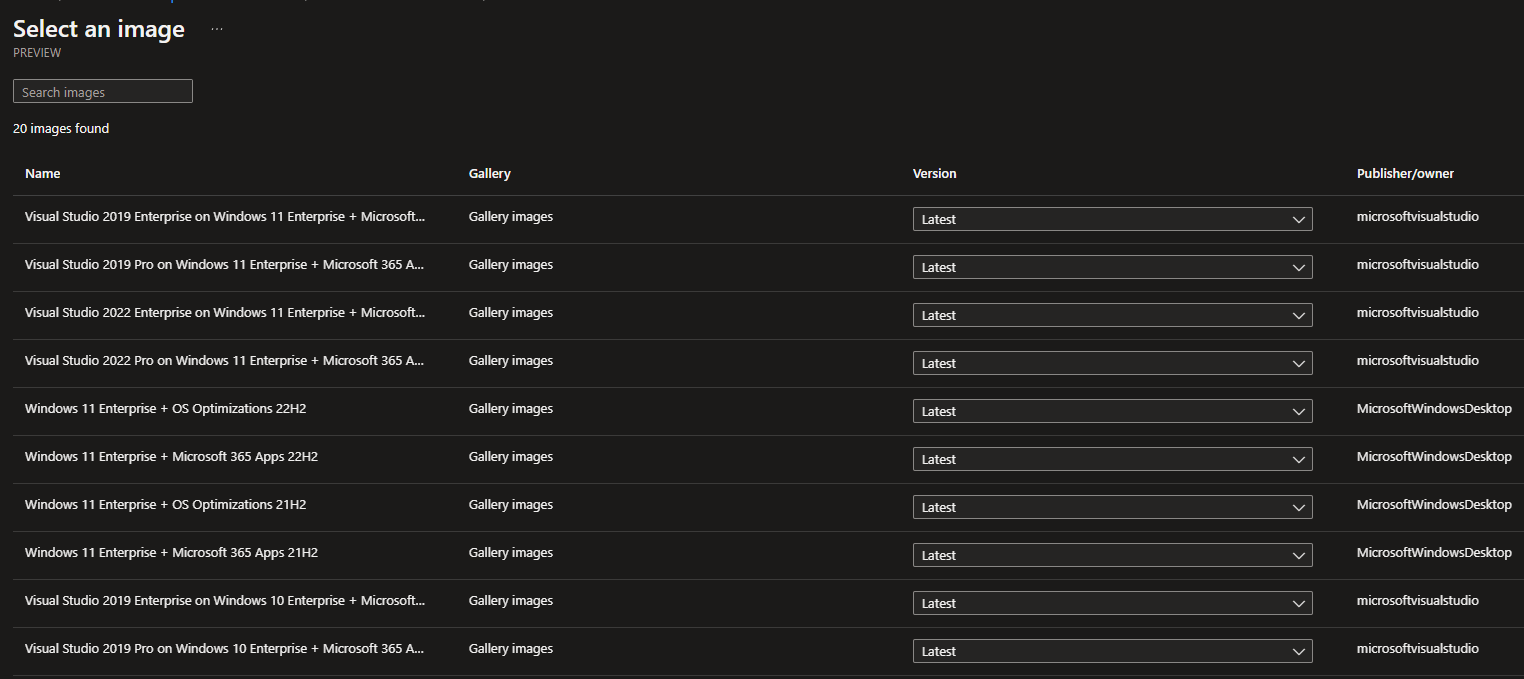
- I will select the Latest image version and specify 4vCPU, 16GB of RAM, and a 256 GB SSD drive.
- Click Create
You can edit a Dev box definition, change the image, Compute, and storage after it has been created; this could be useful if there are issues with the latest version of the image, you can roll back the version - so people can make their Dev Boxes while the image is worked on.
Create and assign Project
Now that we have our Dev Center and Virtual Network connection - it is time to create a Project. A Project is intended to be task specific - an example being the following user story "As a developer working on a mobile game, I need access to a Windows 11 Development workstation with Visual Studio installed" - so all users working on that mobile game - will get an identical virtual machine setup with all the pre-requisites that the need to start development, a project team working on another mobile game, may need different software or dependencies - so will be part of another project.
- Log in to the Microsoft Azure Portal
- Navigate to your Dev center
- Navigate to Projects
- Select + Create
- Select your Resource Group
- Select your Dev center
- Please type in the name of our Project and enter a description.
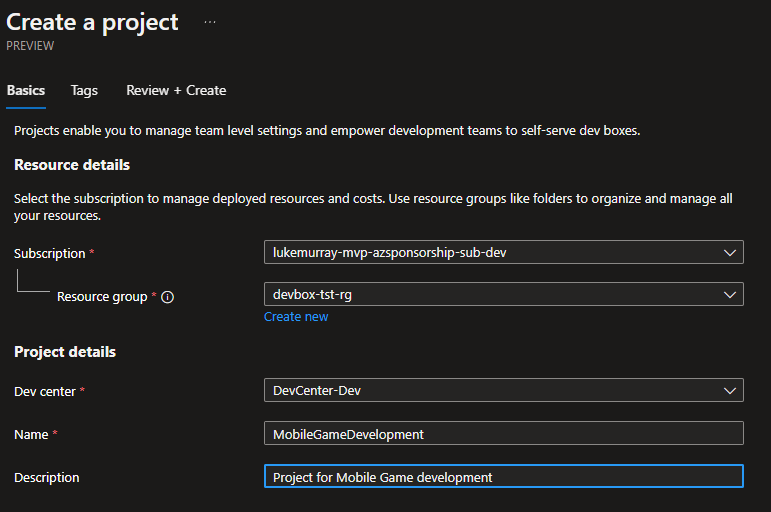
- You can use Tags to add additional information on billing for the project or the project administrator's contact details - but we will select Review + create and Create
- Once the Project has been created, we need to assign assignees to use the project. I will give a DevBox User role to the project so I can make a Dev Box.
- Within the Project, click on the Access Control (IAM)
- Click + Add
- Select Add Role assignment
- Select DevCenter Dev Box User
- Click Next
- Make sure User, Group, or Service principal is selected and click + Select Members.
- Ideally, you would assign the Dev Box User role to an Azure AD group - but in my demo, I will select an individual user.
- Click Next
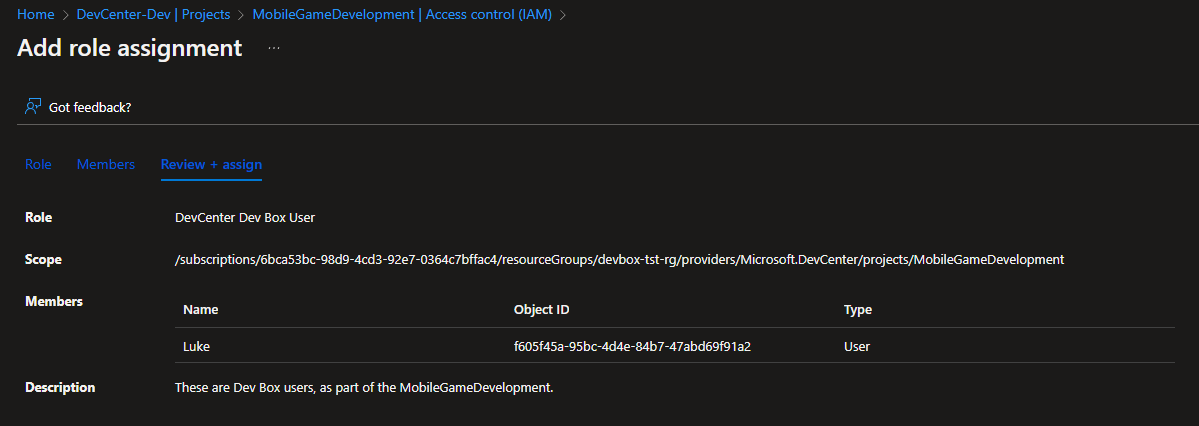
- Once you have confirmed your users have been assigned, click on Review + assign to give your users or groups to the project, allowing them to create Dev Boxes.
Note: I have found it can take 5-10 minutes for access to be granted to the users before they can create Dev Boxes.
Create Dev Box Pool
Now that we have our project and dev box definitions - it's time to create our Dev Box Pool - which is what the Dev Boxes will be made from.
- Log in to the Microsoft Azure Portal
- Navigate to your Dev center
- Navigate to Projects
- Navigate to the project you created earlier (i.e. for me, its MobileGameDevelopment)
- Click on the Dev box pools
- Click on + Create
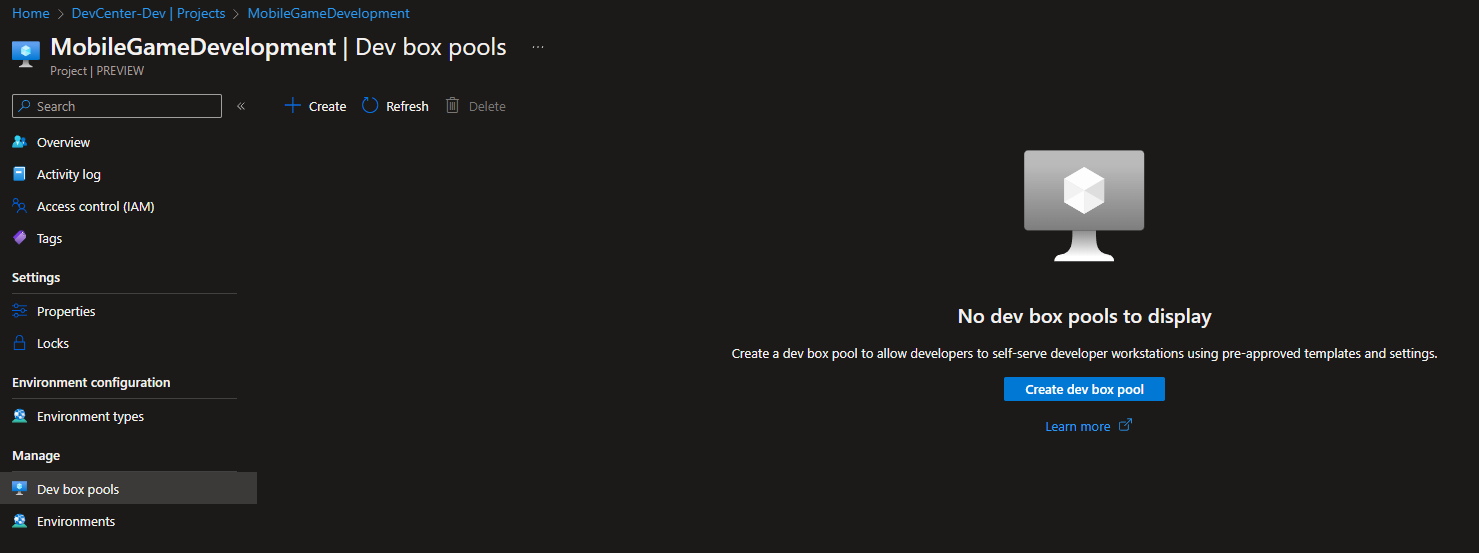
- Type in a name - i.e. MobleDevelopmentWin11
- Select your Network connection
- Select your definition
- Select your Creator privileges (i.e. select whether your user will be a standard user or have Local administrator rights on their devbox)
- Configure Auto-stop or skip and confirm licensing.
- Click Create
After 1-2 minutes, your Dev Box pool has been created.
Create & Connect
Now that your Dev Center, Network, and Dev Box project has been stood up - it's time to Create and connect to your new Dev box! Microsoft Dev Box - offers a few ways to connect to the DevBox; we will go through a few options now.
Create Dev Box
Now it's time to create our Dev Box! To do this, we need to go to the Dev box Developer portal (as a Dev Center Devbox, User)
- Navigate to the Microsoft Dev Box portal
- Click on + New Dev Box
- Enter your name of the DevBox (i.e. what you will name the Virtual Machine and see in the portal - make sure this is meaningful - as you may have more than one Dev Box)
- Select your assigned Dev Box Pool, and select your Dev Box definition
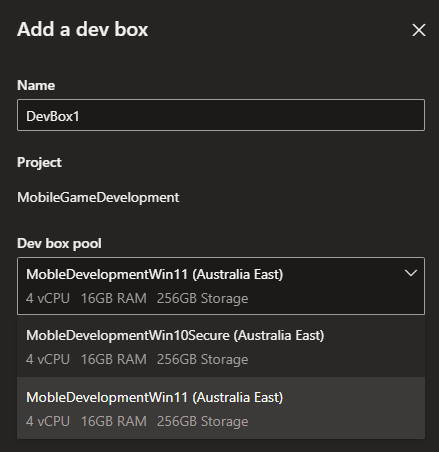
- Click Create
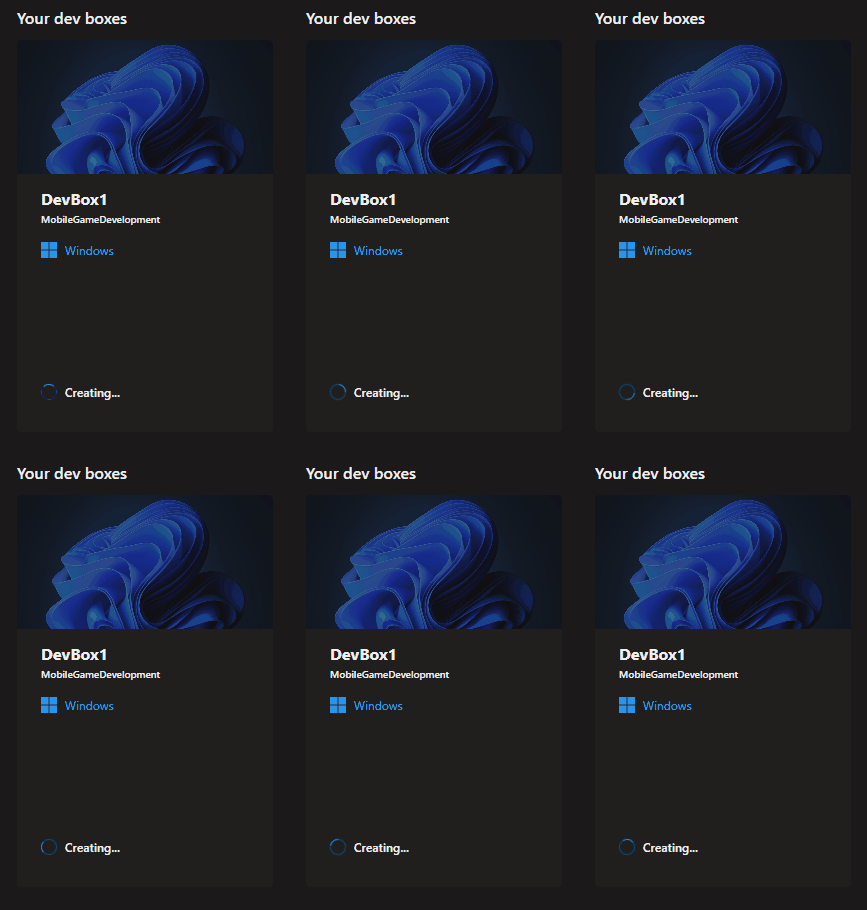
Note: Dev box creation can take 30-90 minutes. Dev boxes will automatically start upon creation.
Connect Dev Box using Microsoft Dev Box Portal
- Navigate to the Microsoft Dev Box portal
- Click on the Dev Box you want to connect to.
- Select Open in the browser
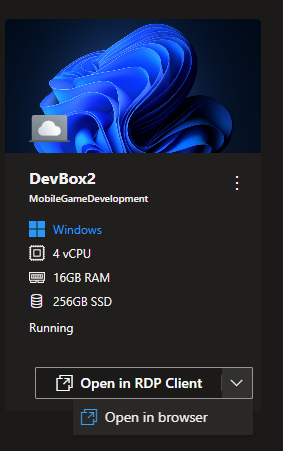
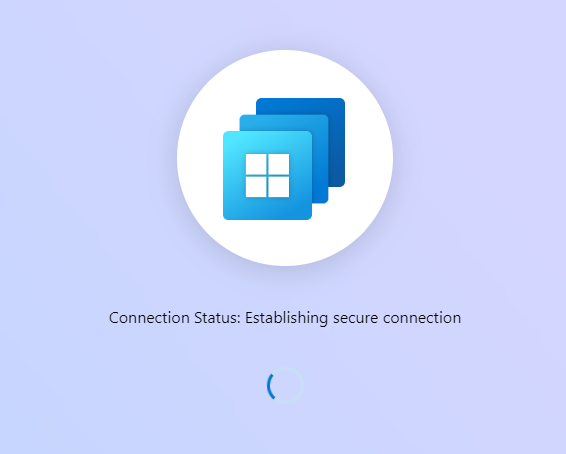
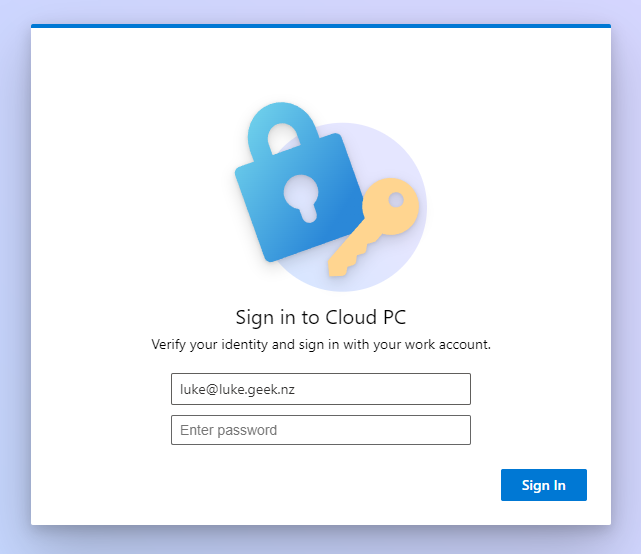
- If prompted, then log in with your credentials.
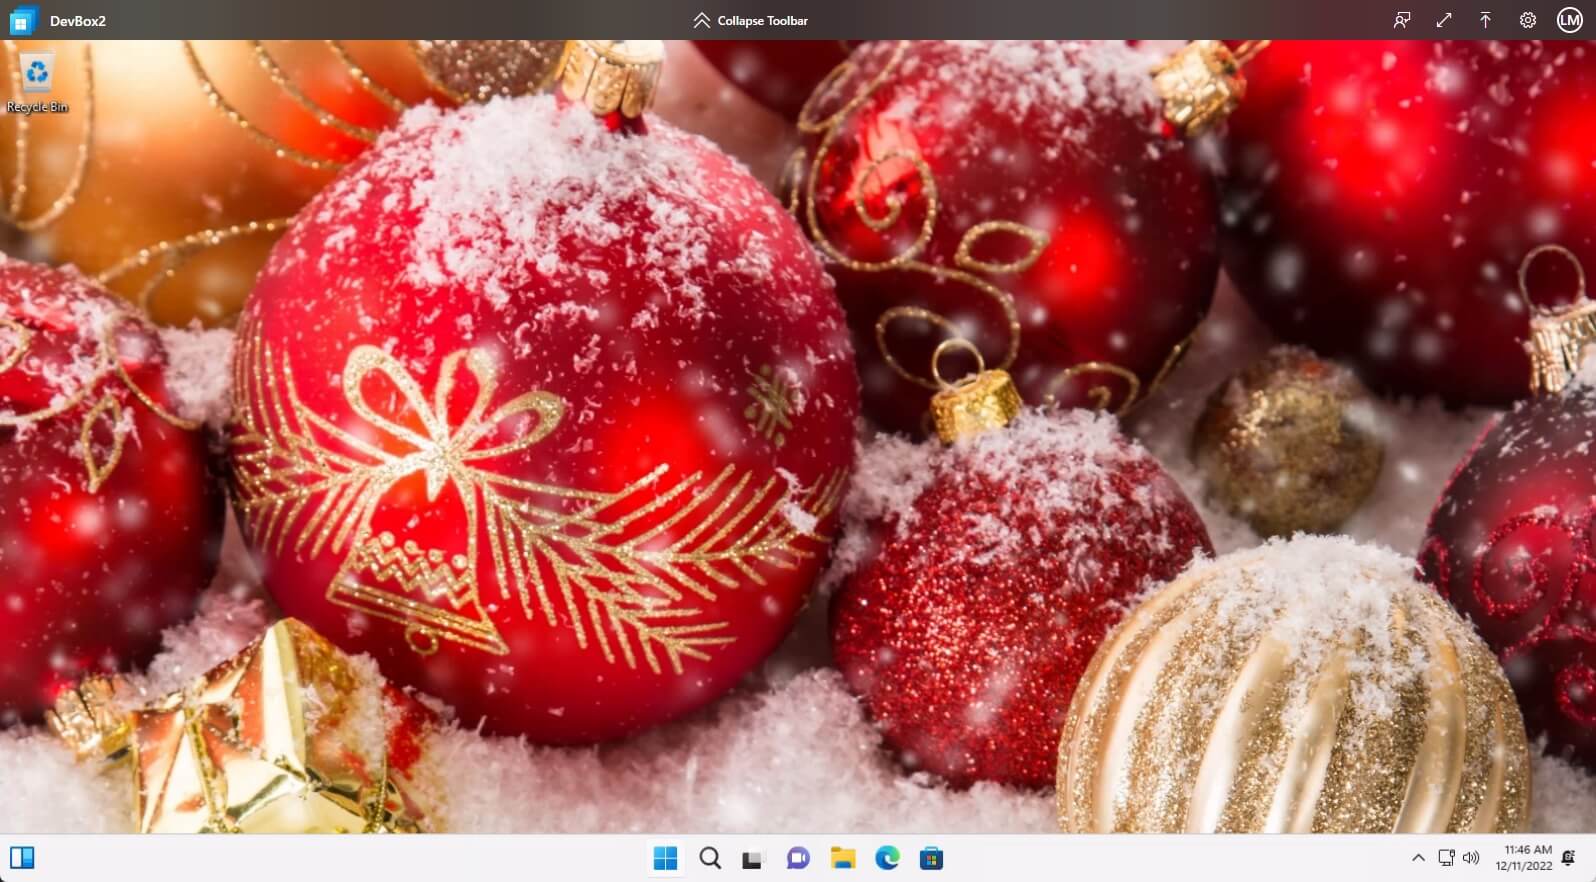
- You will now be connected to your new Azure Dev Box!
Connect Dev Box using Remote Desktop Application
Like Azure Virtual Desktop, you can connect to your Dev Box using the Remote Desktop client.
- Download and install the Remote Desktop Client
- Subscribe to the Azure workspace
- As long as the Dev Box has been created, you can see your Dev Box and connect to it directly.
Configuration
We can configure a few extra things for the Azure DevBox environment.
Auto-Stop
As the Dev Box is Pay As You Go, you can ensure that a Dev Box is shut down after hours.
- Log in to the Microsoft Azure Portal
- Navigate to your Dev center
- Navigate to Projects
- Navigate to the project you created earlier (i.e. for me, its MobileGameDevelopment)
- Click on the Dev box pools
- Click on Edit on your pools
- Click Enable Auto-stop
- Select Yes
- Configure your Stop Time and time zone
You may also have multiple pools - selected with the exact Dev box image definition - if your project runs across various timezones, so you can schedule a 7 PM Shutdown in New Zealand and a 7 PM shutdown for those developers in the United States.
Delete or Stop
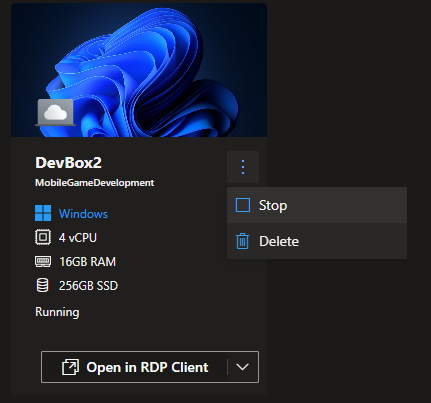
Not as much as a Configuration item, but more of a quick - howto! As a Dev Box user, you can shut down your Dev Box or delete it from the Microsoft Dev Box portal.
Additional Resources
As Microsoft Dev Box is still in Public Preview - at the time of writing - the experience may change before its GA (Generally available).
Documentation
Additional reading on Microsoft Dev Box can be found below:
- Microsoft Dev Box
- Microsoft Dev Box pricing
- Build developer environments fast with Microsoft Dev Box - Youtube
Azure Bicep
Below are some Azure Bicep samples for Azure Dev Box.
Dev Center
param name string
param location string
param tags object

resource name_resource 'Microsoft.DevCenter/devcenters@2022-08-01-preview' = {
  name: name
  location: location
  tags: tags
  identity: {
    type: 'none'
  }
}
DevBox Host Pool
param projects_MobileGameDevelopment_name string = 'MobileGameDevelopment'

resource projects_MobileGameDevelopment_name_MobleDevelopmentWin10Secure 'Microsoft.DevCenter/projects/pools@2022-09-01-preview' = {
  name: '${projects_MobileGameDevelopment_name}/MobleDevelopmentWin10Secure'
  location: 'australiaeast'
  properties: {
    devBoxDefinitionName: 'Win10-VS'
    networkConnectionName: 'ProductionVNETAADJConnection'
    licenseType: 'Windows_Client'
    localAdministrator: 'Disabled'
  }
}

resource projects_MobileGameDevelopment_name_MobleDevelopmentWin10Secure_default 'Microsoft.DevCenter/projects/pools/schedules@2022-09-01-preview' = {
  parent: projects_MobileGameDevelopment_name_MobleDevelopmentWin10Secure
  name: 'default'
  properties: {
    type: 'StopDevBox'
    frequency: 'Daily'
    time: '11:15'
    timeZone: 'Pacific/Auckland'
    state: 'Enabled'
  }
}
