Create a Public Holidays API using Microsoft Azure
Using a previous blog post I did on using a third-party API (Application Programming Interface) to start a Virtual Machine when it wasn't a Public Holiday, I had a thought on what could be an option if I wanted an API only accessible on an internal network or if I wanted to include custom Holidays such as Star Wars day or company holidays? Could I create and query my API using Microsoft Azure services? You can!
Overview
Today we will create a base Public Holidays API using several Microsoft Azure serverless services, such as Azure Function, Azure Storage Account and API Management.
Note: As this is a demonstration, I will be using a Consumption-based Azure Function and Azure storage account, and although it is a good place to start - depending on your requirements, you may be better off with Azure Function Premium Plan to avoid cold-start times, and if you need a high amount of requests and writes (GET and POSTs) and resiliency, then replace the Storage account table with a Cosmos DB.
The solution will be made up of the following:
| Azure Service | Name | Plan | Note |
|---|---|---|---|
| Application Insights | ai-nzPublicHolidays-prd-ae | ||
| Azure API Management | apims-publicholidays-prd-ae | Developer (No SLA) | |
| Azure Function | func-nzpublicHolidays-prd-ae | Function App - Consumption | |
| Azure Storage Account | funcnzpublicholidaystgac | StorageV2 (general purpose v2) - Locally-redundant storage (LRS) | Contains 'PublicHolidays' table |
| Azure Storage Account | rgnzpublicholidayspb4ed | Storage (general purpose v1) - Locally-redundant storage (LRS) | Contains Azure Functions App Files |
| Resource Group | rg-publicholidays-prd-ae | Resource Group - containing above resources. |

Pre-requisites
- An Azure subscription (with at least Contributor rights to a Resource Group).
- Azure PowerShell modules (Az.Accounts, Az.Storage & AzTables)
Note: AzTables is not part of the standard Az PowerShell module set and is a separate module you will need to install (Install-Module AzTables).
We will use a mix of the Azure Portal and PowerShell to deploy this solution from start to finish; you can find the source data and code directly in the GitHub repository here: lukemurraynz/PublicHoliday-API for reference (feel free to fork, raise pull requests etc.). In this guide, I will try not to assume preexisting knowledge (other than general Azure and PowerShell knowledge).
Deployment
The deployment steps will be separated into different sections to help simplify implementation.
First, make sure you adjust the names of your resources and locations to suit your naming conventions and regional locations (such as Australia East or West Europe). Your deployments may fail if a name is already in use. See "Microsoft Azure Naming Conventions" for more about Naming conventions.
Create Resource Group
The Resource Group will contain all resources related to the API that we will deploy today.
However, I recommend you consider what resources might be shared outside of this API - such as API Management, and put them in a separate Shared or Common Resource Group, to keep the li.e.ecycle of your resources together (ie API resources all in one place, so if it gets decommissioned, it is as easy a deleting the Resource Group).
- Log in to the Microsoft Azure Portal
- Click Click on the burger and click Resource groups
- Click + Create
- Select your Subscription
- Type in a name for your Resource Group (like 'rg-publicholidays-prd-ae')
- Select your Region and click Next: Tags
- Enter in applicable tags (i.e. Application: Public Holidays API)
- Click Next: Review + create
- Click Create

If you prefer PowerShell, you can deploy a new Resource Group with the below:
New-AzResourceGroup -Name 'rg-publicholidays-prd-ae' -Location 'Australia East' -Tag @{Application="Public Holidays API"}
Create Storage Account
Now that the Resource Group has been created, it's time to import our Storage Account - which will hold our Table of data around Public Holidays.
- Log in to the Microsoft Azure Portal
- Click Click on the burger and click Storage Accounts
- Click + Create
- Select the Subscription and Resource Group you created earlier
- Enter in a Name for your Storage Account (like 'funcnzpublicholidaystgac')
- Select your Region (i.e. Australia East)
- For Performance, I am going to select: Standard
- For Redundancy, as this is a demo, I will select Locally-redundant storage (LRS). However, if you plan on running this in production, you may consider ZRS for zone redundancy.
- If you plan on locking down the Storage Account to your Virtual Network or specific IP addresses, continue to the Networking Tab; we can accept the defaults and click: Review.
- Click Create
If you prefer PowerShell, you can deploy a new Storage account with the below:
New-AzStorageAccount -ResourceGroupName 'rg-publicholidays-prd-ae' -Name 'funcnzpublicholidaystgac' -Location 'Australia East' -SkuName 'Standard_LRS' -Kind StorageV2
Import Public Holiday data
Create Azure Storage Account Table
Now that we have the Storage account that will hold our Public Holiday time to import the data.
Most of this task will be done with PowerShell, but first, we need to create the Table that will hold our Public Holidays.
- Log in to the Microsoft Azure Portal
- Click Click on the burger and click Storage Accounts
- Navigate to your created Storage account
- In the Navigation blade, click Tables
- Click + Table
- For a Table Name, I will go with PublicHolidays
- Click Ok

You can use PowerShell to create the Table below:
$storageAccount = Get-AzStorageAccount -ResourceGroupName 'rg-publicholidays-prd-ae' -Name 'funcnzpublicholidaystgac'
$storageContext = $storageAccount.Context
New-AzStorageTable -Name 'PublicHolidays' -Context $storageContext
Import Public Holiday Data into Table
Now that we have the Azure storage account and PublicHolidays table, it's time to import the data.
If you want to do this manually, the Azure Table will have the following columns:
| Date | Country | Type | Name | Day | Year | Comments |
We could enter the data manually, but I will leverage the Nager API to download and parse a CSV file for a few countries. You can find the source data and code directly in the GitHub repository here: lukemurraynz/PublicHoliday-API for reference.
To do this, we will need PowerShell, so assuming you have logged into PowerShell and set the context to your Azure subscription, let us continue.
I have created a CSV (Comma-separated values) file with a list of countries (i.e. US, NZ, AU) called 'SourceTimeDate.CSV', but you can adjust this to suit your requirements and place it in a folder on my C:\ drive called: Temp\API.
Open PowerShell and run the following:
$Folder = 'C:\Temp\API\'
$Csv = Import-csv "$Folder\DateTimeSource\SourceTimeDate.csv"
$CurrentYear = (Get-Date).Year

   ForEach ($Country in $Csv)
  {
$CountryCode = $Country.Country
Invoke-WebRequest -Uri "https://date.nager.at/PublicHoliday/Country/$CountryCode/$CurrentYear/CSV" -OutFile "$FolderAPI\DateTimeSource\Country$CountryCode$CurrentYear.csv"
}
These cmdlets will download a bunch of CSV files into the API folder, with the Public Holidays for each Country for this year, and then you can adjust the $CurrentYear variable for future years (i.e. 2025).
Once you have all the CSV files for your Public Holidays and before we import the data into the Azure storage table, now is the time to create a new Custom Holidays CSV; you can easily use an existing one to create a new CSV containing your company's public holidays or other days that may be missing from the standard list, make sure it matches the correct format and save it into the same folder.

Now that you have all your CSV files containing the Public Holidays in your Country or countries, it's time to import them into the Azure Table. First, we import the data using a PowerShell session logged into Azure.
# Imports Public Holiday into Azure Storage table
# Requires AzTable Module (not part of the normal Az cmdlets)
Import-Module AzTable

#Imports data from CSV files into $GLobalHolidays variable
$Folder = 'C:\Temp\API\'

$GlobalHolidays = Get-ChildItem "$Folder\DateTimeSource\*.csv" | Foreach-Object {
  $basename = $_.BaseName
  import-csv $_
}

#Connect-AzAccount
#Connects to Azure Storage Account
$storageAccountName = 'funcnzpublicholidaystgac'
$resourceGroupName = 'rg-publicHolidays-prd-ae'
$tableName = 'PublicHolidays'
$storageAccount = Get-AzStorageAccount -ResourceGroupName $resourceGroupName -Name $storageAccountName
$storageContext = $storageAccount.Context
$cloudTable = (Get-AzStorageTable -Name $tableName -Context $storageContext).CloudTable


#Imports CSV data into Azure Table
$counter = 0
ForEach ($Holiday in $GlobalHolidays)

{
  $Date = [DateTime]($Holiday.Date)
  $Dayofweek = $Date.DayOfWeek | Out-String
  $Year = $Date.Year
  $HolidayDate = Get-Date $Date -format "dd-MM-yyyy"

 Add-AzTableRow `
  -table $cloudTable `
  -partitionKey '1' `
  -rowKey ((++$counter)) -property @{"Date"=$HolidayDate;"Country"=$Holiday.CountryCode;"Type"=$Holiday.Type;"Name"=$Holiday.LocalName;"Day"=$Dayofweek;"Year"=$Year;"Comments"=$Holiday.Counties}

}


#Validate the data in the Storage table
Get-AzTableRow -table $cloudTable


Now the Public Holidays are imported into the Azure storage account table with additional information, such as the Day it falls, and the Date format has been changed to suit the NZ format (DD-MM-YYYY).
If we log in to the Azure Portal, navigate to the Storage account and under Storage Browser, we can now see our Table is full of Public Holidays.

Create API
That we have our Table with Public Holiday data, it's time to create our Azure Function to act as the API that will talk to the azure storage account!
Create Azure Function
- Log in to the Microsoft Azure Portal
- Click Click on the burger and click Resource groups
- Navigate to your resource group and click + Create
- Search for: Function
- Select Function App, and click Create
- Enter your Function App Name (i.e. 'func-nzpublicHolidays-prd-ae')
- For Runtime Stack, select PowerShell Core
- Select the latest version (at this time, it's 7.2)
- Select your Region
- Select Windows
- Set your Plan (in my example, its Consumption (Serverless))
- Click Review + Create
- Click Create

Configure Environment Variables
Now that the Function App has been created before creating the GetPublicHoliday function, we need to add a few environment variables that the Function will use; these variables will contain the ResourceGroup and Storage account name.
- Navigate to your Azure Function
- Click Configuration
- Click + New application setting
- Under the name, add: PublicHolidayRESOURCEGROUPNAME
- For value, type in the name of your resource group.
- Add a second application setting named: PublicHolidaySTORAGEACCNAME
- For value, type in the name of your storage account that contains the Public Holiday table.
- Click Save (to save the variables).

Configure Managed Identity
Next, we need to give the Function App the ability to read the Azure storage account. To do this, we need to configure a System assigned managed identity.
- Navigate to your Azure Function
- Click Identity
- Under the System assigned heading, toggle the status to On
- Click Save
- Select Yes, to enable the System assigned managed identity
- Under Permissions, click Azure role assignments
- Click + Add role assignment
- For Scope, select Storage
- Select your Subscription and storage account containing your Public Holiday data
- For role, select Contributor (Storage Table Data Reader is not enough).
- Click Save
Configure Requirements
The Azure function app will rely on a few PowerShell Modules; for the FunctionApp to load them, we need to add them to the requirements.psd1 file.
-
Navigate to your Azure Function
-
Click App files
-
Change the dropdown to requirements.psd1
-
In the hash array, comment out the #Az module line (as this will load the entire Az Module set, which will cause an increased delay in the startup as those extra modules aren't needed), and add the following:
# This file enables modules to be automatically managed by the Functions service.# See https://aka.ms/functionsmanageddependency for additional information.#@{# For latest supported version, go to 'https://www.powershellgallery.com/packages/Az'.# To use the Az module in your function app, please uncomment the line below.#'Az' = '8.*''Az.Accounts' = '2.*''Az.Storage' = '4.*''Az.Resources' = '2.*''AzTable' = '2.*'} -
Click Save
Create Function PublicHolidays
Now that the Function App has been configured, it is time to create our Function.
- Navigate to your Azure Function
- Click Functions
- Click + Create
- Change Development environment to Develop in Portal
- Select Template, an HTTP trigger
- For the New Function name, I will go with GetPublicHoliday
- Change Authorization level to Anonymous (if you aren't going to implement API Management, select Function and look at whitelisting your IP only, we will be locking it down to API Management later).
- Click Create

-
Click Code + Test
-
Copy the following Code into the run.ps1 file, this code is core to the Function that will read the HTTP request and bring back a PowerShell object with the Public Holiday information as part of a GET request:
<# The code above does the following, explained in English:1. Read the query parameters from the request.2. Read the body of the request.3. Write to the Azure Functions log stream.4. Interact with query parameters or the body of the request.5. Associate values to output bindings by calling 'Push-OutputBinding'.https://luke.geek.nz/ #>using namespace System.Net# Input bindings are passed in via param block.param([Parameter(Mandatory = $true)]$Request, [Parameter(Mandatory = $true)]$TriggerMetadata)# Write to the Azure Functions log stream.Write-Host 'GetPublicHoliday function processed a request.'# Interact with query parameters or the body of the request.$date = $Request.Query.Date$country = $Request.Query.CountryCode$resourceGroupName = $env:PublicHolidayRESOURCEGROUPNAME$storageAccountName = $env:PublicHolidaySTORAGEACCNAME$tableName = 'PublicHolidays'$ClientIP = $Request.Headers."x-forwarded-for".Split(":")[0]try {$storageAccount = Get-AzStorageAccount -ResourceGroupName $resourceGroupName -Name $storageAccountName$storageContext = $storageAccount.Context$cloudTable = (Get-AzStorageTable -Name $tableName -Context $storageContext).CloudTableImport-Module AzTable$Tables = Get-AzTableRow -table $cloudTableForEach ($table in $Tables){[string]$Filter1 = [Microsoft.Azure.Cosmos.Table.TableQuery]::GenerateFilterCondition("Country", [Microsoft.Azure.Cosmos.Table.QueryComparisons]::Equal, $country)[string]$Filter2 = [Microsoft.Azure.Cosmos.Table.TableQuery]::GenerateFilterCondition("Date", [Microsoft.Azure.Cosmos.Table.QueryComparisons]::Equal, $date)[string]$finalFilter = [Microsoft.Azure.Cosmos.Table.TableQuery]::CombineFilters($Filter1, "and", $Filter2)$object = Get-AzTableRow -table $cloudTable -CustomFilter $finalFilter$body = @()$System = New-Object -TypeName PSObjectAdd-Member -InputObject $System -MemberType NoteProperty -Name CountryCode -Value $object.CountryAdd-Member -InputObject $System -MemberType NoteProperty -Name HolidayDate -Value $object.DateAdd-Member -InputObject $System -MemberType NoteProperty -Name HolidayYear -Value $object.YearAdd-Member -InputObject $System -MemberType NoteProperty -Name HolidayName -Value $object.NameAdd-Member -InputObject $System -MemberType NoteProperty -Name HolidayType -Value $object.TypeAdd-Member -InputObject $System -MemberType NoteProperty -Name Comments -Value $object.CommentsAdd-Member -InputObject $System -MemberType NoteProperty -Name RequestedIP -Value $ClientIP$body += $System$System = New-Object -TypeName PSObject$status = [Net.HttpStatusCode]::OK}}catch {$body = "Failure connecting to table for state data, $_"$status = [Net.HttpStatusCode]::BadRequest}#$body = $TriggerMetadata# Associate values to output bindings by calling Push-OutputBinding'Push-OutputBinding -Name Response -Value ([HttpResponseContext]@{StatusCode = $statusBody = $body}) -
Click Save
Test Function - PublicHolidays
Before proceeding with the next step, it's time to test the function.
- Navigate to your Azure Function
- Click Functions
- Click GetPublicHoliday
- Click Code + Test
- Click Test/Run
- Change HTTP method to Get
- Under Query, add Country value and Date value.
Note: Make sure the date and country formats match what is in the Azure storage account.
You can also Invoke the function app directly with PowerShell, with the Date and Country as Parameters at the end:
Invoke-RestMethod -URI "https://func-nzpublicholidays-prd-ae.azurewebsites.net/api/GetPublicHoliday?Date=25-12-2023&CountryCode=NZ"

Congratulations! You have now created a Public Holiday API that you can call for automation! You can lock down the Function App to only certain IPs or proceed to configure Azure API Management.
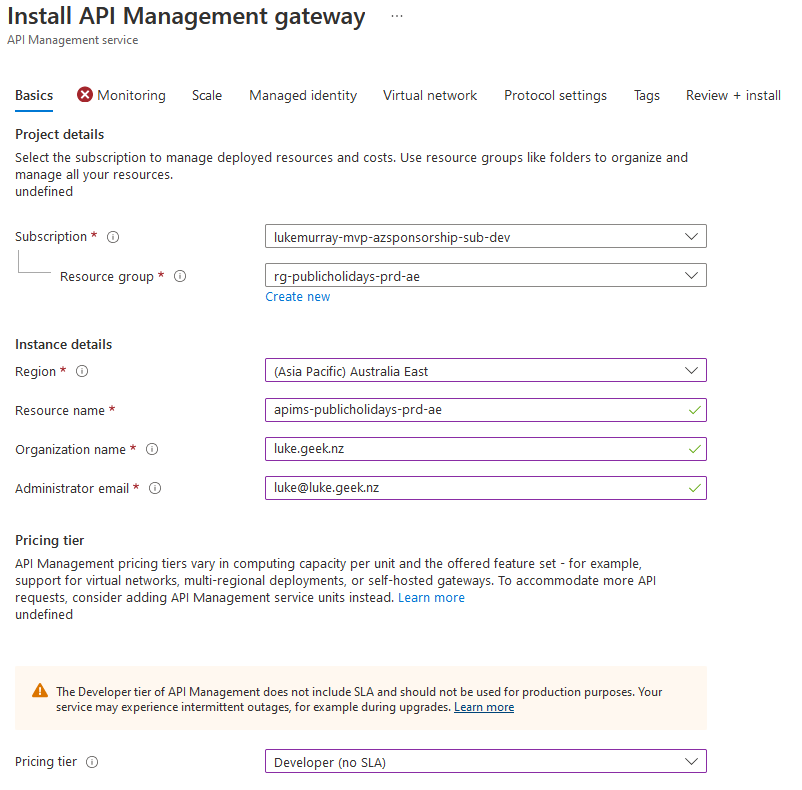
Configure Azure API Management
Now that the Function App responds to requests, we can expose the HTTP endpoint through Azure API Management. Azure API Management will give greater flexibility and security over API endpoints, particularly when dealing with more than one API. Azure API Management also offers inbuilt shared cache functionality and integration into Azure Cache for Redis.
- Log in to the Microsoft Azure Portal
- Navigate to your Azure Function
- On the Navigation blade, select API Management
- Click Create New
- Select your subscription, Region, and organisation name.
- Select a Pricing Tier
- Click Review + Create
- Click Create
-
Wait for 10 minutes to half an hour for provisioning to take place, and Azure API Management will be in an activating state.
-
Once API Management has been provisioned, you can copy the Virtual IP (VIP) addresses of API Management and restrict your function app to only allow inbound access from that IP.
-
Once you have done that, add the GetPublicHoliday function app into Azure API Management, add the paths to add a version, and then, using the subscription key, you run the following command to pull data.
Invoke-RestMethod -uri "https://apims-nzpublicholidays-prd-ae.azure-api.net/v1/GetPublicHoliday?Date=4/05/2022&CountryCode=NZ&Ocp-Apim-Subscription-Key=$KEY"