Connect to Azure SQL Database in a Jupyter Notebook using Python
Jupyter Notebooks, commonly used by Data Scientists and Students, allow you to run code, such as Python and PowerShell, inside a Notebook format and display the output inside the notebook; this is useful for teaching a subject or displaying up-to-date information.
I am not a python or Jupyter expert, so this article will be brief on how I was able to connect to an Azure SQL Database using Microsoft Entra ID authentication and run a query.
To run a Jupyter Notebook, you can install Anaconda and then use that to download Juypter to run the notebooks from a locally (or server) hosted web-based interface.
However, today I will be using Visual Studio Code with the Jupyter extension on a windows endpoint.
Make sure you install:
- Python
- pyodbc library
- Microsoft ODBC Driver for SQL Server (has to be v17 or newer to support Microsoft Entra ID authentication).
- Visual Studio Code + Jupyter extension
Note: Jupyter notebook extensions end in '*.ipynb'.
Once all the prerequisites are installed, it's time to create the Notebook.
-
Open Visual Studio Code
-
Click File, New File
-
Select Jupyter Notebook
-
Press + Code (to add a Code snippet)
-
First, we need to import the pyodbc library:
#Libraries
import pyodbc
Then we need to add the snippet to connect to the SQL database (this can be in a separate Codeblock or the same code block, as long as the import is run before the SQL connection is made - make sure you update the server and database variables, to match your environment!):
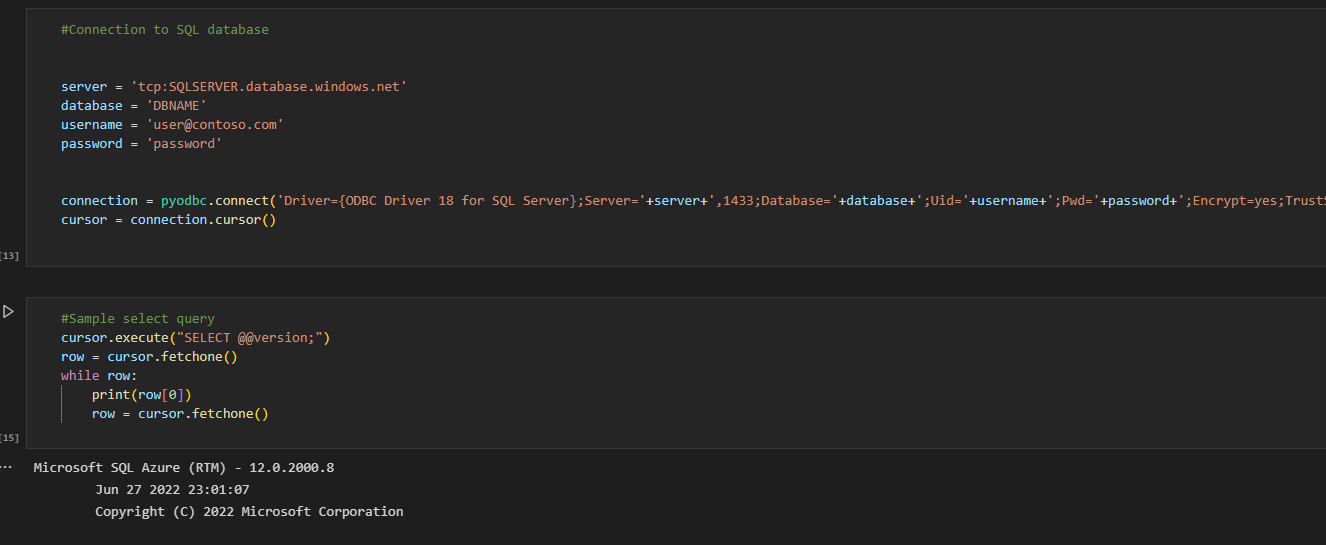
#Connection to SQL database


server = 'tcp:SQLSERVER.database.windows.net'
database = 'DBNAME'
username = '[email protected]'
password = 'password'


connection = pyodbc.connect('Driver={ODBC Driver 18 for SQL Server};Server='+server+',1433;Database='+database+';Uid='+username+';Pwd='+password+';Encrypt=yes;TrustServerCertificate=no;Connection Timeout=180;Authentication=ActiveDirectoryInteractive')
cursor = connection.cursor()
The 'Authentication=ActiveDirectoryInteractive' parameter as part of the Connection string will prompt an interactive Microsoft Entra ID prompt to display and ask for credentials to be logged in; this includes MFA support. Using this method, the username and password variables are simply placeholders.
If you want to hardcode credentials into the Notebook (not recommended), you can remove the 'Authentication=ActiveDirectoryInteractive' section and enter the credentials into the username and password field.
Now that we have connected to the database, let us run a test query to obtain the SQL version:
#Sample select query
cursor.execute("SELECT @@version;")
row = cursor.fetchone()
while row:
print(row[0])
row = cursor.fetchone()
Congratulations, you have successfully connected to an Azure SQL database and ran a query against the database.
If the connection to SQL appears to be stalling, check to make sure the Azure authentication window, isn't hidden behind another window.
A GIST has been created, with the code as well, in case issues are copied from the website.