Native RDP Client & Azure Bastion
In early February 2022, Azure Bastion Preview support for the native Windows SSH and RDP client came out, and this meant that we no longer have to rely on the Azure Portal and the limitations of a web browser - the support also includes File transfer through the clipboard by copying and pasted into the RDP session!
Azure Bastion is a fully managed service that provides more secure and seamless Remote Desktop Protocol (RDP) and Secure Shell Protocol (SSH) access to virtual machines (VMs) without any exposure through public IP addresses. Provision the service directly in your local or peered virtual network to get support for all the VMs within it.
Let’s test the native RDP client through a secure connection using Azure Bastion!
Prerequisites
- This configuration requires the Standard tier for Azure Bastion.
- A Virtual Machine(s) to connect
- Latest Azure CLI
- Reader role on the Virtual Machine
- Read role on the Network Interface Card of the Virtual Machine.
- Reader role on the Azure Bastion resource
- Virtual Machine Administrator (or User) login role using Microsoft Entra IDauthentication.
Create Azure Bastion
If you have a Virtual Machine but haven't set up Azure Bastion, run through the below to set it up:
- Log in to the Azure Portal
- Click on Create a resource
- Search for: Bastion

- Click Create
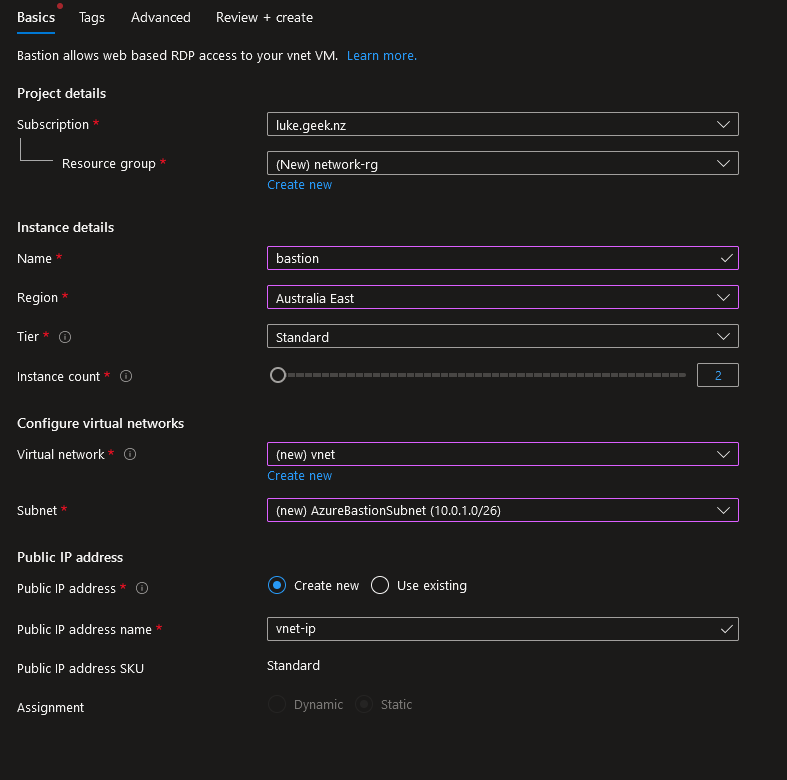
- This is a Networking resource to place it in the same Resource Group as my Virtual Network.
- Please type in a Name for the Bastion instance; I will call mine: Bastion
- Select the Region that matches the Virtual Network region
- Select Standard Tier
- Select the Virtual Network
- It now warns you about creating an: AzureBastionSubnet with a prefix of at least /27, so we need to create one; click on Manage Subnet Configuration.
- Click + Subnet
- For the Name type in: AzureBastionSubnet
- For the Subnet address range: 10.0.1.0/27, If you get an error that indicates the address is overlapping with another subnet, it may be because the Address space is only a /24; click Cancel and click on Address Space in the Virtual Network and change the /24 to/16 to increase the address range.
- Click Save to create the subnet

- Up the Top, click Create a Bastion. Your subnet should be selected automatically to go back to the Bastion setup.
- You do need a Public IP for Bastion, so confirm the name is appropriate, then click Next: Tags.
- Add in appropriate tags, then click Next: Advanced
- Check the box next to Native client support (Preview)

- Click Next: Review + Create
- Click on Create to create your Bastion instance!
Note: Bastion may take 10-20 minutes to provision.
Check Bastion SKU
If you already have an Azure Bastion instance, let's check the SKU and, if needed, change it to Standard. Just a note:
Downgrading from a Standard SKU to a Basic SKU is not supported. To downgrade, you must delete and recreate Azure Bastion.
- Log in to the Azure Portal
- Navigate to your Bastion resource
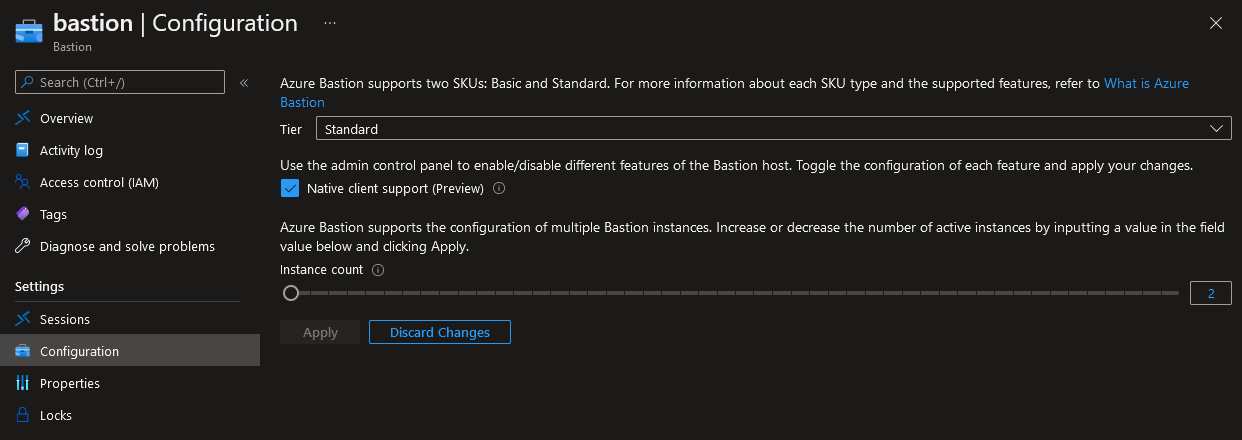
- Click on: Configuration
- Change Tier to Standard
- Check: Native client support (Preview)
- Click Apply
Connect to VM using Native RDP Support
-
Open command prompt or Terminal
-
Type: az login
-
Login to your Azure subscription
-
We need the resource ID of the VM we need to connect to, type in: az VM show --resource-group 'appserver-rg' --name 'APP-P01' --show-details
-
Change the resource group and VM name above to match your VM
-
Copy the id of the Virtual Machine you want to connect to
-
Because I am running the Azure CLI from a PowerShell terminal, I am going to use the following variables:
$BastionName = 'Bastion'$BastionRG = 'network-rg'$VMResourceID= '/subscriptions/000000-0000-0000-0000000/resourceGroups/appserver-rg/providers/Microsoft.Compute/virtualMachines/APP-P01'az network bastion rdp --name $BastionName --resource-group $BastionRG --target-resource-id $VMResourceID -
Run the command, your Remote Desktop window should open up, and the tunnel has been established; if you close the Azure CLI window, your RDP session will be dropped!
-

As you could most likely tell, there are no options to enable drive passthrough, etc. You would usually find when connecting to Remote Desktop, but the copying of files/text, etc., does work!