Setup Azure Cloud Shell
The Azure Cloud Shell allows connectivity to Microsoft Azure using an authenticated, browser-based shell experience that’s hosted in the cloud and accessible from virtually anywhere as long as you have access to your favourite browser!
Azure Cloud Shell is assigned per unique user account and automatically authenticated with each session.
Get a modern command-line experience from multiple access points, including the Azure portal, shell.azure.com, Azure mobile app, Azure docs_(e.g.Azure CLI,_ Azure PowerShell), and VS Code Azure Account extension.
Both Bash and PowerShell experiences are available.
Microsoft routinely maintains and updates Cloud Shell, which comes equipped with commonly used CLI tools including Linux shell interpreters, PowerShell modules, Azure tools, text editors, source control, build tools, container tools, database tools, and more. Cloud Shell also includes language support for several popular programming languages such as Node.js, .NET, and Python.
Along with native tools such as Azure PowerShell, it also contains Terraform, allowing you to implement and test functionality such as Infrastructure as Code, without needing to touch your local machine and is always up-to-date, a full list of tools can be found 'here'.
Just some noticeable things to be aware of regarding the Azure Cloud Shell:
- Cloud Shell runs on a temporary host provided on a per-session, per-user basis
- Cloud Shell times out after 20 minutes without interactive activity
- Cloud Shell requires an Azure file share to be mounted
- Cloud Shell uses the same Azure file share for both Bash and PowerShell
- Cloud Shell is assigned one machine per user account
- Cloud Shell persists $HOME using a 5-GB image held in your file share
- Permissions are set as a regular Linux user in Bash
The Azure Cloud Shell is very easy to set up and get going, but in this article, I will show you the additional configuration options you have available, such as selecting your own storage account, region and resource group to conform to any naming policies and preferences you may have.
By default, CloudShell creates a new Resource Group, Storage account, Fileshare in the Southeast Asia region.
To set up Azure Cloud Shell
- Navigate to the Azure Portal
- Click on the little Terminal/PowerShell icon in the upper navigation bar

- You should get notified, "You have no storage mounted" click on Show advanced settings
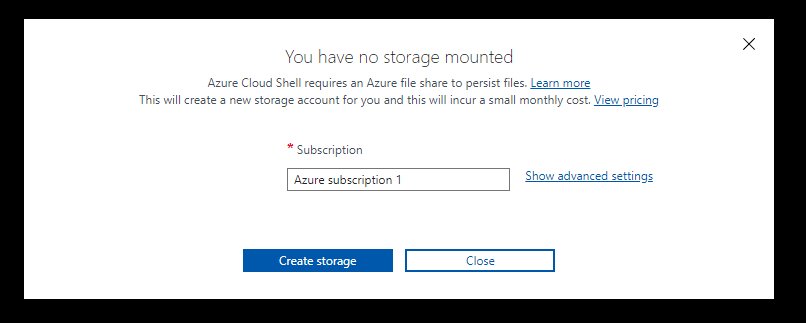
- Here you can easily create your CloudShell storage account with your own preferences:
- The subscription
- Region
- Resource Group (new or existing)
- Storage account (new or existing)
- Fileshare (new or existing)
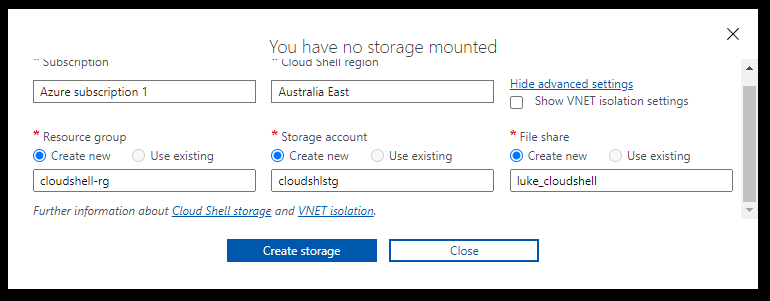
- Click on Create Storage when you are ready to start the verification (which happens after you click Create storage, don't worry as long as you have the window open you can make any additional changes) and deployment.
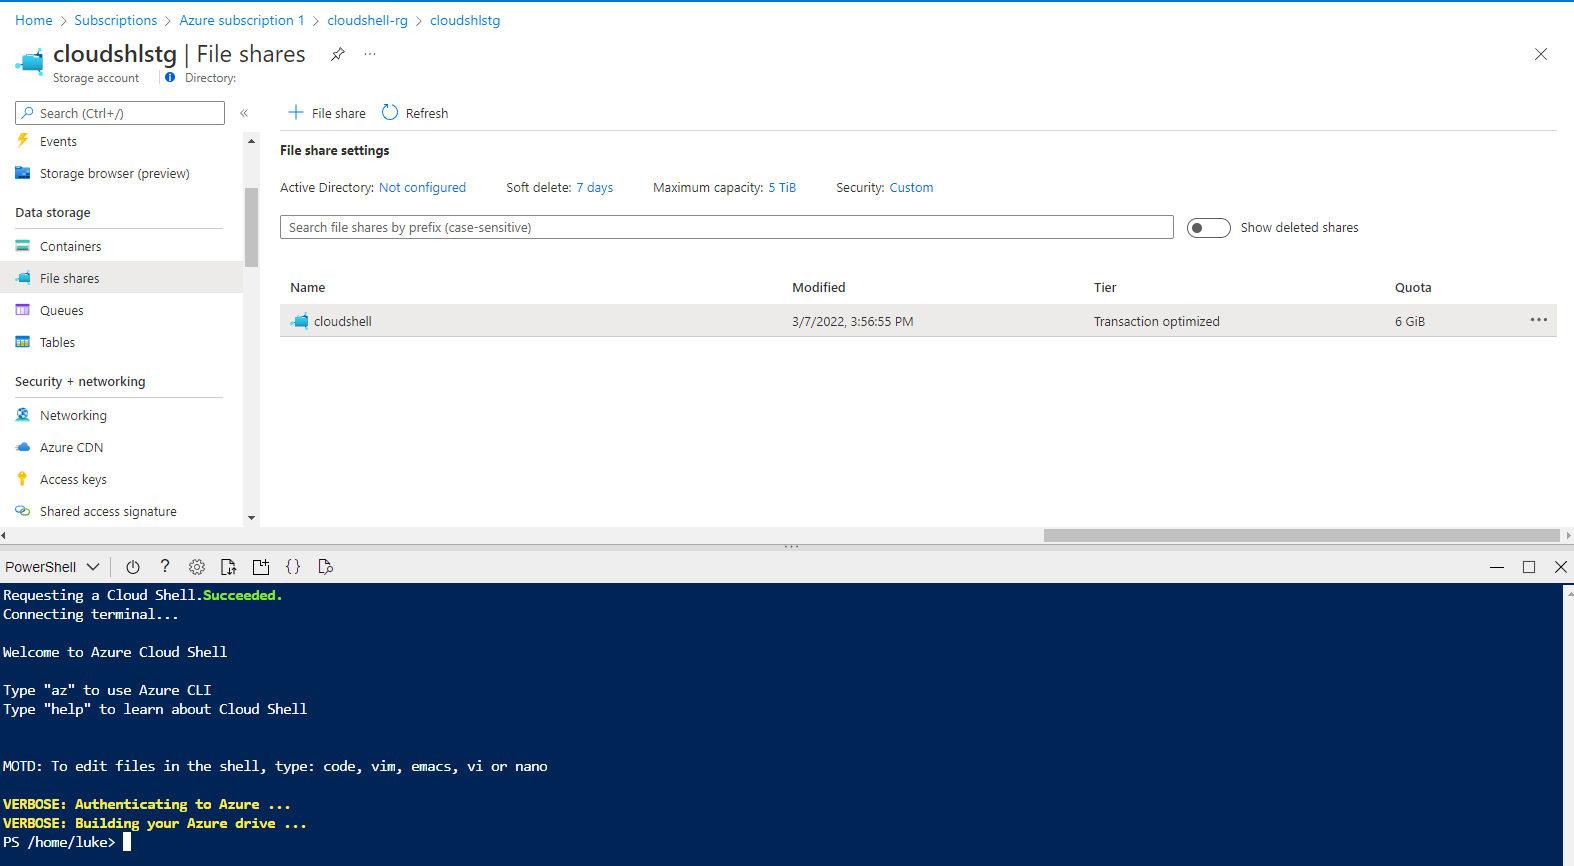
Using this method is handy when you have more than one person administering the subscription, each person can have its own file share, which can then be backed up using Azure Backup and easily removed later when not needed.