AVD-Collect - Azure Virtual Desktop Diagnostics and Logging
AVD-Collect is a handy PowerShell script created by Microsoft Customer Support Services to assist with troubleshooting and resolving issues with Azure Virtual Desktop (and Windows 365), by capturing Logs for analysis (which could then be passed to Microsoft or allow you to delve deeper) and running basic Diagnostics against some common known issues.
You can download this script from: https://aka.ms/avd-collect
There is no publically avaliable github repository for it currently, Microsoft will retain the latest version of the script at this link.
This script was NOT created by me and comes 'As/Is', this article is merely intended to share the script to assit others in their AVD troubleshooting.
This script is intended to help support Microsoft Customer Support with assisting customers, but was made publically accessible to assist with MS Support cases and Azure Virtual Desktop diagnostics. No data is automatically uploaded to Microsoft.
Please be aware that the script may change and include new functionality not part of this article, please review the Changelog and Readme of the script directly.
A lot of the information below is contained in the script readme (including a list of the extensive diagnostics and log locations) and changelog; however, I am supplying this article for reference and to help share this nifty tool.
Script pre-requisites
-
The script must be run with elevated permissions to collect all required data.
-
All collected data will be archived into a .zip file located in the same folder as the script itself.
-
As needed, run the script on AVD host VMs and/or Windows-based devices from where you connect to the AVD hosts.
-
When launched, the script will present the Microsoft Diagnostic Tools End User License Agreement (EULA). You need to accept the EULA before you can continue using the script.
-
If the script does not start, complaining about execution restrictions, then in an elevated PowerShell console run:
Set-ExecutionPolicy -ExecutionPolicy RemoteSigned -Force -Scope Process
Acceptance of the EULA will be stored in the registry under HKCU\Software\Microsoft\CESDiagnosticTools, and you will not be prompted again to accept it as long as the registry key is in place. You can also use the "-AcceptEula" command line parameter to accept the EULA silently. This is a per-user setting, so each user running the script will accept the EULA once.
Script scenarios
Core - suitable for troubleshooting issues that do not involve Profiles or Teams or MSIX App Attach
- Collects core troubleshooting data without including Profiles/FSLogix/OneDrive or Teams or MSIXAA related data
- Runs Diagnostics.
Core + Profiles - suitable for troubleshooting Profiles issues
- Collects all Core data
- Collects Profiles/FSLogix/OneDrive related information, as available
- Runs Diagnostics.
Core + Teams - suitable for troubleshooting Teams issues
- Collects all Core data
- Collects Teams related information, as available
- Runs Diagnostics.
Core + MSIX App Attach - suitable for troubleshooting MSIX App Attach issues
- Collects all Core data
- Collects MSIX App Attach related information, as available
- Runs Diagnostics.
Core + MSRA - suitable for troubleshooting Remote Assistance issues
- Collects all Core data
- Collects Remote Assistance related information, as available
- Runs Diagnostics.
Extended (all) - suitable for troubleshooting most issues, including Profiles/FSLogix/OneDrive, Teams and MSIX App Attach
- Collects all Core data
- Collects Profiles/FSLogix/OneDrive related information, as available
- Collects Microsoft Teams related information, as available
- Collects MSIX App Attach related information, as available
- Runs Diagnostics.
DiagOnly
- Skips all Core/Extended data collection and runs Diagnostics only (regardless of any other parameters that have been specified).
The default scenario is "Core".
Available command line parameters (to preselect the desired scenario)
- Core - Collects Core data + Runs Diagnostics
- Extended - Collects all Core data + Extended (Profiles/FSLogix/OneDrive, Teams, MSIX App Attach) data + Runs Diagnostics
- Profiles - Collects all Core data + Profiles/FSLogix/OneDrive data + Runs Diagnostics
- Teams - Collects all Core data + Teams data + Runs Diagnostics
- MSIXAA - Collects all Core data + MSIX App Attach data + Runs Diagnostics
- MSRA - Collects all Core data + Remote Assistance data + Runs Diagnostics
- DiagOnly - The script will skip all data collection and will only run the diagnostics part (even if other parameters have been included).
- AcceptEula - Silently accepts the Microsoft Diagnostic Tools End User License Agreement.
Usage example with parameters
To collect only Core data (excluding Profiles/FSLogix/OneDrive, Teams, MSIX App Attach):
.\AVD-Collect.ps1 -Core
To collect Core + Extended data (incl. Profiles/FSLogix/OneDrive, Teams, MSIX App Attach):
.\AVD-Collect.ps1 -Extended
To collect Core + Profiles + MSIX App Attach data
.\AVD-Collect.ps1 -Profiles -MSIXAA
To collect Core + Profiles data
.\AVD-Collect.ps1 -Profiles
If you are missing any of the data that the script should normally collect, check the content of the "__AVD-Collect-Log.txt" and "__AVD-Collect-Errors.txt" files for more information. Some data may not be present during data collection and thus not picked up by the script.
Execute the script
-
Download the AVD-Collect script to the session host you need to collect the logs from, if you haven't already.
-
Extract the script to a folder (i.e. C:\Users\%username&\Downloads\AVD-Collect)
-
Right-click on: AVD-Collect.ps1, select Properties
-
Because this file has been downloaded from the Internet, it may be in a protected/block status - select Unblock and click Apply
-
Open Windows Powershell as Administrator
-
Now we need to change the directory for where the script is located; in my example, the command I use is:
cd 'C:\Users\Luke\Downloads\AVD-Collect' -
By default, the script will run as 'Core', and I want to include everything, profiles, Teams etc., so run Extended:
.\AVD-Collect.ps1 -Extended -AcceptEula -
Read the notice from the Microsoft Customer Support centre and press 'Y' if you accept to move onto the next steps.
-
The script will now run:
-

-
You will start to see new folders get created in the directory that the script is running from with the extracted log files. The script will take a few minutes to complete as it extracts the logs and then zips them.
-
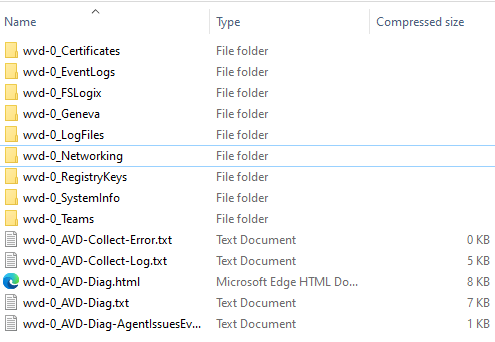
Once the script has ran, there will now be a ZIP file of all the Logs collected by the script. In my example, the logs consisted of:
- Certificates
- Recent Event Log
- FSLogix logs
- Networking
- Registry Keys
- Teams information
- System information
- Networking and Firewall information

- If needed, you can now send or upload the ZIP file to Microsoft support. If you are troubleshooting yourself, you can navigate to the folders to look at the specific logs you want, all in one place!
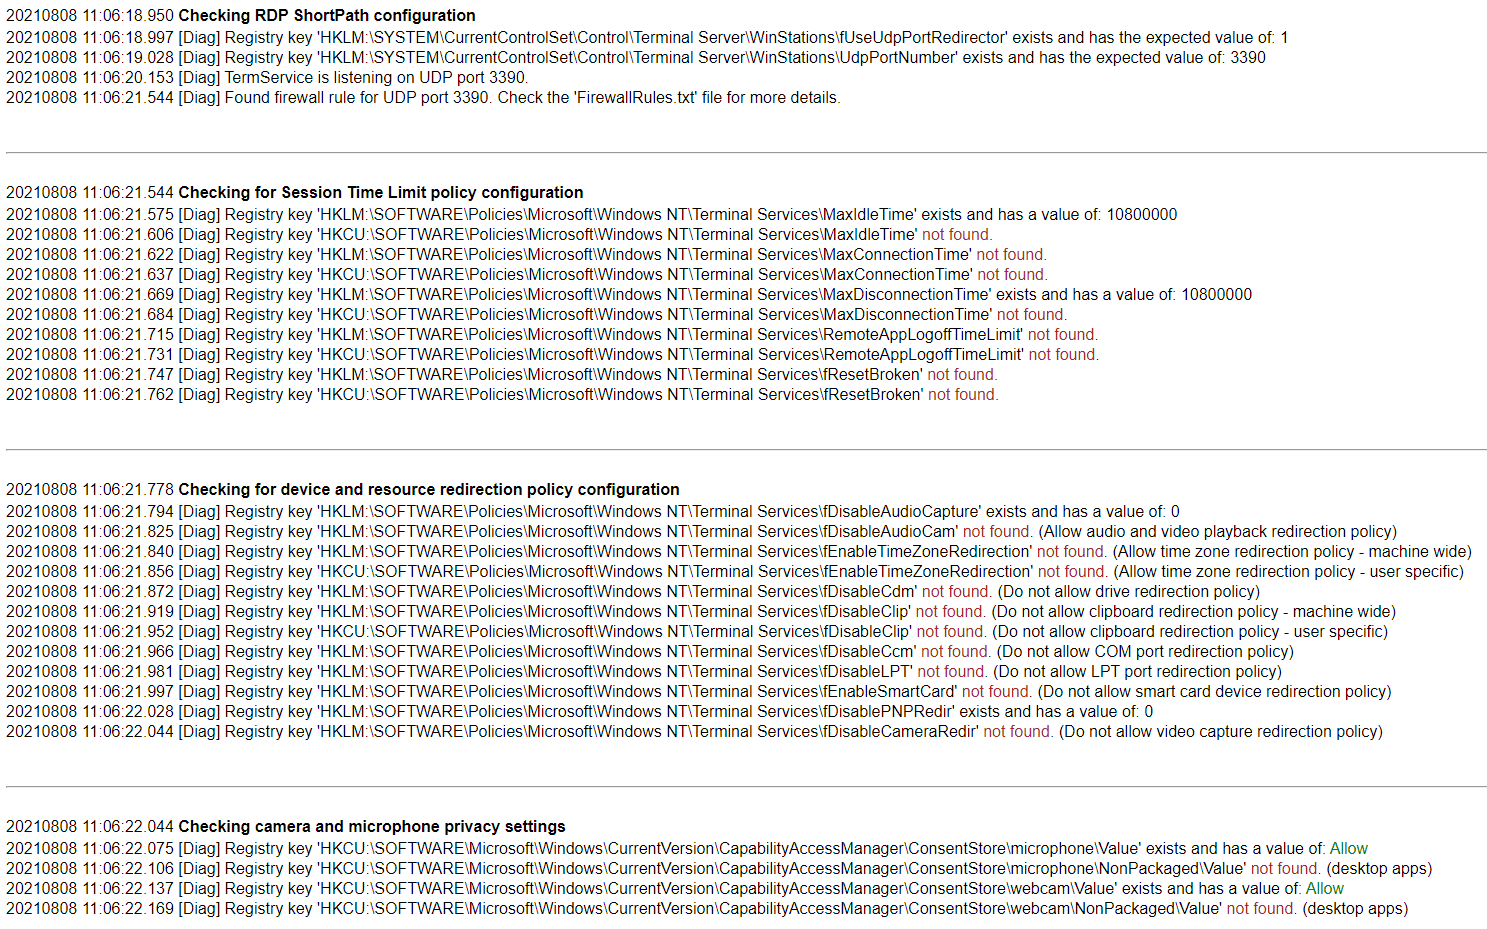
- To look at Diagnostic information, open the: AVD-Diag.html file.
- You can now see a list of common issues, what the script is looking for, and whether the host has passed or failed these scripts (this can be very useful for Azure Virtual Desktop hosts, to make sure all the standard configuration is done or being applied, including making sure that the session host has access to all the external resources it needs):

