How to setup FSLogix profiles for Azure Virtual Desktop
If you have a few Azure Virtual Desktop machines, you need some way to keep user persistence's and application customisations, which would usually be stored in the user profile locally across multiple machines (or even the same machine if using Ephemeral OS), this is where FSLogix Profile Containers can assist.
We are going to implement FSLogix using an Azure File Share, to store the profiles.
I am going to assume you already have an Azure Virtual Desktop farm (and Azure ADDS), if not you can check out my guide here.
This article will be based on the Azure Virtual Desktop farm created in a previous article, however, you can just still along and replace the resource names and groups with your own.
Setup Storage Account
- Log in to the Azure Portal
- Click on Create a resource
- Type in Storage Account and press Enter to search
- Select Storage account
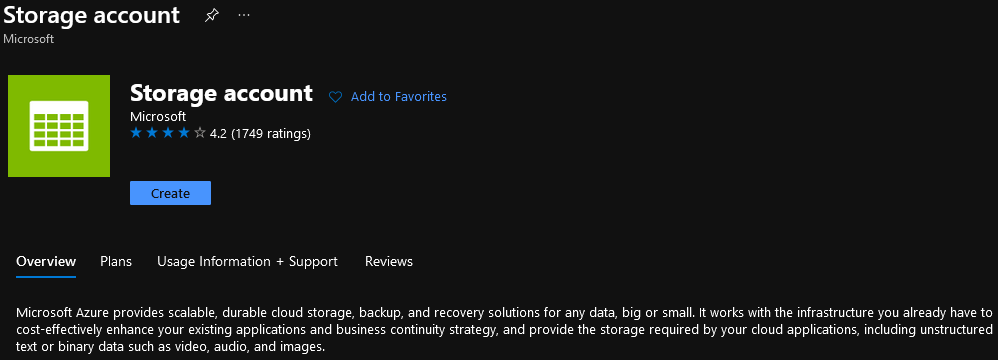
- Click Create
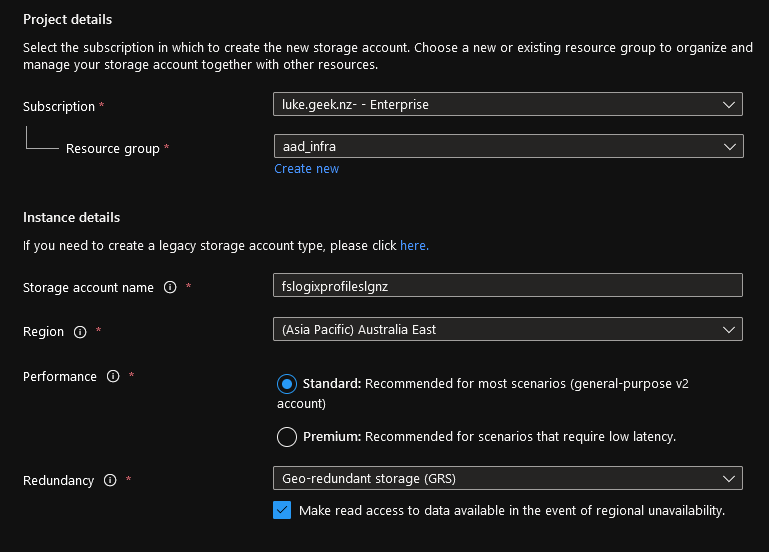
- If you already have a Resource Group, then select it, if not you can create a new resource group. I am going to put my resources user profiles in the same resource group as my utility server: aad_infra (this is just personal preference, keeping the session hosts in their own resource groups).
- Type in a Storage Account Name (the name needs to be globally unique across all of Azure, the field can contain only lowercase letters and numbers. Name must be between 3 and 24 characters.), in my case I have gone with: fslogixprofileslgnz.
- Select your Region (the same region you have your Azure Virtual Desktop session hosts and Virtual Network)
- Select Standard performance (Microsoft have recommendations, based on users on what Tier to select - https://learn.microsoft.com/en-us/azure/virtual-desktop/store-fslogix-profile)
- For Redundancy, I am going to select LRS storage (I haven't built have any redundancy in my Azure Virtual Desktop farm).
- Note: Just a heads up, don't select Geo-Redundant if you are looking to create File Shares on this Storage account over 100TiB, it is only supported in LRS. If you do need this kind of large file size, I recommend using a completely different storage account from the one you are using for user profiles. My screenshot below has GRS, just ignore it!
- Click Next: Advanced
- Leave everything as default and select Next: Networking
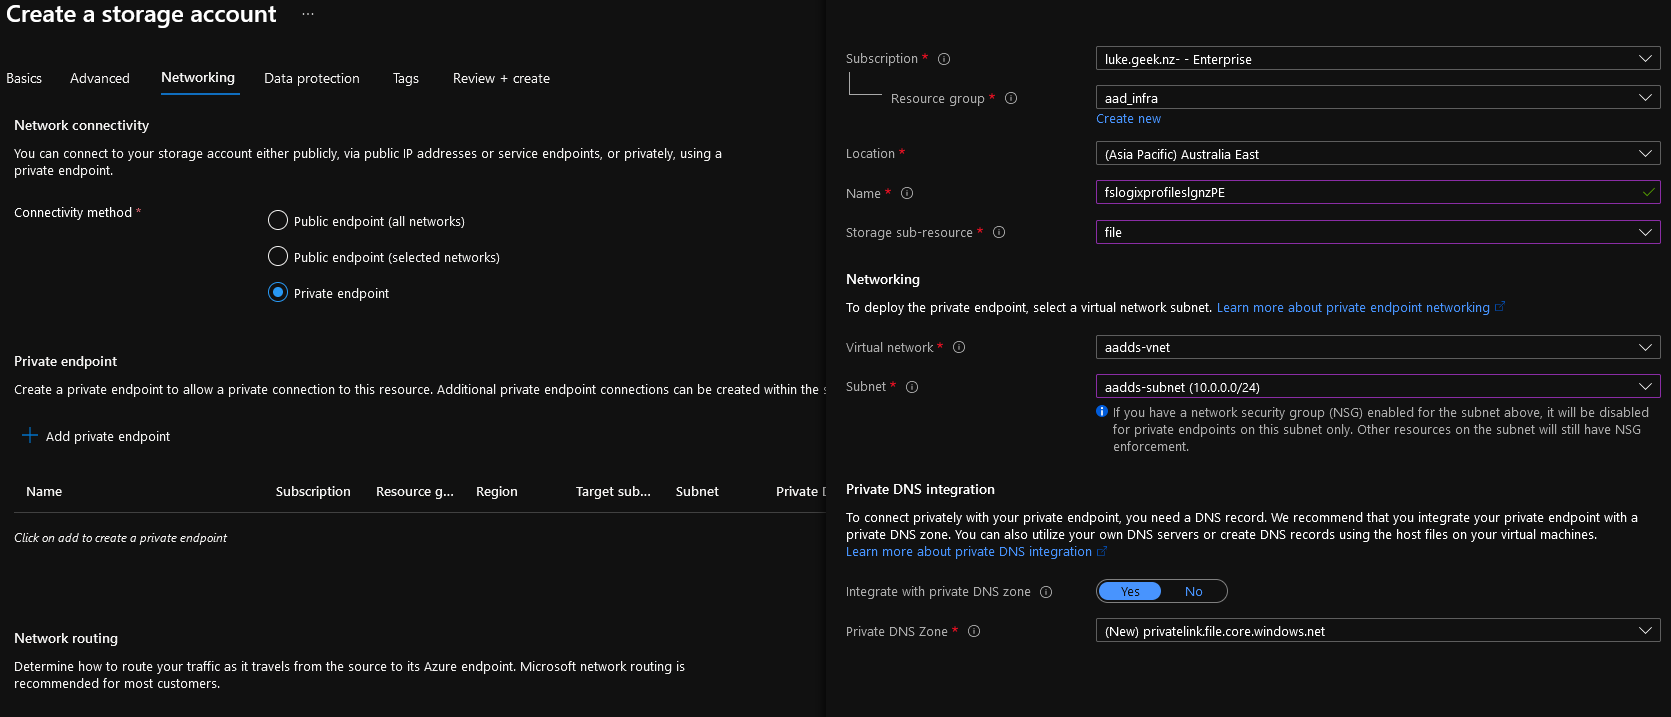
- Now we need to configure a Private Endpoint for the Azure storage account to add onto the Virtual Network directly.
- Select Private endpoint and click + Add Private endpoint
- Verify that your Location is correct and type in a Name for your Private Endpoint service, in my case: fslogixprofileslgnzPE
- Select the drop-down for Storage sub-resource and select file
- Select your Virtual Network and subnet (I will be selecting my main resource subnet of aadds-subnet, where the Azure Virtual Desktop hosts are)
- Click Ok
- Select Next: Data Protection
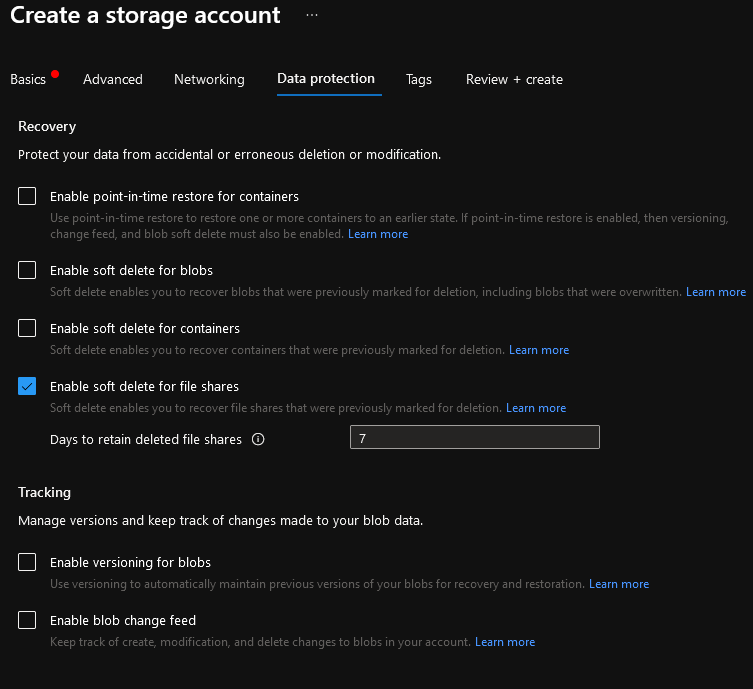
- Untick the Enable soft delete for Blogs and Container's (we will only be using Azure Files in this storage account)
- Soft delete allows you to quickly recover a deleted file-share, even though we can backup the Azure Fileshare, my recommendation would be to leave this on for additional protection and '7' days is enough for me.
- Select Review + Create
- Validate your configuration and select Create
Configure Storage Account
-
Once your storage account has been created, go to it.
-
Navigate down the left-hand side Blade and select: Networking
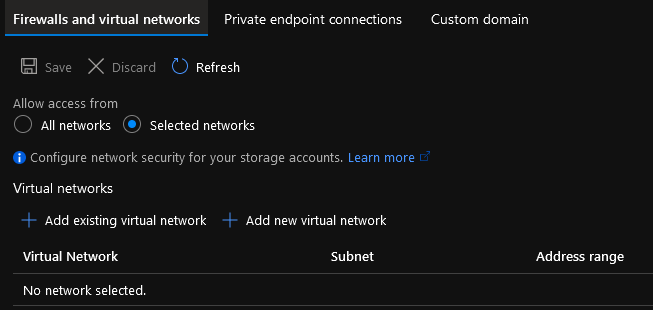
Make sure: Selected networks are selected and the Private Endpoint connection is displaying.
-
-

-
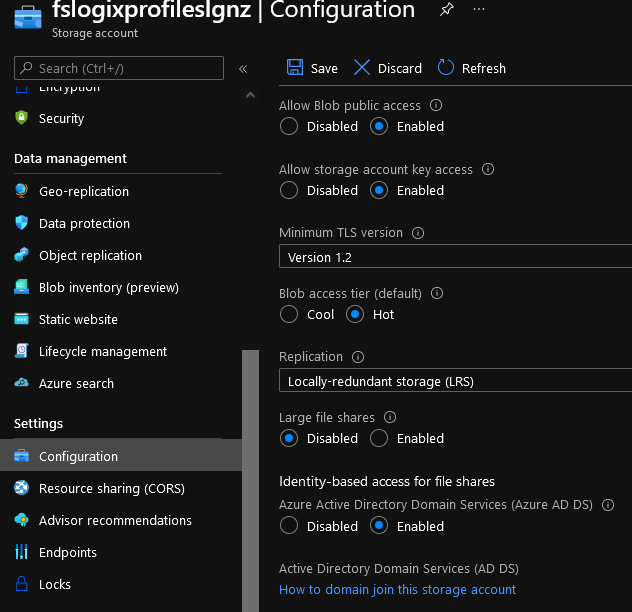
Now its time to join the Storage account to Microsoft Entra ID Domain Services, on the left-hand side Blade, click on Configuration (under Settings)
-
Navigate to: Identity-based access for file shares
-
Select Enabled
-
Click Save
-
-
Now its time to create the File Share, On the left-hand side Blade, navigate to File Shares (under Data Storage)
-
Select + File Share
-
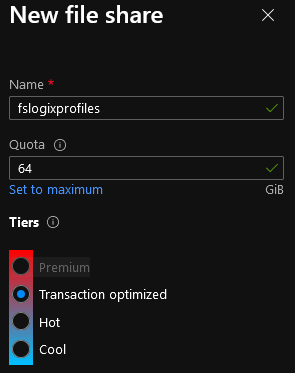
Give this File share a name: fslogixprofiles
-
Even though you don't need to have a Quota (the Fileshare will grow), I will add one in stop any surprises and make sure that I have an ongoing task to review and optimize the profiles
-
Because user profiles are generally a lot of read/write activity, select Transaction Optimized (take a look at the https://azure.microsoft.com/en-us/pricing/details/storage/files/ )
-
Click Create
-
-
One last thing we can do on the Storage Account is enable backups for your Azure File Share - https://learn.microsoft.com/en-us/azure/backup/backup-afs?WT.mc_id=AZ-MVP-5004796
Configure File Share
Now that the Microsoft Entra ID rights have been assigned and the File Share has been created, we now need to set up the NTFS permissions on the FSLogix share.
-
Navigate to File Shares (under Data Storage)
-
Click on your file-share
-
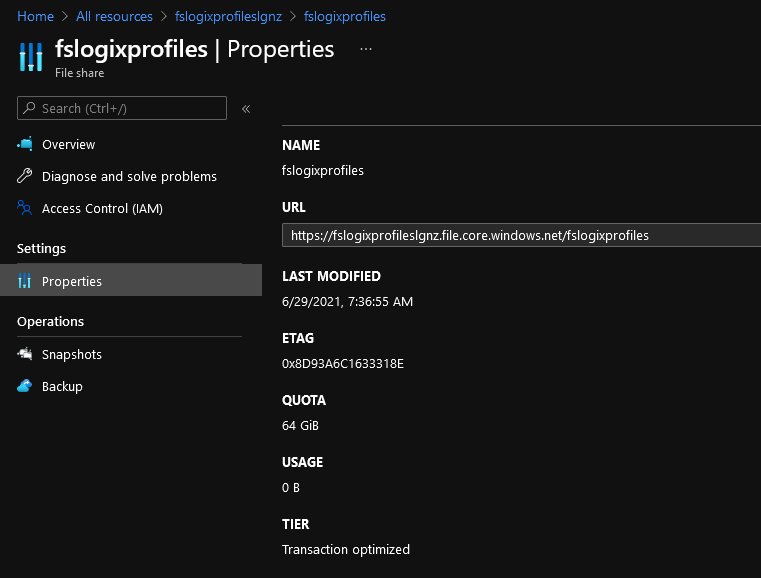
Click on Properties
-
Copy the URL
-
-
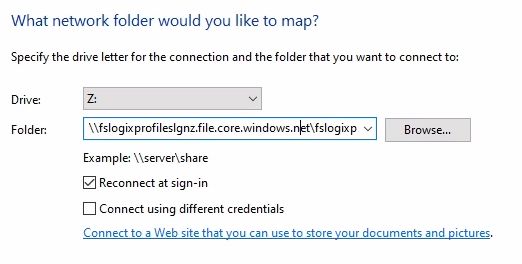
Remove http and replace the forward slashes with backslashes so it looks like this: \\fslogixprofileslgnz.file.core.windows.net\fslogixprofiles
-
Using a user that is a member of the 'AVD Admins' group and can log into the Azure Virtual Desktop farm (it’s a good chance to test connectivity to the Storage account through the private endpoint from your Azure Virtual Desktop session host)
-
Open Computer
-
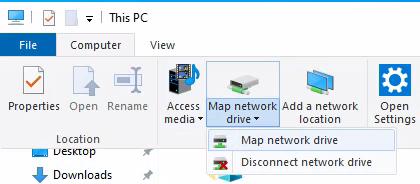
Select the Computer Tab and select Map network drive
-
-
Select a drive letter that isn't in use and paste in the UNC path created earlier (step 6).
-
-
Hopefully, you should successfully have mapped a drive!
-
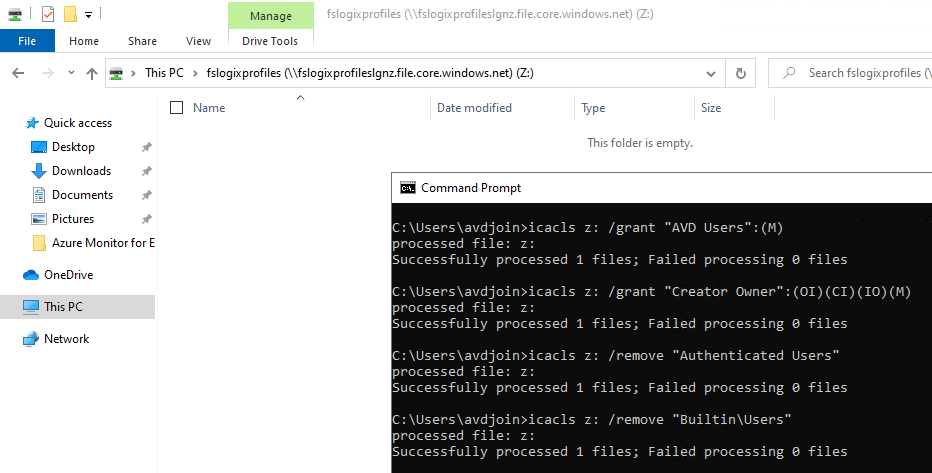
Once the drive is mapped, open up a Command Prompt
Note: Don't run the Command Prompt as Administrator, as this runs in a separate context and doesn't have permissions to the mapped drive.
-
Run the following command to set the necessary NTFS permissions (change the Drive mapping and AVD Users group to your own group):
icacls z: /grant "AVD Users":(M)

icacls z: /grant "Creator Owner":(OI)(CI)(IO)(M)

icacls z: /remove "Authenticated Users"

icacls z: /remove "Builtin\Users" -
-
The permissions should look similar to:
-

Configure FSLogix policies
Now that you have successfully created a Storage Account and granted it the proper permissions, we now need to configure Group Policy for FSLogix.
- Connect to your Microsoft Entra ID Utility server, that has Group Policy management installed using an account in the: AAD DC Administrators group
- Download the latest FSLogix Agent - https://aka.ms/fslogix_download onto the Utility server
- Extract the FSLogix agent zip file to a folder
- Now we will create a Central Store to manage the Group Policy consistently
- On your Utility server, browse to C:\Windows (If you are primarily using Azure Virtual Desktop, it may be best to copy the PolicyDefinitions folder from an Azure Virtual Desktop session host to make sure you can edit all the latest Windows 10 policies)
- Copy the PolicyDefinitions folder
- Copy the PolicyDefinitions folder to your Policies folder on your domain: \luke.geek.nz\SYSVOL\luke.geek.nz\Policies
(replace luke.geek.nz, with your ADDS DNS name) 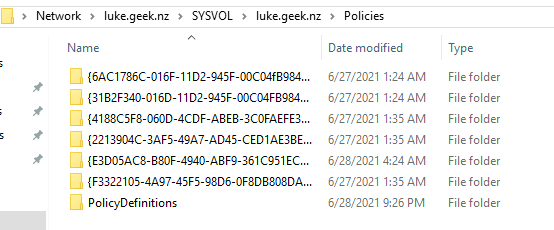
- Go to your extracted FSLogix folder and copy:
- fslogix.admx to: \luke.geek.nz\SYSVOL\luke.geek.nz\Policies\PolicyDefinitions\
- fslogix.adml to: \luke.geek.nz\SYSVOL\luke.geek.nz\Policies\PolicyDefinitions\en-US\
- This will allow us to use Group Policy to manage FSLogix using Group Policy, Open Group Policy Management
- Navigate to your Hosts OU
- Right-click the OU and select: Create a GPO in this domain, and Link it here…
- Name it according to your naming standards (this is a Computer-based policy) - in my example, I am using: AVD_ComputerPolicy
- Click Ok
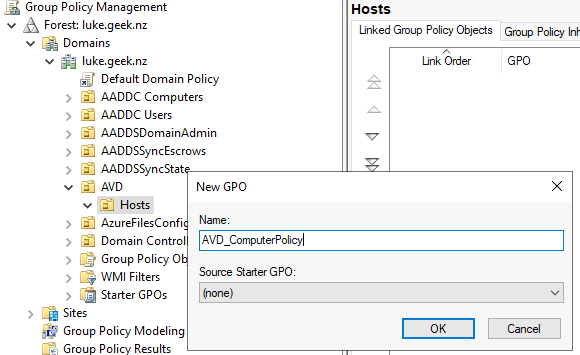
- Right-click the GPO you have just created and select Edit…
- Because this is a Computer-based policy, to speed up processing, right-click the Policy heading and select Properties
- Tick: Disable User Configuration Settings
- Confirm that you want to do it and select Yes
- Click Apply
- While you have the screen open, click on Comment, and add in some details about the GPO for future reference then click Apply and Ok
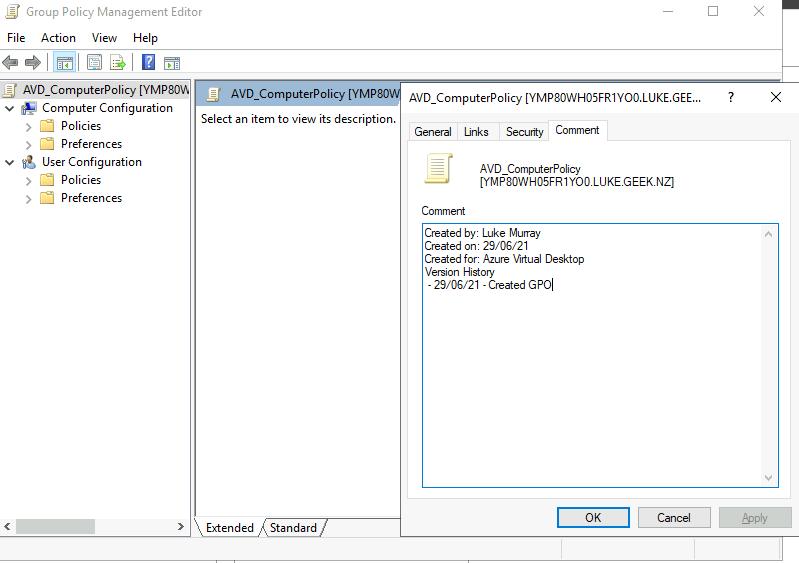
- Now it's time to actually configure the FSLogix Group Policy settings.
- Navigate to: Computer Configuration\Policies\Administrative Templates\FSLogix\Profile Containers
- Open up Enabled and select: Enabled and Apply
- Open: VHD Location and copy in your Profiles UNC share (for example, mine is: [\\fslogixprofileslgnz.file.core.windows.net\fslogixprofiles) click Ok
- Select: Delete local profile when FSLofix profile should apply, click Enabled and check to Delete local profile when FSLogix Profile should apply (don't blindly follow this, I am making the assumption this is a new farm, with no user-based profile stored on it. You may need to create a separate GPO to test this setting on, or you could lose valuable data).
- Open: Set Outlook cached mode on successful container attach to Enabled.
- Now in Group Policy Management console, click on Container and Directory Naming and select Virtual Disk type
- Click Enabled and change the Option to VHDX, click Ok
- Click on: Swap directory name components setting and click Enabled, check the swap directory name components and click Apply
- Restart the Azure Virtual Desktop session hosts to pick up the new policies.
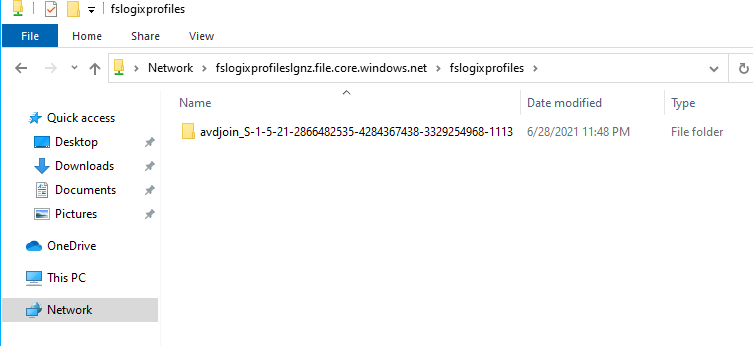
- You have now set up FSLogix profiles! If you map the drive you should see your user profile folders!
