Unable to delete DevCenter Project
· One min read
When attempting to delete a devcenter project, you may encounter the following error:
warning
This resource is in a failed state.
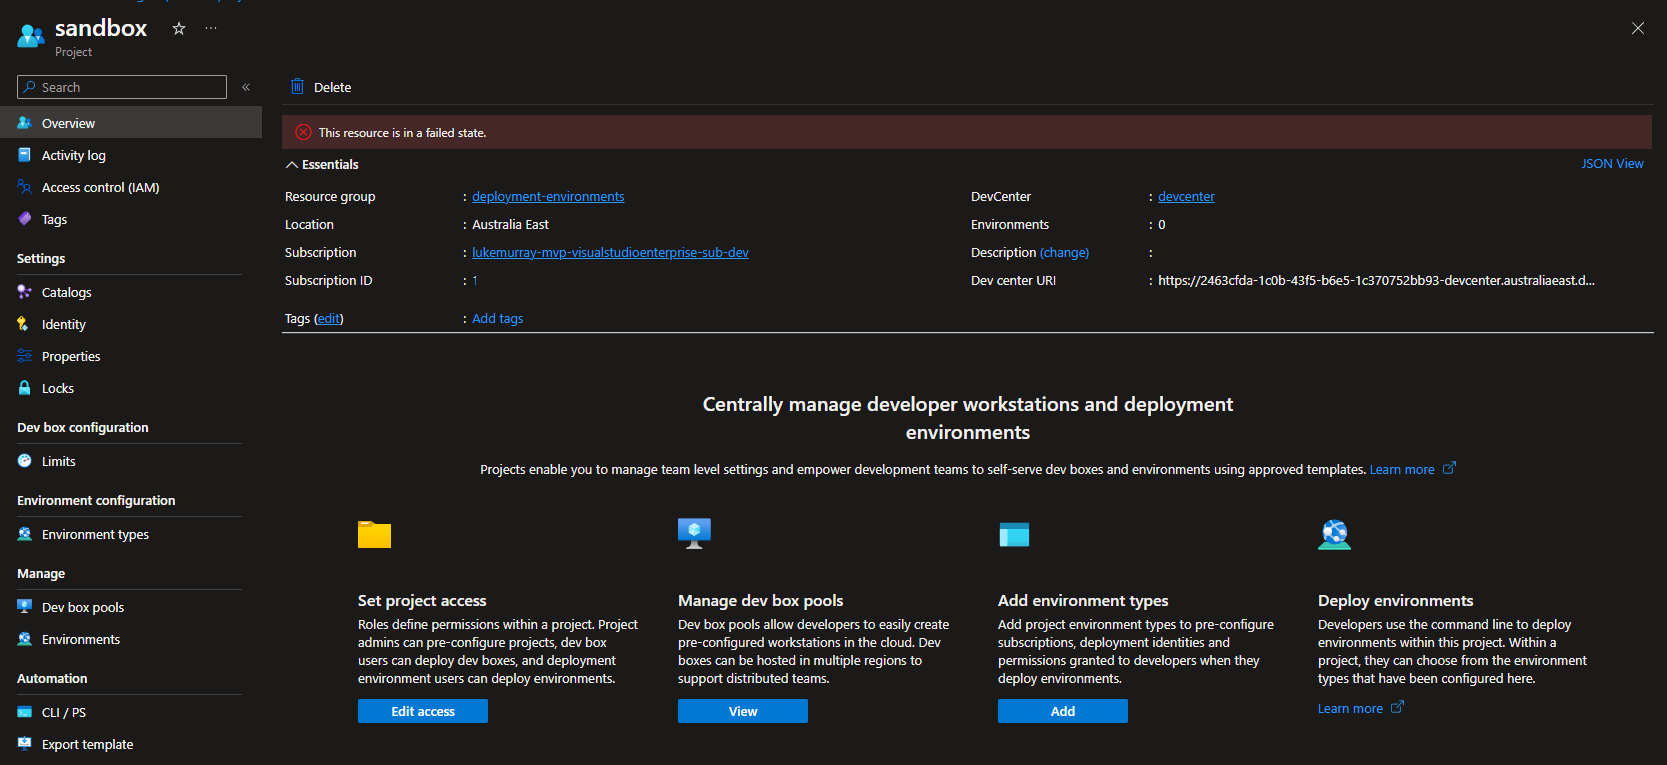
When attempting to delete a devcenter project, you may encounter the following error:
This resource is in a failed state.
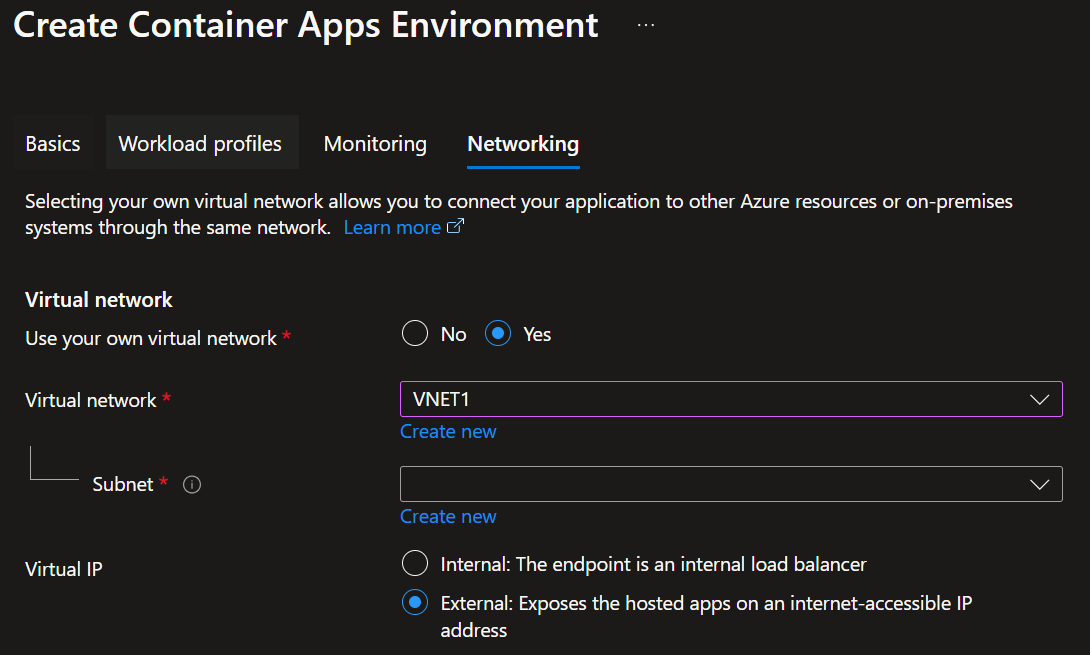
When attempting to deploy a Container Apps Environment integrated into a VNET (Virtual Network) that was pre-created, you may have issues selecting a subnet which your Container Apps Environment should be deployed into, as your subnet may not be appearing in the Azure Portal to select.
When you use an Azure API Management solution in Internal mode, you may also want to use an Azure Application Gateway to provide additional security and performance features for external consumers as well and contain a mix of both Internal (to your own vnet and private dns) and (external, accessed via public DNS) APIs.
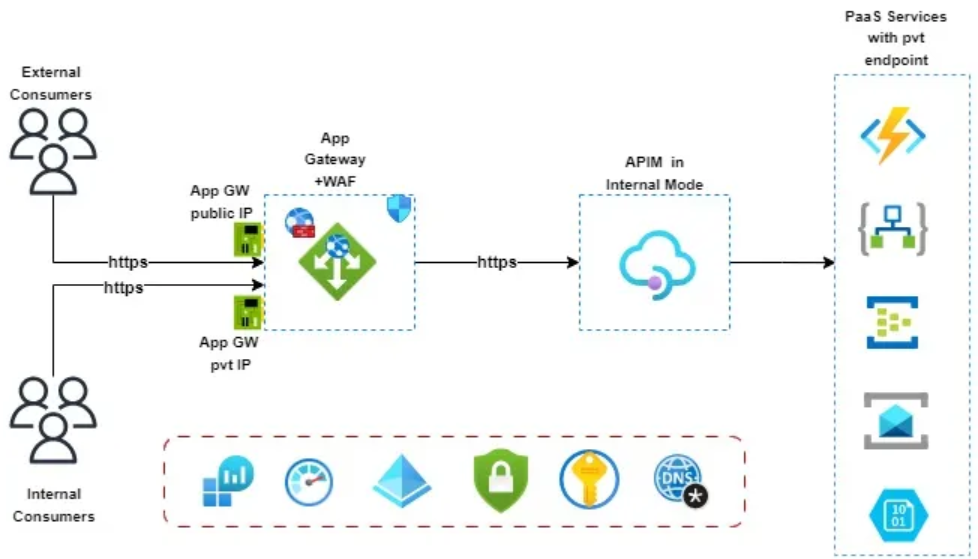 (Image courtesy of: Azure APIM and Application Gateway Integration)
In this scenario, you can use the following paths on your APIs:
https://apim.yourdomain.com/internal/echohttps://apim.yourdomain.com/external/echo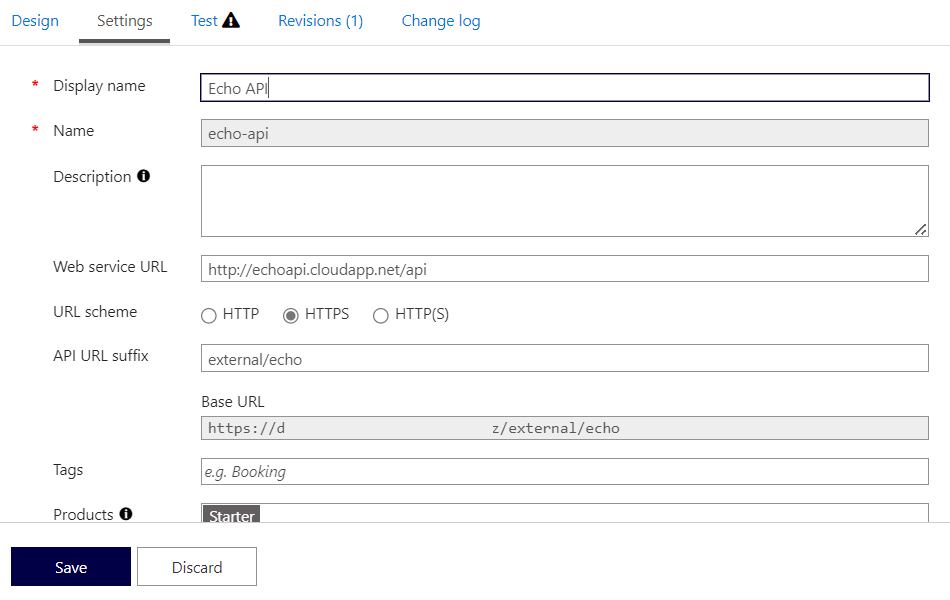
The Azure Proactive Resiliency Library is a curated collection of best practices, guidance, and recommendations designed to improve the resiliency of applications and services running in Azure. Built on the Resiliency pillar of the Well-Architected Framework, this catalog provides valuable insights to ensure your workloads remain robust and reliable.
The library also includes automation capabilities (using Azure Graph queries) that allow you to collect data, analyze it, and generate detailed Word and PowerPoint reports. These reports, part of the Well-Architected Resiliency Assessment workshop, provide visibility into the resiliency of your Azure workloads. This toolset, often used by Microsoft Cloud Solution architects, can be leveraged to identify areas for improvement in your own Azure estate, following Resiliency well-architected principles.
In this article, we will walk through the process of running the scripts to collect, analyze, and report on resiliency data for your workloads using the Azure Proactive Resiliency Library to help you identify and address potential reliability issues in your Azure environment.
I've written, about GitHub Codespaces before, in the article Coding on the Cloud - Getting Started with GitHub Codespaces, this article builds on it by supplying a Codespace setup for Infrastructure as Code (IaC) coding, including Bicep and Terraform, and Linting.