Azure Bicep Deployment with Deployment Stacks
Deployment Stacks! What is it? insert confused look
Maybe you have been browsing the Microsoft Azure Portal and noticed a new section in the management blade called: Deployment stacks and wondered what it was, and how you can use it.
Let us take a look!
Before we get started its worth noting that as of the time of this article, this feature is under Public Preview. Features or ways of working with Deployment Stacks may change, when it becomes generally available. If you run into issues, make sure you have a look at the current known issues.

Overview
Azure Deployment Stacks are a type of Azure resource that allows you to manage a group of Azure resources as an atomic unit.
When you submit a Bicep file or an ARM template to a deployment stack, it defines the resources that are managed by the stack.
You can create and update deployment stacks using Azure CLI, Azure PowerShell, or the Azure portal along with Bicep files. These Bicep files are transpiled into ARM JSON templates, which are then deployed as a deployment object by the stack.
Deployment stacks offer additional capabilities beyond regular deployment resources, such as simplified provisioning and management of resources, preventing undesired modifications to managed resources, efficient environment cleanup, and the ability to utilize standard templates like Bicep, ARM templates, or Template specs.
When planning your deployment and determining which resource groups should be part of the same stack, it's important to consider the management lifecycle of those resources, which includes creation, updating, and deletion. For instance, suppose you need to provision some test VMs for various application teams across different resource group scopes.
Comparisons
Before we dig into it further, it may help to give you a comparison between the different products and where Deployment Stacks, could be used, lets us take a look at a comparison, between similar products, that may come to mind, such as:
- Azure Blueprints
- Bicep (on its own)
- Template Specs
- Terraform
| Feature | Deployment Stacks | Azure Blueprints | Using Bicep | Template Specs | Terraform |
|---|---|---|---|---|---|
| Management of Resources | Manages a group of Azure resources as an atomic unit. | Defines and deploys a repeatable set of Azure resources that adhere to organizational standards. | Defines and deploys Azure resources using a declarative language. | Defines and deploys reusable infrastructure code using template specs. | Defines and provisions infrastructure resources across various cloud providers using a declarative language. |
| Resource Definition | Bicep files or ARM JSON templates are used to define the resources managed by the stack. | Blueprint artifacts, including ARM templates, policy assignments, role assignments, and resource groups, are used to define the blueprint. | Bicep files are used to define the Azure resources. | Template specs are used to define reusable infrastructure code. | Terraform configuration files are used to define the infrastructure resources. |
| Access Control | Access to the deployment stack can be restricted using Azure role-based access control (Azure RBAC). | Access to blueprints is managed through Azure role-based access control (Azure RBAC). | Access to Azure resources is managed through Azure role-based access control (Azure RBAC). | Access to template specs is managed through Azure role-based access control (Azure RBAC). | Access to cloud resources is managed through provider-specific authentication mechanisms. |
| Benefits | Simplified provisioning and management of resources as a cohesive entity. Preventing undesired modifications to managed resources.*Efficient environment cleanup.*Utilizing standard templates such as Bicep, ARM templates, or Template specs for your deployment stacks. | Rapidly build and start up new environments with organizational compliance. Built-in components for speeding up development and delivery. | *Easier management and deployment of Azure resources.*Improved readability and understanding of resource configurations. | * Publish libraries of reusable infrastructure code. | * Infrastructure-as-Code approach for provisioning resources across multiple cloud providers. |
| Deprecation | N/A | Azure Blueprints (Preview) will be deprecated. | N/A | N/A | N/A |
It is always recommended to refer to the official documentation for the most up-to-date and comprehensive information. The comparison table above, was created with the help of AI.
It is hard to do a complete comparison, as always 'it depends' on your use cases and requirements, but hopefully this makes it clear where Deployment Stacks come into play (and it does not replace Bicep but works with it for better governance), with out-of-the-box benefits such as:
- Simplified provisioning and management of resources across different scopes as a cohesive entity.
- Preventing undesired modifications to managed resources through deny settings.
- Efficient environment cleanup by employing delete flags during deployment stack updates.
- Utilizing standard templates such as Bicep, ARM templates, or Template specs for your deployment stacks.
The key here is that Azure Deployment Stacks, is a native way to treat your infrastructure components as an atmonic unit or stack, so you manage the lifecycle of the resources as a whole vs every resource separately.
Using Deployment Stacks
Deployment stacks requires Azure PowerShell (version 10.1.0 or later) or Azure CLI (version 2.50.0 or later).
For the purposes of this article, I will be using PowerShell.
PowerShell
Once you have the latest Azure PowerShell modules, its time to take a look at the cmdlets, that are offered to us for Deployment Stacks.
Open your PowerShell terminal and type in:
Get-Command -Name *DeploymentStack*
 As you can see, there are a range of cmdlets we have to work with.
For the purpose of this article, I will be using a Bicep file, I already have on hand (unmodified for Deployment Stacks). This bicep file will create:
- 2 Virtual Networks
- 4 Subnets (2 subnets in each Virtual Network)
- 4 NSGs (and assign to each subnet, with Deny All rules)
- Then finally, peer the virtual networks.
This is the Bicep file:
@description('Name of the virtual network.')
param vnetName string = 'myVnet'

@description('Name of the first subnet.')
param subnet1Name string = 'subnet1'

@description('Name of the second subnet.')
param subnet2Name string = 'subnet2'

@description('Name of the first network security group.')
param nsg1Name string = 'nsg1'

@description('Name of the second network security group.')
param nsg2Name string = 'nsg2'

@description('Name of the second virtual network.')
param vnet2Name string = 'myVnet2'

@description('Name of the third subnet.')
param subnet3Name string = 'subnet3'

@description('Name of the fourth subnet.')
param subnet4Name string = 'subnet4'

@description('Name of the third network security group.')
param nsg3Name string = 'nsg3'

@description('Name of the fourth network security group.')
param nsg4Name string = 'nsg4'

@description('Location for all resources.')
param location string = resourceGroup().location

resource vnet 'Microsoft.Network/virtualNetworks@2023-04-01' = {
  name: vnetName
  location: location
  properties: {
    addressSpace: {
      addressPrefixes: [
        '10.0.0.0/16'
      ]
    }
  }
}

resource subnet1 'Microsoft.Network/virtualNetworks/subnets@2023-04-01' = {
  parent: vnet
  name: subnet1Name
  properties: {
    addressPrefix: '10.0.1.0/24'
    networkSecurityGroup: {
      id: resourceId('Microsoft.Network/networkSecurityGroups', nsg1Name)
    }
  }
}

resource subnet2 'Microsoft.Network/virtualNetworks/subnets@2023-04-01' = {
  parent: vnet
  name: subnet2Name
  properties: {
    addressPrefix: '10.0.2.0/24'
    networkSecurityGroup: {
      id: resourceId('Microsoft.Network/networkSecurityGroups', nsg2Name)
    }
  }
}

resource nsg1 'Microsoft.Network/networkSecurityGroups@2023-04-01' = {
  name: nsg1Name
  location: location
  properties: {
    flushConnection: false
    securityRules: [

      {
        name: 'Deny-All-Inbound'
        properties: {
          priority: 4096
          access: 'Deny'
          direction: 'Inbound'
          destinationPortRange: '*'
          protocol: 'Tcp'
          sourcePortRange: '*'
          destinationAddressPrefix: '*'
          sourceAddressPrefix: '*'
        }
      }
    ]
  }
}

resource nsg2 'Microsoft.Network/networkSecurityGroups@2023-04-01' = {
  name: nsg2Name
  location: location
  properties: {
    flushConnection: false
    securityRules: [

      {
        name: 'Deny-All-Inbound'
        properties: {
          priority: 4096
          access: 'Deny'
          direction: 'Inbound'
          destinationPortRange: '*'
          protocol: 'Tcp'
          sourcePortRange: '*'
          destinationAddressPrefix: '*'
          sourceAddressPrefix: '*'
        }
      }
    ]
  }
}

resource vnet2 'Microsoft.Network/virtualNetworks@2023-04-01' = {
  name: vnet2Name
  location: location
  properties: {
    addressSpace: {
      addressPrefixes: [
        '10.1.0.0/16'
      ]
    }
  }
}

resource subnet3 'Microsoft.Network/virtualNetworks/subnets@2023-04-01' = {
  parent: vnet2
  name: subnet3Name
  properties: {
    addressPrefix: '10.1.1.0/24'
    networkSecurityGroup: {
      id: resourceId('Microsoft.Network/networkSecurityGroups', nsg3Name)
    }
  }
}

resource subnet4 'Microsoft.Network/virtualNetworks/subnets@2023-04-01' = {
  parent: vnet2
  name: subnet4Name
  properties: {
    addressPrefix: '10.1.2.0/24'
    networkSecurityGroup: {
      id: resourceId('Microsoft.Network/networkSecurityGroups', nsg4Name)
    }
  }
}

resource nsg3 'Microsoft.Network/networkSecurityGroups@2023-04-01' = {
  name: nsg3Name
  location: location
  properties: {
    flushConnection: false
    securityRules: [

      {
        name: 'Deny-All-Inbound'
        properties: {
          priority: 4096
          access: 'Deny'
          direction: 'Inbound'
          destinationPortRange: '*'
          protocol: 'Tcp'
          sourcePortRange: '*'
          destinationAddressPrefix: '*'
          sourceAddressPrefix: '*'
        }
      }
    ]
  }
}

resource nsg4 'Microsoft.Network/networkSecurityGroups@2023-04-01' = {
  name: nsg4Name
  location: location
  properties: {
    flushConnection: false
    securityRules: [

      {
        name: 'Deny-All-Inbound'
        properties: {
          priority: 4096
          access: 'Deny'
          direction: 'Inbound'
          destinationPortRange: '*'
          protocol: 'Tcp'
          sourcePortRange: '*'
          destinationAddressPrefix: '*'
          sourceAddressPrefix: '*'
        }
      }
    ]
  }
}

resource vnetPeering 'Microsoft.Network/virtualNetworks/virtualNetworkPeerings@2023-04-01' = {
  parent: vnet
  name: vnet2Name
  properties: {
    remoteVirtualNetwork: {
      id: vnet2.id
    }
    allowVirtualNetworkAccess: true
    allowForwardedTraffic: false
    allowGatewayTransit: false
    useRemoteGateways: false
  }
  dependsOn: [
    subnet1
    subnet3
  ]
}

resource vnetPeering2 'Microsoft.Network/virtualNetworks/virtualNetworkPeerings@2023-04-01' = {
  parent: vnet2
  name: vnetName
  properties: {
    remoteVirtualNetwork: {
      id: vnet.id
    }
    allowVirtualNetworkAccess: true
    allowForwardedTraffic: false
    allowGatewayTransit: false
    useRemoteGateways: false
  }
  dependsOn: [
    subnet2
    subnet4
    vnetPeering
  ]
}
I have already deployed a new Resource Group to deploy our virtual network into:
New-AzResourceGroup -Name 'rg-network' -Location 'Australia East'
So let us create our first Deployment Stack!
New-AzResourceGroupDeploymentStack
The 'New-AzResourceGroupDeploymentStack' cmdlet is the first one we will look into.
Let us look at the most common syntax that you may use:
New-AzResourceGroupDeploymentStack -Name "<deployment-stack-name>" -TemplateFile "<bicep-file-name>" -DeploymentResourceGroupName "<resource-group-name>" -DenySettingsMode "none"
| Parameter | Description |
|---|---|
-Name | Specifies the name of the deployment stack. |
-Location | Specifies the Azure region where the deployment stack will be created. This is valid for Subscription based DeploymentStacks. |
-TemplateFile | Specifies the Bicep file that defines the resources to be managed by the deployment stack. |
-DeploymentResourceGroupName | Specifies the name of the resource group where the managed resources will be stored. |
-DenySettingsMode | Specifies the operations that are prohibited on the managed resources to safeguard against unauthorized deletion or updates. Possible values include "none", "DenyDelete", "DenyWriteAndDelete". |
-DeleteResources | Deletes the managed resources associated with the deployment stack. |
-DeleteAll | Deletes all deployment stacks and their associated resources. |
-DeleteResourceGroups | Deletes the resource groups associated with the deployment stacks. |
These parameters allow you to customize the creation and management of deployment stacks.
The DenySettingsMode parameter is used in Azure Deployment Stacks to assign specific permissions to managed resources, preventing their deletion by unauthorized security principals, this is a key differentiator to some of the other solutions mentioned earlier, but it does mean you need to think about how your resources will be managed, let us take a look at the DenySettingsMode a bit deeper.
The DenySettingsMode parameter accepts different values to define the level of deny settings. Some of the possible values include:
- "none": No deny settings are applied, allowing all operations on the managed resources.
- "DenyDelete": Denies the delete operation on the managed resources, preventing their deletion.
- "DenyWriteAndDelete": Denies all operations on the managed resources, preventing any modifications or deletions.
By specifying the appropriate DenySettingsMode value, you can control the level of permissions and restrictions on the managed resources within the deployment stack.
For our testing, we will deploy our Azure Virtual Networks, NSGs to a new Deployment Stack, using the DenyDelete DenySettingMode.
$RGName = 'rg-network'
$DenySettings = 'DenyDelete'
$BicepFileName = 'main.bicep'
$DeploymentStackName = 'NetworkProd'

New-AzResourceGroupDeploymentStack -Name $DeploymentStackName -TemplateFile $BicepFileName -ResourceGroupName $RGName -DenySettingsMode $DenySettings -DenySettingsApplyToChildScopes
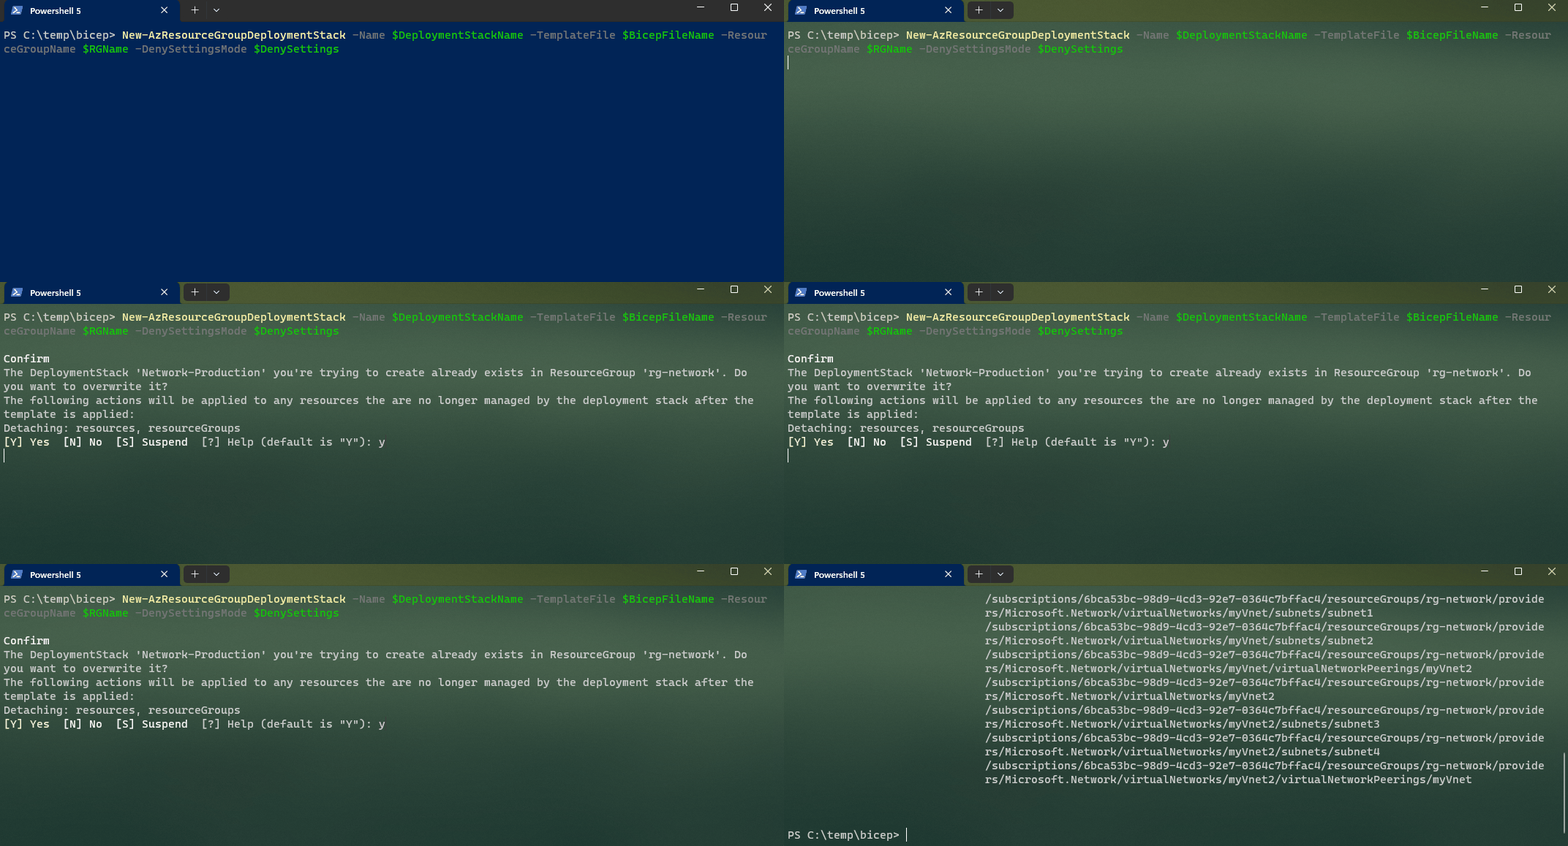
As you can see, creating a new Azure Deployment Stack is easy, with no adjustments to the underlying Bicep configuration needed.
Note: If you get an error, that the cmdlet is missing -Name parameter, make sure that the -ResourceGroupName parameter has been added.
If we navigate to the Azure Portal, we can see the Deployment Stack natively, including the Stack properties, such as what are the actions if resources are removed, what the denyDelete mode is.
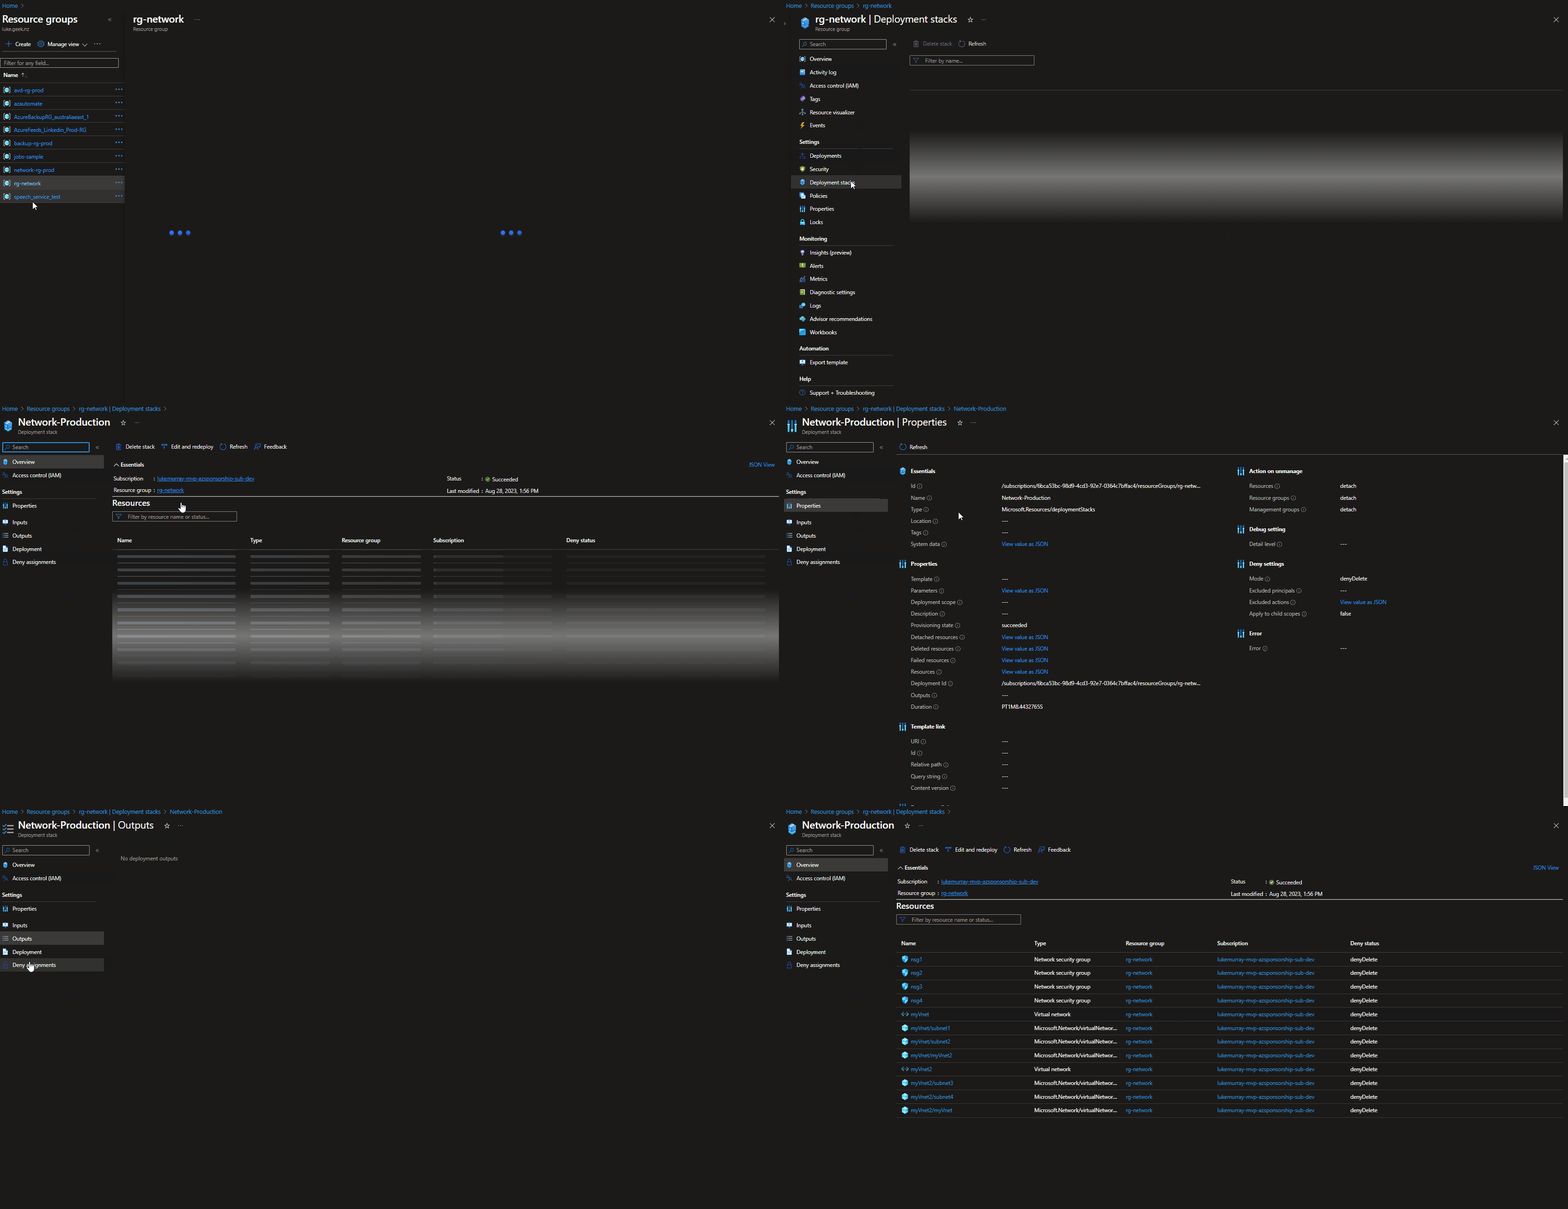
Testing Deny-Assignment
As we deployed our virtual networks, using the denyDelete assignment, lets take a look and attempt to delete a Network Security Group, before we do that we need to dissociate it from the subnet.
Note: Its worth noting my permissions are: Owner.
When I attempted to delete a Network Security Group I get the error below:
Failed to delete network security group 'nsg1'. Error: The client '************' with object id 'cb059544-e63c-4543-930f-4b6e6b7aece1' has permission to perform action 'Microsoft.Network/networkSecurityGroups/delete' on scope 'rg-network/providers/Microsoft.Network/networkSecurityGroups/nsg1'>nsg1'; however, the access is denied because of the deny assignment with name 'Deny assignment '55ebfe82-255d-584a-8579-0e0c9f0219ff' created by Deployment Stack '/subscriptions/f0ee3c31-ff51-4d47-beb2-b1204a511f63'.
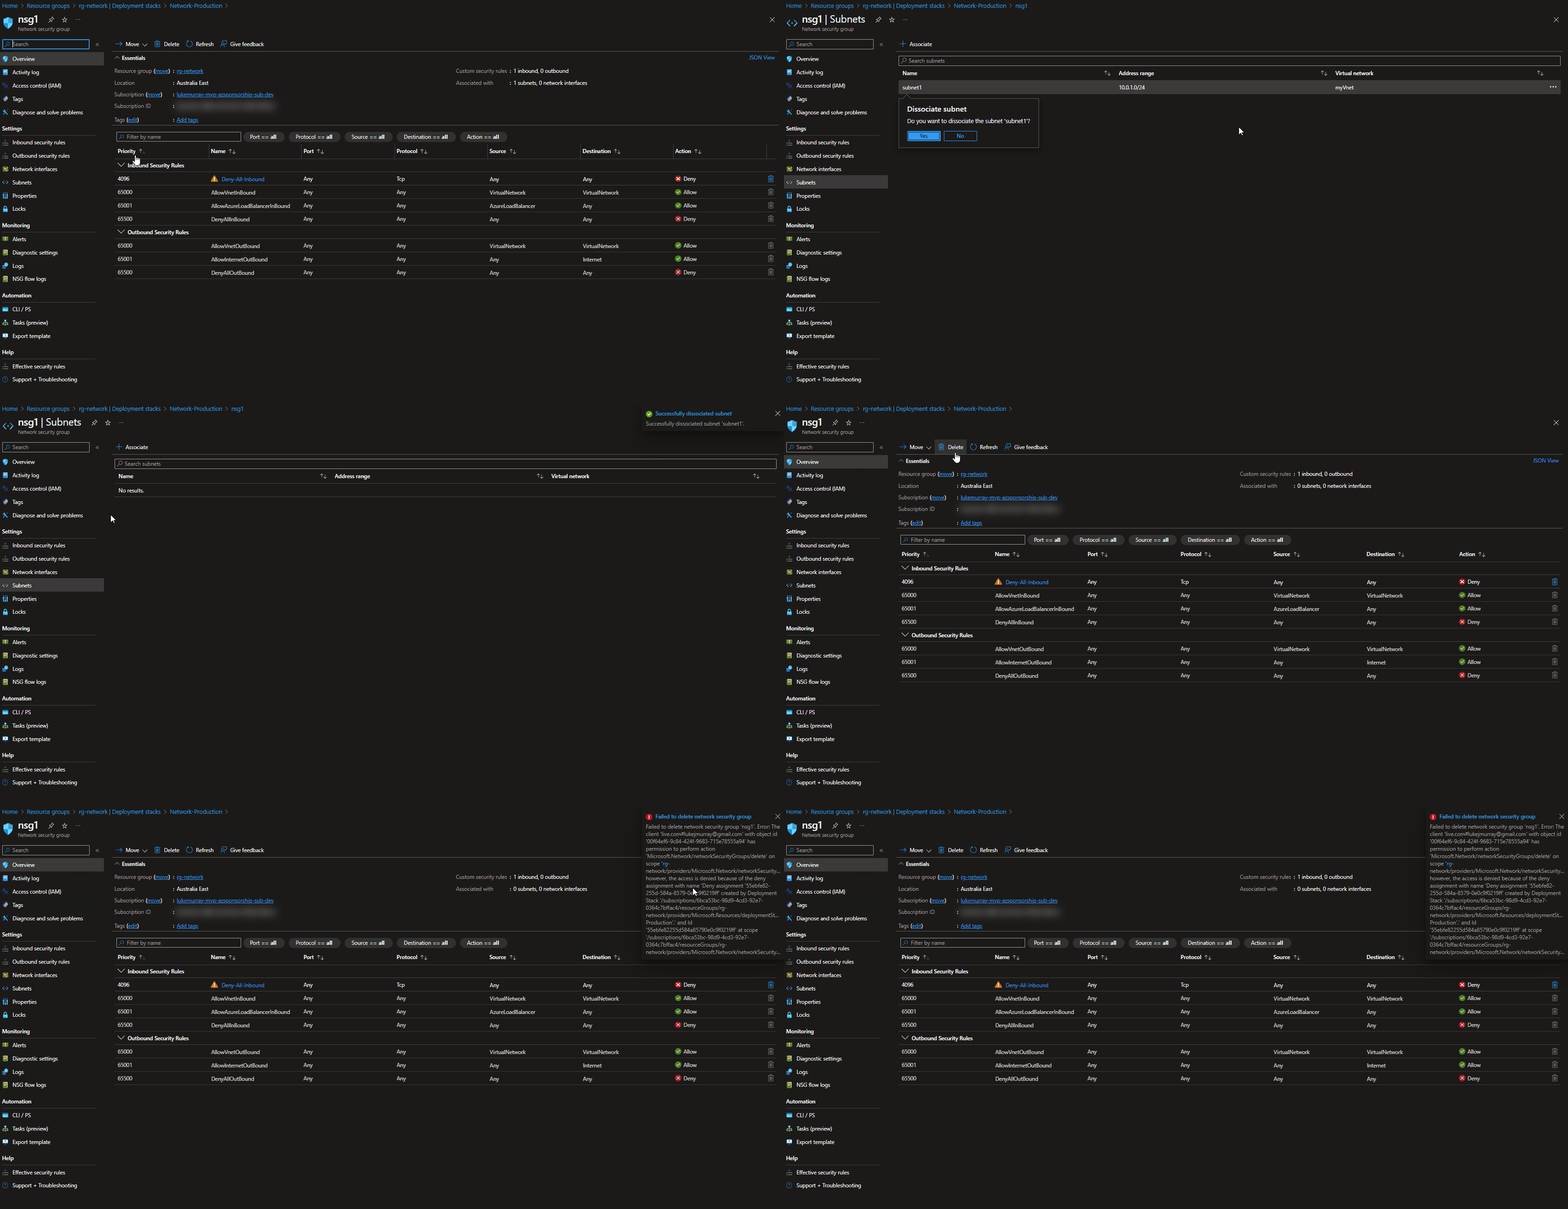
To delete the resource, I would need to, do one of the following:
- Delete the Deployment Stack (and detach the resources and delete it manually)
- Delete the Deployment Stack (and delete all the resources)
- Remove from the bicep code and update deployment stack.
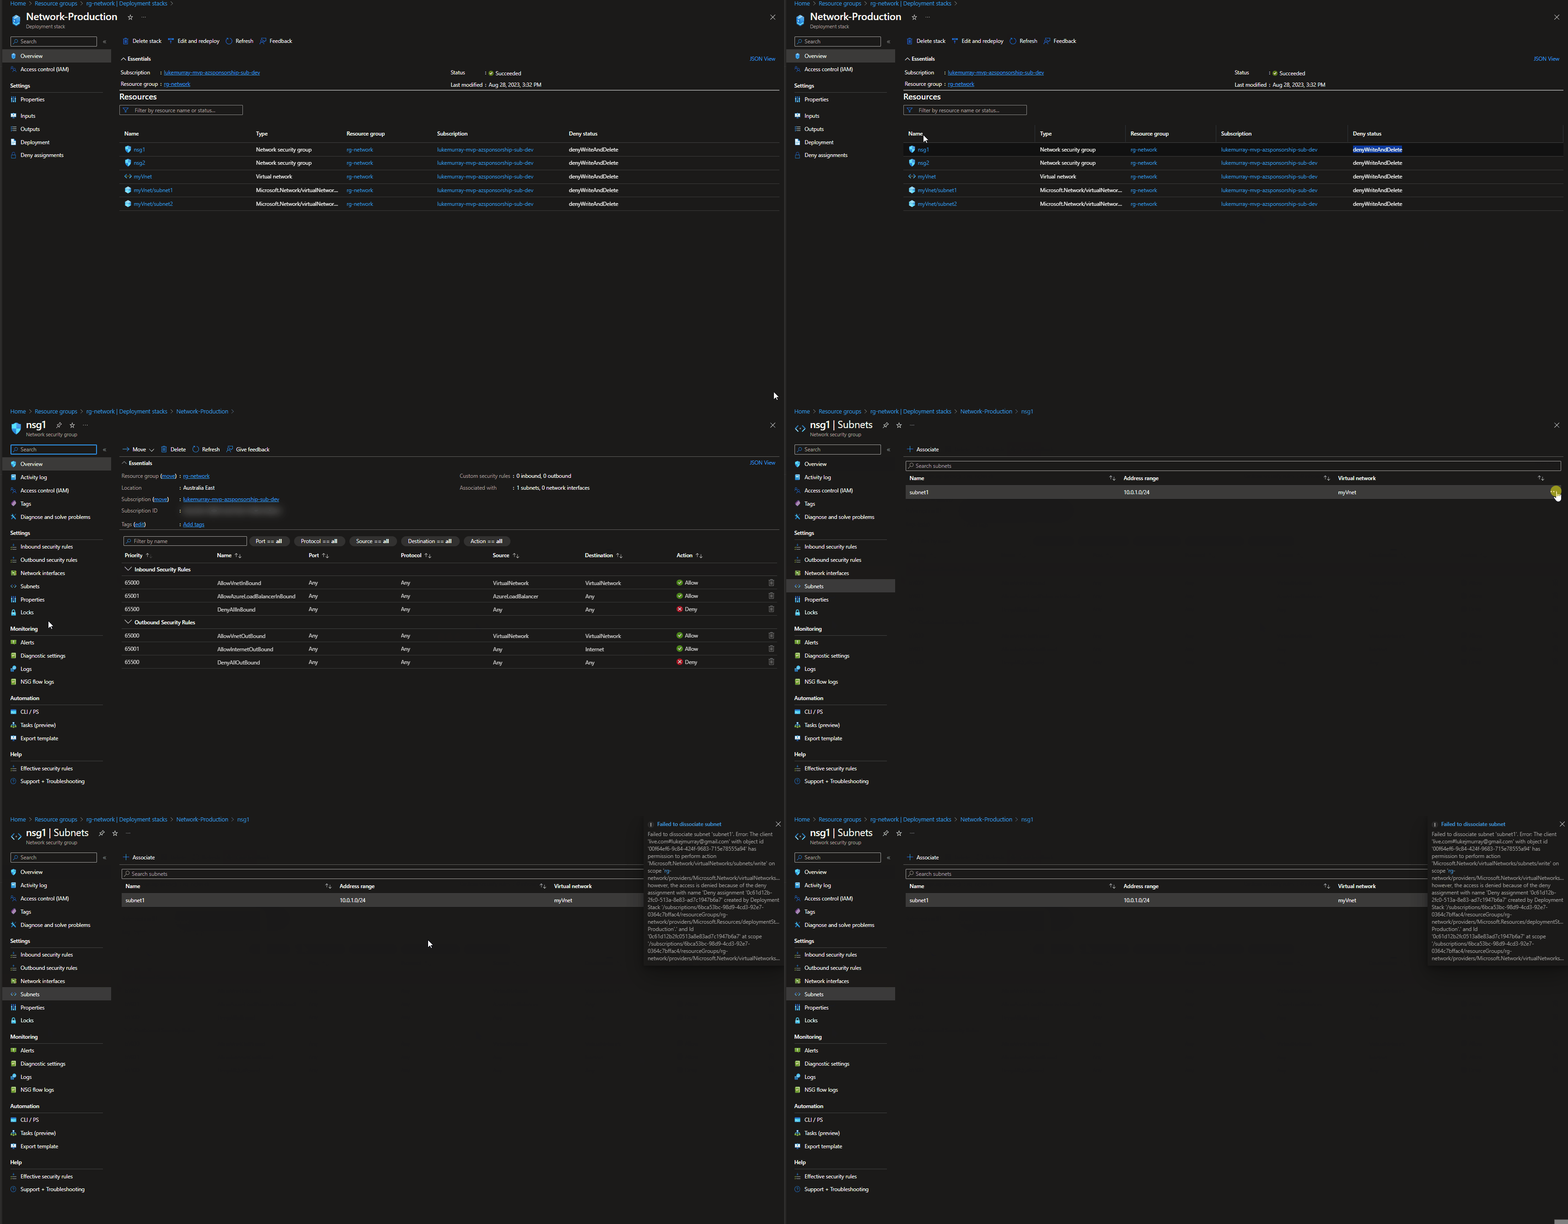
Note: In our testing, we were able to disassociate the Network Security Group, from the Subnet, because when the deployment stack was deployed - it was with the: denyDelete assignment, not the:'DenyWriteAndDelete'.
Redeploy - Deployment Stack (Portal)
Using the Azure Portal, we can Edit and re-deploy our existing Deployment stack, if you have changes or resources that you may want to roll back:
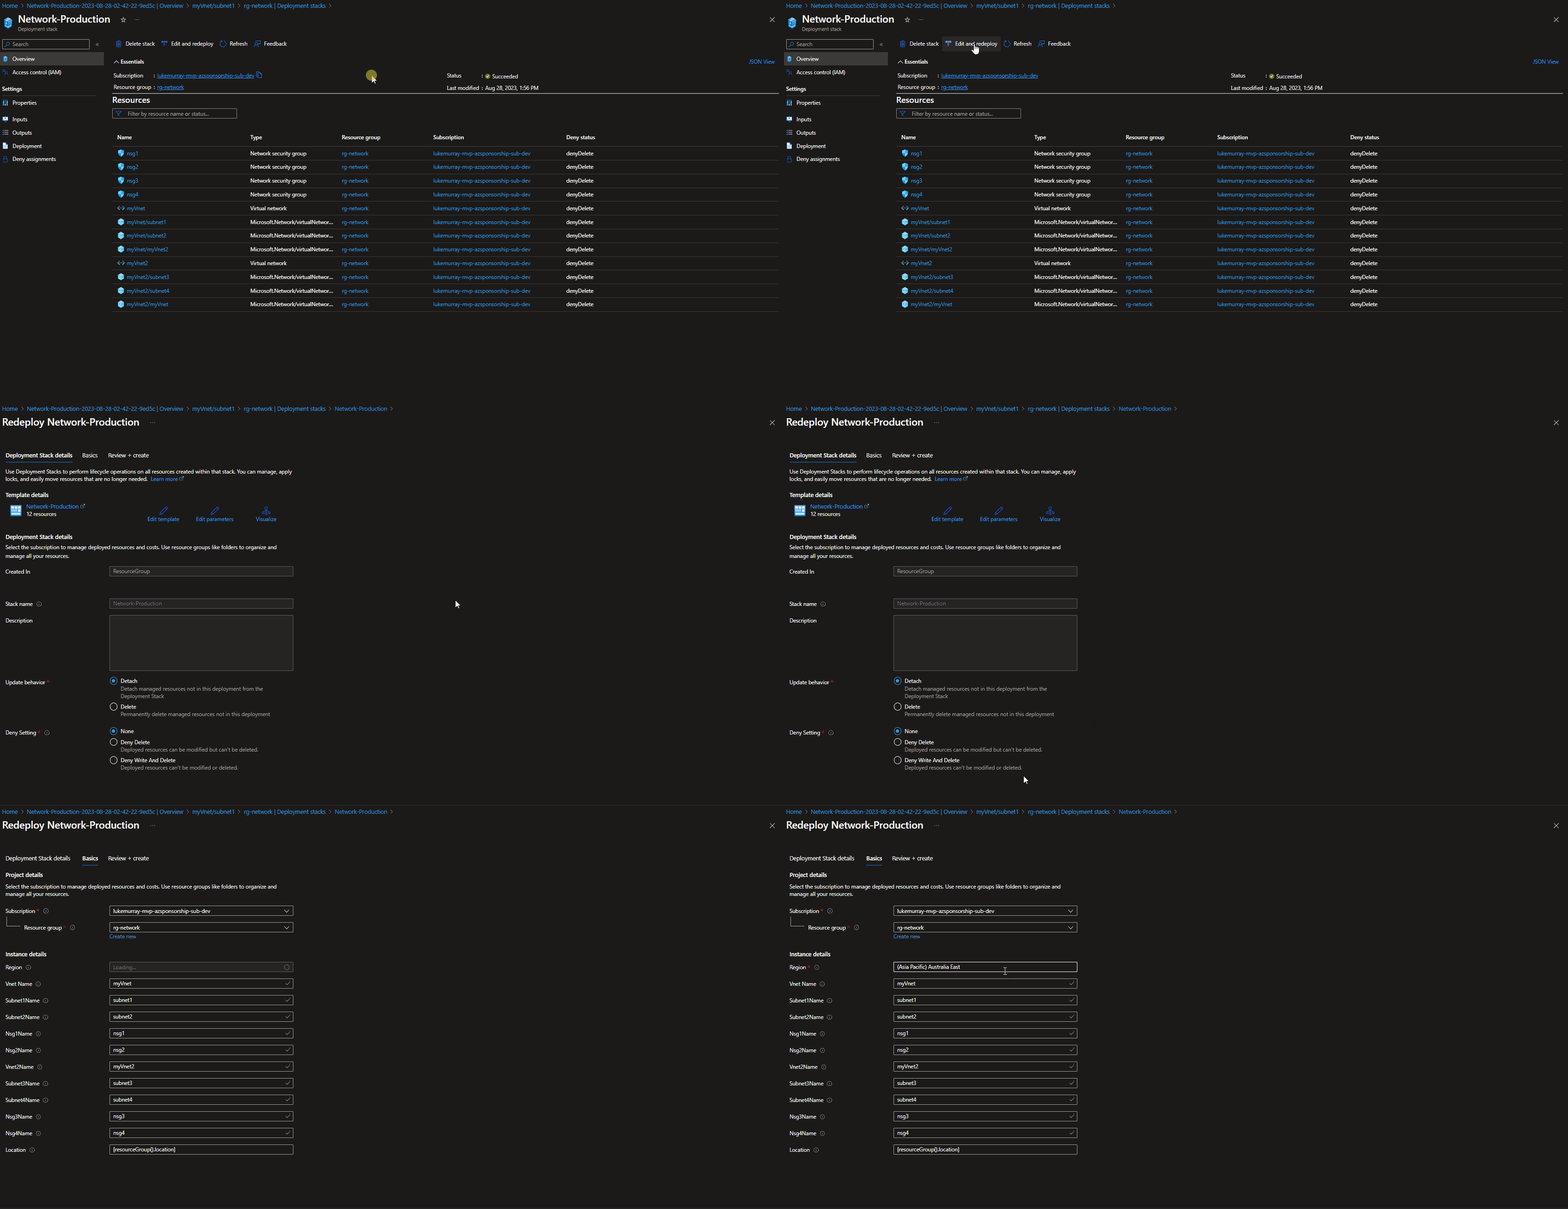
Redeploy - Deployment Stack (Bicep)
What if we want to make further changes, such as removing resources from our Deployment Stack?
In this example, we will modify our bicep code to remove the second Virtual network, subnets and associated NSGs (Network Security Groups), and remove the resources from Azure completely (we can unattach them, which will remove them from being managed by the deployment stack), but I want my Virtual Network resources to be managed completely by Bicep.
We could use the: Save-AzResourceGroupDeploymentStackTemplate, to save the Deployment Stack to an ARM template, if we wanted to deploy it later.
Note: In the bicep code example supplied earlier I removed everything after NSG2.
We will run the Set-AzResourceGroupDeploymentStack, pointing to the modified bicep code:
$RGName = 'rg-network'
$DenySettings = 'DenyWriteAndDelete'
$BicepFileName = 'main.bicep'
$DeploymentStackName = 'NetworkProd'

Set-AzResourceGroupDeploymentStack -Name $DeploymentStackName -ResourceGroupName $RGName -TemplateFile $BicepFileName -DenySettingsMode $DenySettings -DeleteResources -Verbose -DenySettingsApplyToChildScopes
In this example, we tell Deployment Stacks to Delete Resources that are no longer part of the stack, and this time we will add the Verbose flag, so we can see what it is doing.

Note: I cut the gif, thats why the timestamps don't match, or you could be spending 10 minutes staring at the verbose output.
If we navigate to the Azure Portal, we can see the deleted resources listed in the Deployment stack history (only displays the last Deployment stack changes vs keeping a history of everything), and the Resource un-managed state has changed to: delete.
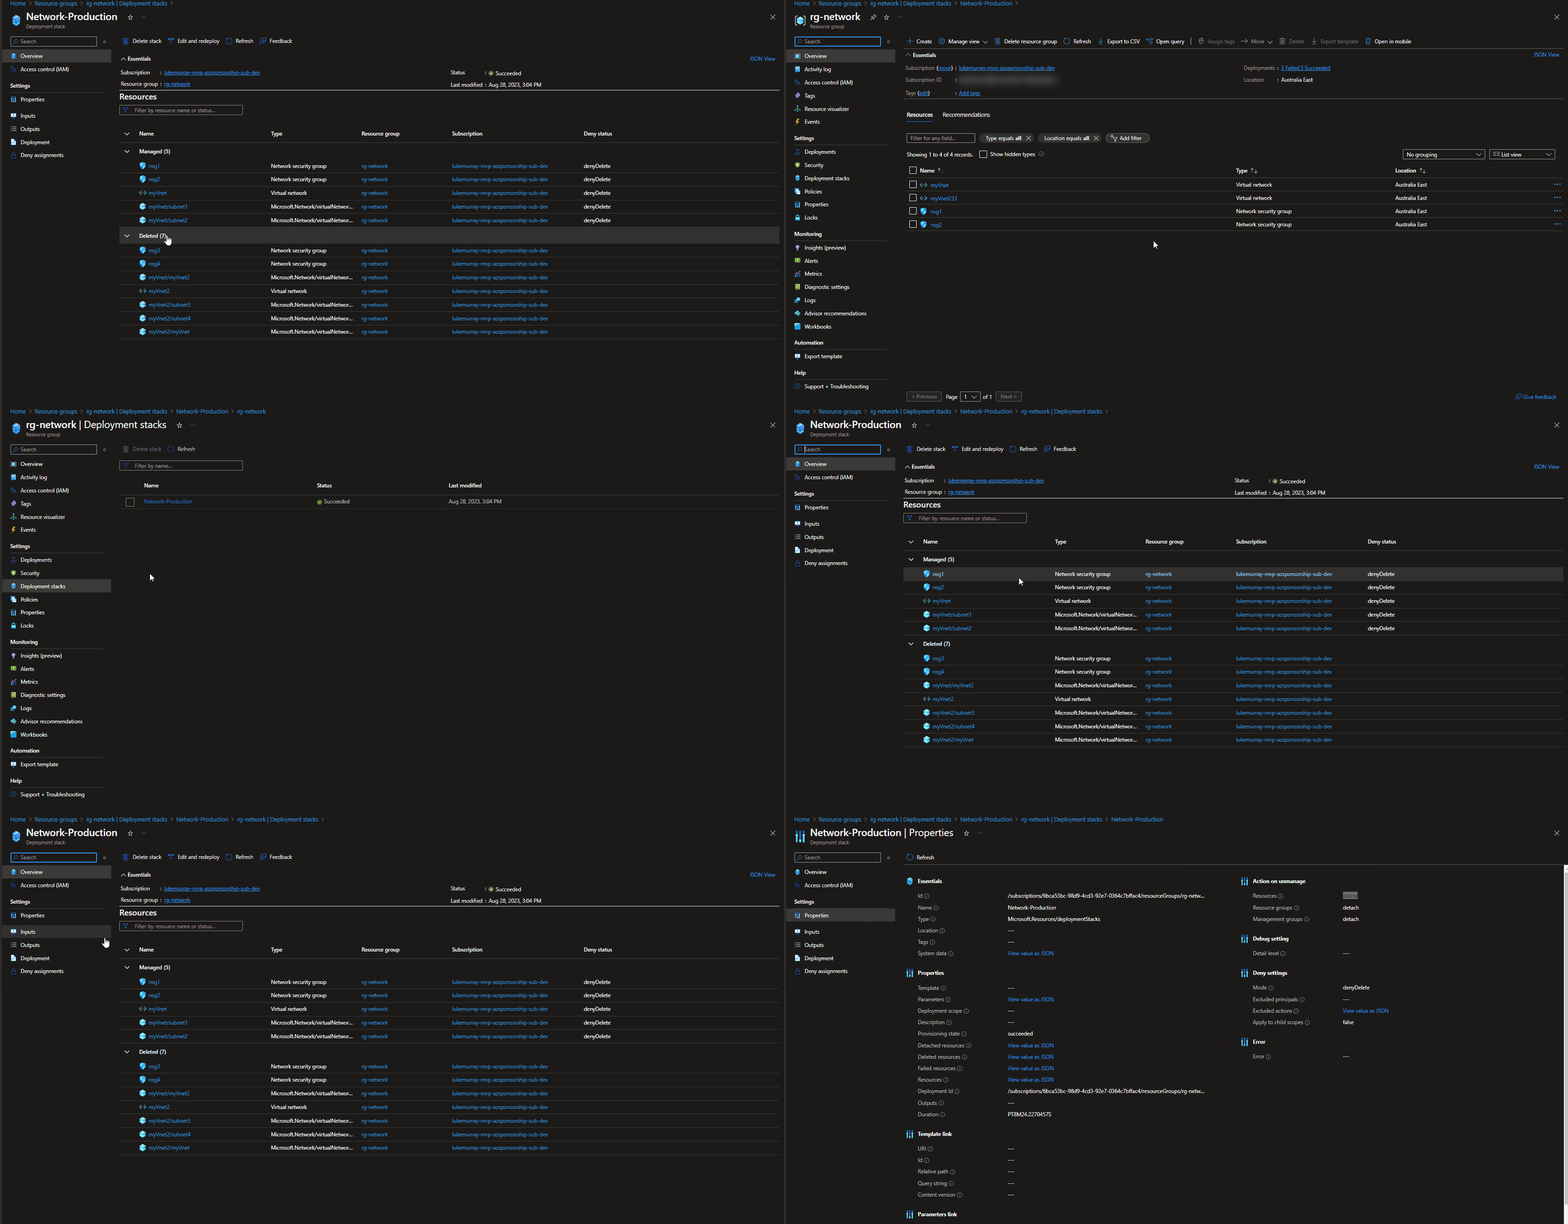
Note: A manually created Virtual Network in the same Resource Group (but not part of the deployment stack) remained untouched.
I forgot to update, the DenySettings variable, so once I re-deployed with the 'DenyWriteAndDelete' instead of: 'DenyDelete'. I was unable to disassociate my Network Security Group.
Permissions
I have 'Owner' rights over my own demo subscriptions, so a bit more flexibility than I would have in a Production environment.
You can add exclusions to your Deployment Stack, allowing certain principals or actions to be completed.
You could also create custom role (Microsoft.Resources/deploymentStacks) to be able to Read, Update or delete deployment stacks, giving you the flexibility to allow people to modify their own stacks and redeploy, without accessing to other tooling required and self-service functionality, such as being able to give someone a deployment stack, that the users can then delete the resources and redeploy later straight from the Azure Portal when required for testing.
